Royal Arch Loop – The Ultimate Backpacking Guide
The Royal Arch Loop is a 32-mi / 51.5-km loop hike beginning at South Bass Trailhead in Grand Canyon National Park.
The hike can be completed clockwise or counterclockwise, but it’s most commonly completed clockwise due to a short section near the Colorado River requiring either a small climb (encountered counterclockwise) or rappel/downclimb (encountered clockwise).
There is also a popular alternate route that can be completed as part of the Royal Arch Loop that enters (or exits) the Canyon via Point Huitzil. More on the Point Huitzil alternate below.

Royal Arch Loop Overview
- Location: Grand Canyon National Park (Arizona, USA)
- Length: 32-mi / 51.5-km
- Type: Loop
- Recommended Time: 3-4 days
- Most Popular Months: March/April, October/November
- Max Group Size: 11
- Permit Required: Yes
- Permit Cost: $10 plus $8 per person per night camped below the rim and/or $8 per group per night camped above the rim
- Access Fee: $35 per vehicle to enter Grand Canyon National Park, $25 per vehicle to pass through Havasupai Indian Reservation (located on the way to the trailhead)
- Dogs Allowed: No
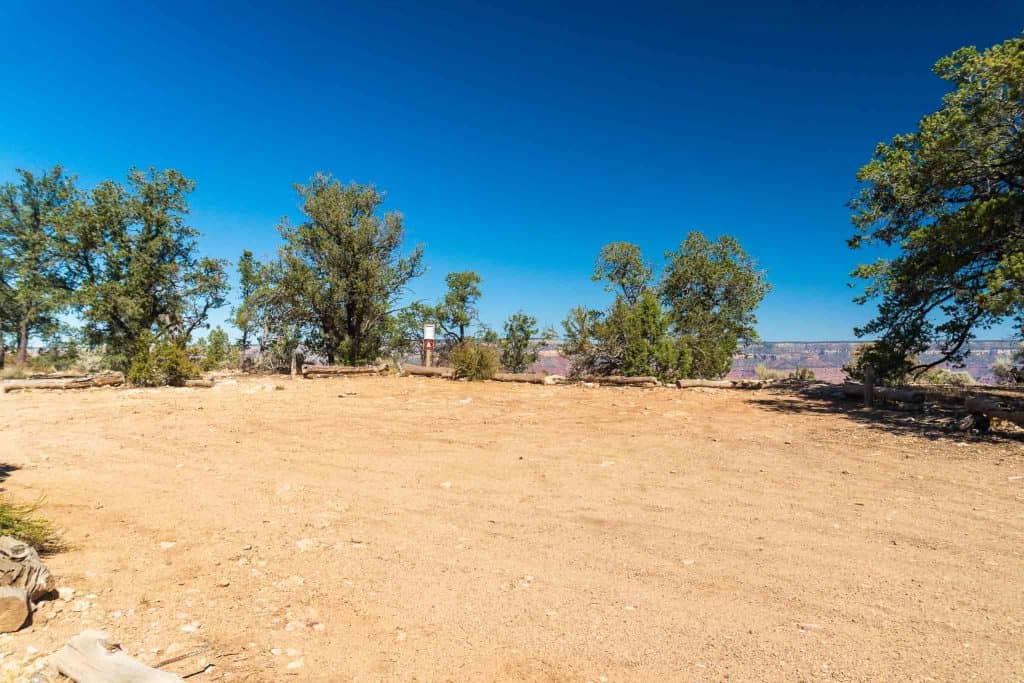
- Trailhead: South Bass Trailhead | 36.183833, -112.376747
- Low Point: Colorado River (2,140 ft / 652 m)
- High Point: South Bass Trailhead (6,650 ft / 2,027 m)
- Elevation Gain: 10,978 ft / 3,346 m
- Elevation Loss: 11,016 ft / 3,358 m
- Difficulty: Strenuous

Getting to the Royal Arch Loop Trailhead
By Car
Perhaps the only way to reach the trailhead, a private vehicle is recommended for this hike. It’s a long drive on a dirt road to the remote trailhead and a high-clearance vehicle with 4WD is recommended (especially if there’s been precipitation or snowmelt recently). I made it just fine in a Subaru Outback.
From Highway 64 (the road leading through Tusayan and to the South Entrance Station for Grand Canyon National Park), it’s 33 mi / 53 km on dirt roads to reach South Bass Trailhead. Google Maps does not give accurate driving directions to the trailhead.
To reach the trailhead, turn west off Highway 64 onto Fire Road 800 which becomes Forest Road 328 after passing the Arizona Trail and curving south – almost immediately after you turn off Highway 64 (map).
It is also possible to reach FR 328 from Grand Canyon Village. From Grand Canyon Village, follow signs from Maswik Lodge toward the park kennel and then onto Rowe Well Road; follow this road southwest until intersecting FR 328A (map). Follow FR 328A south until heading east (making a right) onto FR 328.
Continue west on FR 328 until reaching the gate at the border of the Havasupai Indian Reservation. If the station is staffed, you’ll be required to pay a $25 entrance fee to pass through the reservation. Continue ~1.7 mi / 2.74 km to a four-way intersection where you’ll turn right (northeast) toward Pasture Wash.
It’s not ~1.9 mi / 3.06 km to the Forest Service boundary and another 0.5 mi / 800 m to the Grand Canyon National Park boundary. You may encounter a gate at the cattle guard here – please close the gate behind you.
Proceeding north you’ll pass the now-defunct Pasture Wash Ranger Station (a short detour off the road). It’s another 3.6 mi / 5.78 km to South Bass Trailhead. The National Parks Service has a document regarding the South Bass Trail (which includes information on the trailhead) here.
By Public Transportation
There are no public transportation options available for reaching the trailhead.
By Hitchhiking
Hitchhiking to/from the South Bass Trailhead would be incredibly difficult. It’s 33 mi / 53 km on dirt roads that dead-end at the trailhead. Could you get lucky heading in or out? Sure. However, I wouldn’t count on it.
Things to Know
- You don’t need to pass the Grand Canyon National Park entry station to access the South Bass Trailhead. However, if you’re going to the Backcountry Office, you will have to enter the park. Entering the park costs $35 (even if you have a permit). If you don’t already have one, I would suggest looking into getting an Annual Parks Pass.
- You can park for free for an indefinite amount of time at the trailhead.
- There is space for you to pitch a tent at the trailhead (check with rangers before planning to camp here)
- The weather at the South Rim (South Bass Trailhead) can vary dramatically from the weather in the canyon below. A “warm day” at the rim can mean a brutally hot day down at the river.
- The only reliable water is the Colorado River. The route is close enough to the river to pull water for only a short time (east of Elves Chasm). You can also access the Colorado by descending the South Bass Trail (a detour from the Royal Arch Loop).
- There is no camping permitted at Elves Chasm.
- Two of your biggest challenges on this hike will be route-finding and water. Although it exists for parts of the Royal Arch Loop, much of it lacks a well-defined trail. Water may only be available at the Colorado River in certain times/years – plan appropriately.
- The rappel can be dangerous if you’re not familiar with building anchors or proper rappelling techniques. Be sure you know what you’re doing before you go or to go with someone who does.

When to Hike: Weather and Conditions
The Royal Arch Loop can be hiked for most of the year – so long as the road isn’t covered in snow or impassable due to precipitation depending on snowfall and when the roads to/from the trailheads open. More broadly, the season for the route is probably considered to be July through September.
Shoulder Season Hiking (March/April, October/November): This is when I would suggest (and when I did) a hike of the Royal Arch Loop. Later in the year might be preferable since there’s less chance you’ll have to deal with snowmelt. However, the road to South Bass Trailhead will be your limiting factor here. So long as the road is possible, you should be good to go for shoulder-season hiking.
Summer Hiking (May-September): Summer can start early at the Grand Canyon and can last well into what’s officially the fall. Temperatures can exceed 100°F / 38°C at the bottom of the Grand Canyon – where you’ll be for most of the Royal Arch Loop. There aren’t a lot of opportunities for water, so your capacity should be sufficient if you plan on completing this hike in the summer (which I would not recommend).
Winter Hiking (December-February): The Royal Arch Loop can be hiked in the winter, but you can expect below-freezing temperatures at the South Rim and possible snowfall between December and February. Snow can make the road impassable (whether due to its accumulation or its melting – turning the road to mud). That said, temperatures at the bottom of the canyon during winter are far more favorable than the blistering heat of the summer.

Grand Canyon Permits
Grand Canyon National Park requires permits for overnight users. If you’re planning on doing the Royal Arch Loop in a day you do not need a permit (I would not suggest attempting this hike in a single day).
The Grand Canyon permit process is frustrating. The park requires you to fill out this form and then either fax or mail it to the park. That’s right, you cannot get a permit via the internet, email, or over the phone. Walk-up permits are available, but if you want your permit in advance, email or fax is your only option.
I’ve used the website Fax Zero to send my permit applications (for free) to the Grand Canyon Backcountry Office in the past. There are other similar services available that allow you to send free faxes via the internet, choose your favorite. They will typically print an ad or something similar as a cover page if you’re using a free option.
Fax Grand Canyon permit requests to +1 (928) 638-2125
If you prefer, you can mail your permit request to:
Grand Canyon Permits Office
1824 S Thompson Street
#201
Flagstaff AZ, 86001
USA
The earliest you can submit a request for a Grand Canyon permit is 5 pm MST on the 1st of the month that is four months before the proposed start date (e.g. if you want to hike starting November 15, you can submit your request on July 1). Permit requests can take up to three weeks to be considered.
Note that you do not have to put your credit card information on the permit request form. The park will request your payment information separately once your permit has been approved.
Camping and Campgrounds
There are no established campgrounds on the Royal Arch Loop.
Dispersed or “at large” camping is permitted along the route. The Use Areas (required on your permit) the Royal Arch Loop passes through are:
- SE0 Pasture Wash (everything above the rim at/around the trailhead)
- BR9 Garnet (the entirety of the route except for the area adjacent to the South Bass Trail)
- BQ9 South Bass (the portion of the Royal Arch Loop along the South Bass Trail – i.e. everything from the trailhead to the Colorado River)
There are three designated campsites located within SE0 Pasture Wash:
- SE3 – next to the trailhead parking lot (small or large group)
- SE1 – a mile (1.6 km) east of trailhead near the rim (small groups only)
- SE2 – a mile (1.6 km) east of the trailhead on the rim (small groups only)
Note: Camping at Elves Chasm is prohibited.


Itinerary
How many days does it take to hike the Royal Arch Loop? I guess it’s possible to do it in a day, but if you’re looking for an endurance test in the Grand Canyon I would recommend Rim to Rim or Rim to Rim to Rim. The Royal Arch Loop is better enjoyed at a slower pace.
I would suggest three or four days for the Royal Arch Loop (or possibly even five if you’re taking things slowly). There’s a lot to be explored and a few detours you can take (to Royal Arch, to Point Huitzil, and to Elves Chasm). It’s not a hike you want to be rushing through.
Dispersed or “at-large” camping is permitted on the Royal Arch Loop, so as long as you make sure to follow Leave No Trace protocol and don’t camp at Elves Chasm (camping is expressly prohibited), then you’re free to camp as you see fit.
Gear & Packing List
You can choose to go lightweight on the Royal Arch Loop, but there are a few things you should have with you – namely, lots of water. I carried my normal backpacking kit for the most part with the addition of an increased water capacity, harness, ATC, locking carabiner, and 40′ of rope (for the 20′ rappel).
- WATER: Bring water – and lots of it. I didn’t use trekking poles and carried a 1-gallon jug of water in my hand in addition to carrying four more liters in my backpack. If you’re looking for a collapsible bladder that’s durable and packs down small, I suggest the HydraPak Seeker; it comes in 2L, 3L, and 4L versions.
- HARNESS: There’s a 20 ft / 6.1 m section of trail that requires you to climb down (or up, if you’re heading counterclockwise). I brought a harness and ATC belay device, and a locking carabiner with me to rappel down this section and I was happy to have this equipment with me.
- ROPE: It may or may not be necessary (I would ask the backcountry office if they have any information), but if the rope/webbing at the vertical section of trail has been removed (honestly, as it should be), then you’ll need a rope and possibly some webbing to rappel down the section. You won’t need a lot – 40 ft / 12 m, but you’ll be glad you have it should you end up needing it. It’s also recommended by the National Park Service that you bring 20 ft / 6 m of webbing for building an anchor.
- MAP: I would suggest you pick up a Grand Canyon map. This will help you to have a good idea of where on the route you are and how much water you should be conserving. I would also suggest you have a map/route downloaded on your phone – I use and recommend Gaia if you’re looking for a navigation/recording app.
- WATER FILTER: When you reach the Colorado River you’ll want to water before drinking it. There’s a chance the water will be incredibly silty (depending on what’s going on upstream). Something like a Platypus QuickDraw will do just fine, but if you’re filtering a large amount of water (or are hiking as a couple or in a group), it may be wise to bring a Gravity Filter instead (it will be a lot less painful to filter with this).
- ELECTROLYTES: Bring electrolytes! It’s hot in the canyon and there are very few opportunities for water on the Royal Arch Loop. Make sure you’re bringing electrolytes to rehydrate and that you’ll have enough to span the length of time you plan to be hiking.
For more recommendations on backpacking gear, check out my current gear list or gear reviews.
Route Description
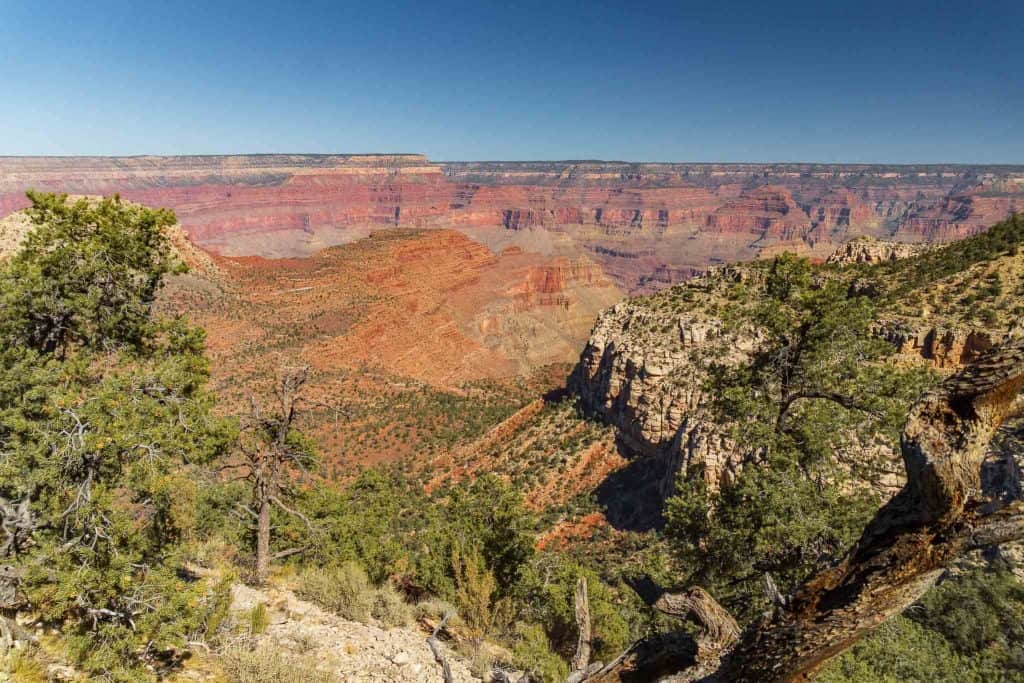
Hiking clockwise (to avoid the climb and give yourself the option to rappel down) from South Bass Trailhead, you’ll first drop around 1,200 ft / 366 m into the canyon over 1.4 mi / 2.3 km. This small section of trail you descend will be repeated (in the other direction) when you hike out via the South Bass Trail (so I guess this hike is technically a lollipop loop and not a true loop).
The trail leads west on the Esplanade and passes Chemehuevi, Toltec, and Montezuma Points.
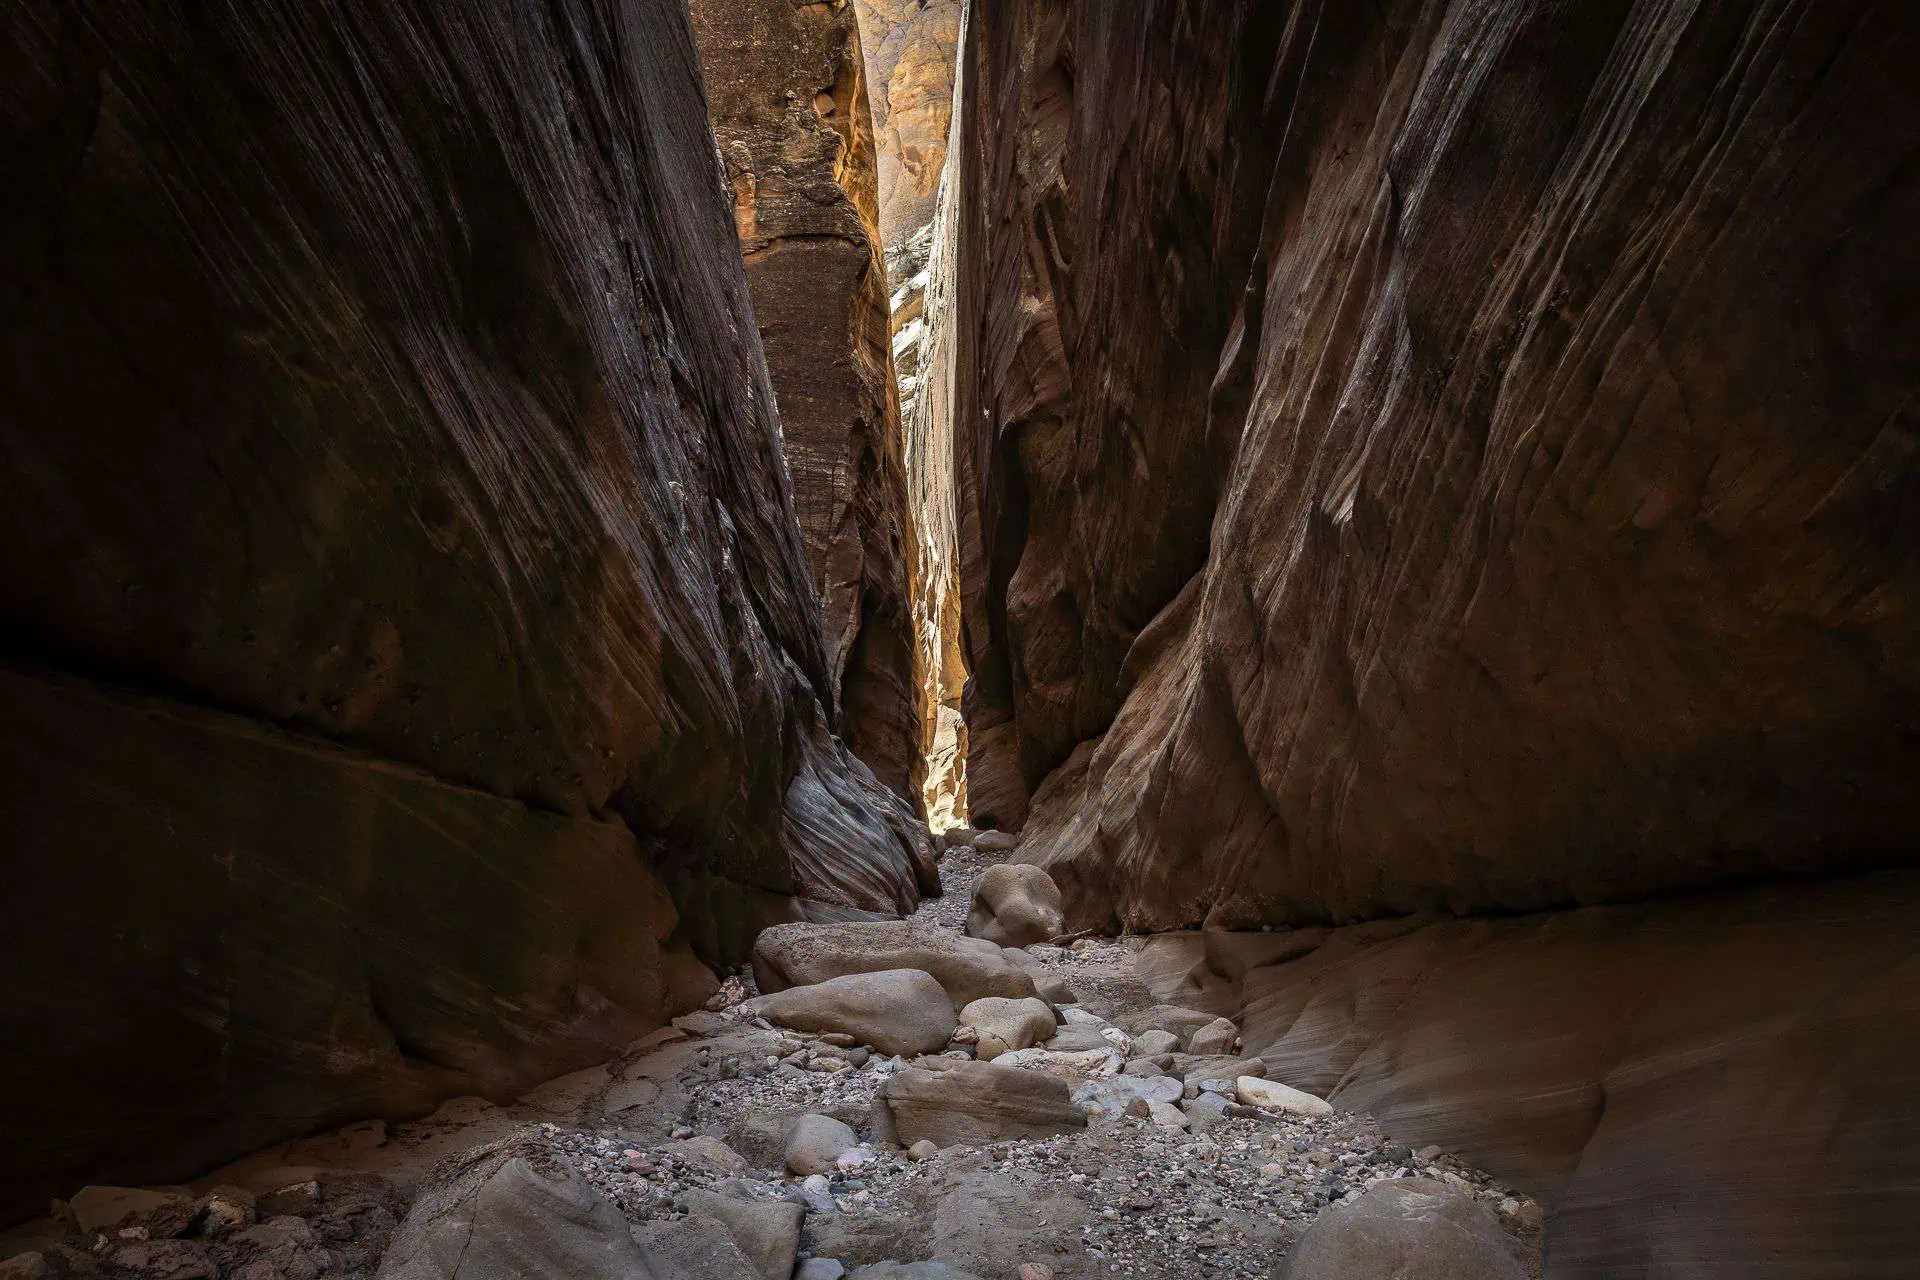
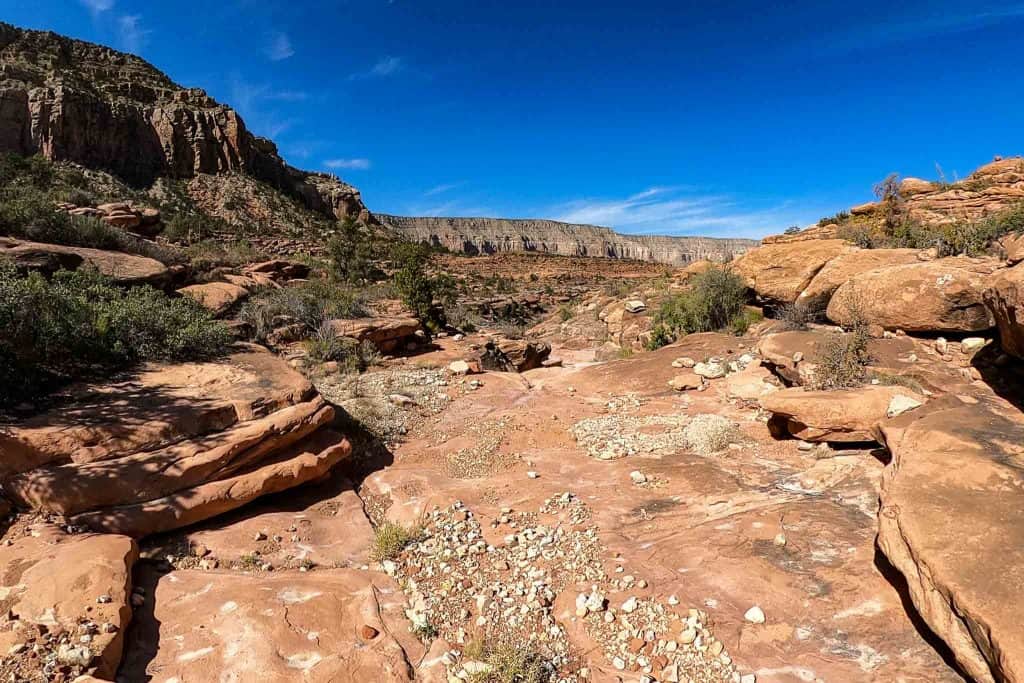
After passing Point Huitzil (more on this alternate below), the trail heads down the eastern arm of upper Royal Arch Canyon. Before hitting the main drainage, you’ll encounter a 200 ft / 61 m drop. You can get around this on both sides, but the north side is the more secure route.

It can be a bit tricky at times following the trail (most of the time there isn’t one) but know that if you encounter anything that looks or feels incredibly dangerous, you’re likely going the wrong way. You’ll need to work your way up from and then back down to the bed of the drainage multiple times. Sometimes you’ll find a more well-defined path with cairns and other times you’ll have to work things out for yourself.
Continue following the drainage until reaching some huge cairns – this is the turnoff for Royal Arch.
You can continue up the trail, leaving the drainage here and continue the loop, or you can follow the drainage to the base of Royal Arch. There is a spring here. It’s a fairly reliable water source but you should always double-check with the backcountry office before depending on it. To continue the loop after visiting Royal Arch you’ll need to backtrack back up the drainage the way you came. There is a way to rappel into Elves Chasm, but that’s beyond the scope of this hike.

After this junction, the trail improves and becomes easier to follow (clockwise). You’ll soon reach the rappel.
When I went through here there was a mess of webbing and rope already attached to the dropoff. I used my equipment to rappel down on one of the existing ropes (despite having brought my own). Make sure you check the existing anchor if there’s one you plan to use. Otherwise, build your own and resist the temptation to leave any ropes/webbing behind.
Now within sight of the Colorado River, the trail descends, steeply at times, to the mouth of the Toltec Point drainage.

It’s here you can detour to Elves Chasm (more on this below). It’s a little over a mile (1.6 km) one way to Elves Chasm. I recommend the detour. There is no camping permitted at Elves Chasm.
From the Elves Chasm junction, the hike follows the river east before eventually forcing you up away from the water. Remember that the Colorado River is the only reliable water source between you and the end of the hike so be sure to fill up with enough water to last until you’re back at the trailhead.
You’ll soon pick up the (more defined) Tonto Trail which you’ll follow back to where it intersects with the South Bass Trail. At certain points, the trail isn’t as obvious, but it’s better than the section of trail before the turnoff for Royal Arch. Expect lots of tracing the trail in and out of canyons.


Finding camping isn’t too difficult. What’s more important is that you have sufficient water. When the Tonto Trail intersects the South Bass Trail, you’ll head up the canyon following the South Bass Trail back to the trailhead (it can be a little tricky to follow the South Bass Trail at lower elevations and it can be overgrown). It’s 4.7 mi / 7.6 km back to the trailhead with 3,855 ft / 1,175 m of climbing.
If you are desperate for water or don’t think you’ll be able to make it back to the trailhead with what you have remaining, you can instead descend 1.8 mi / 2.9 km to the river (losing around 1,100 ft / 335 m) to the river. From the beach, you can fill up on water and then hike the entirety of the South Bass Trail out to the trailhead.

Water Sources
There are very few reliable water sources on the Royal Arch Loop.
One is the Colorado River, accessible for a short time northeast of the rappel. There is also water at Elves Chasm (but you follow the Colorado River to get there so it doesn’t matter much).
Before reaching the river (heading clockwise), you can also find water in Royal Arch Canyon at Royal Arch (if you detour to the base of the arch).
Besides that, there’s also a seasonal seep spring between Chemehuevi and Toltec Points or the possibility of finding pools in drainages (should not be relied upon unless you have extremely recent beta). You may also come across water in Garnet Canyon but anything you find here will be extremely mineralized and is considered undrinkable by the Parks Department.
Moral of the story? Fill up on (a lot of) water whenever you have the chance – especially if you’re hiking in warmer temperatures.
The Rappel
The rappel may seem like the most dangerous part of the hike if you’re not comfortable with climbing/rappelling/wearing a harness and it very well could be. However, let’s not forget that water and route-finding can also be quite challenging on the Royal Arch Loop.
The rappel isn’t scary if you know how to build an anchor, have a harness, locking carabiner, and ATC with you, and you know how to use all the aforementioned equipment. There may already be a mess of webbing and rope secured here. You’re free to use anything you find, but remember to check the anchor/rope before trusting it under your weight.
If words like rappel, ATC, and locking carabiner confuse or scare you, this is probably not a good hike for you to take on solo. Bring someone who knows what they’re doing. The rappel is by no means difficult if you know what you’re doing and have the proper gear, but it does provide an excellent opportunity for things to go wrong (i.e. for you to critically injure yourself) if you try to wing it.
The backcountry office may or may not have information regarding the current conditions of the rappel, but there’s a good chance that you’ll be told to bring rope and webbing in case there’s nothing there.
Do you absolutely need a harness? No, if you are comfortable downclimbing a rope or tying yourself in with webbing, that’s a reasonable option. However, if anything in the previous sentence sounds foreign to you or you have never done/lack confidence doing these things, be sure to go prepared.


Point Huitzil Alternate
There is an alternate you can take at the start (or end) of this hike which will make it into a true loop instead of what’s technically a lollipop loop.
Instead of descending the South Bass Trail, you’ll head back down Pasture Wash Road (on foot) for around 3.6 mi / 5.8 km to the old ranger station. From the ranger station, you head around 2.25 mi / 3.62 km west/northwest following a faint trail/old road/your compass/GPS to a depression where you can pick up a use trail and possibly some cairns leading you into the canyon.
Check out the map below if you want a better idea of where the Point Huitzil alternate heads.
You’ll navigate a traverse into the canyon before following cairns down to what appears to be a dropoff with no way forward. It’s here that you need to climb down at the edge of the dropoff across and down a series of ledges and chokepoints until you reach an Ancestral Puebloan log staircase. It’s a bit tricky to descend so be careful.
Once you’re down, continue heading northwest/west following the drainage until reaching the Royal Arch Loop. From here, continue clockwise as you would have if you had begun your hike via the South Bass Trail.
More on Point Huitzil in a coming post.


Map
The following is an overview of the Royal Arch Loop with landmarks. Note, this should be used as a guide and it is not necessarily 100% representative of what’s on the ground (i.e. you shouldn’t just be blindly trying to follow this track).
Conclusion
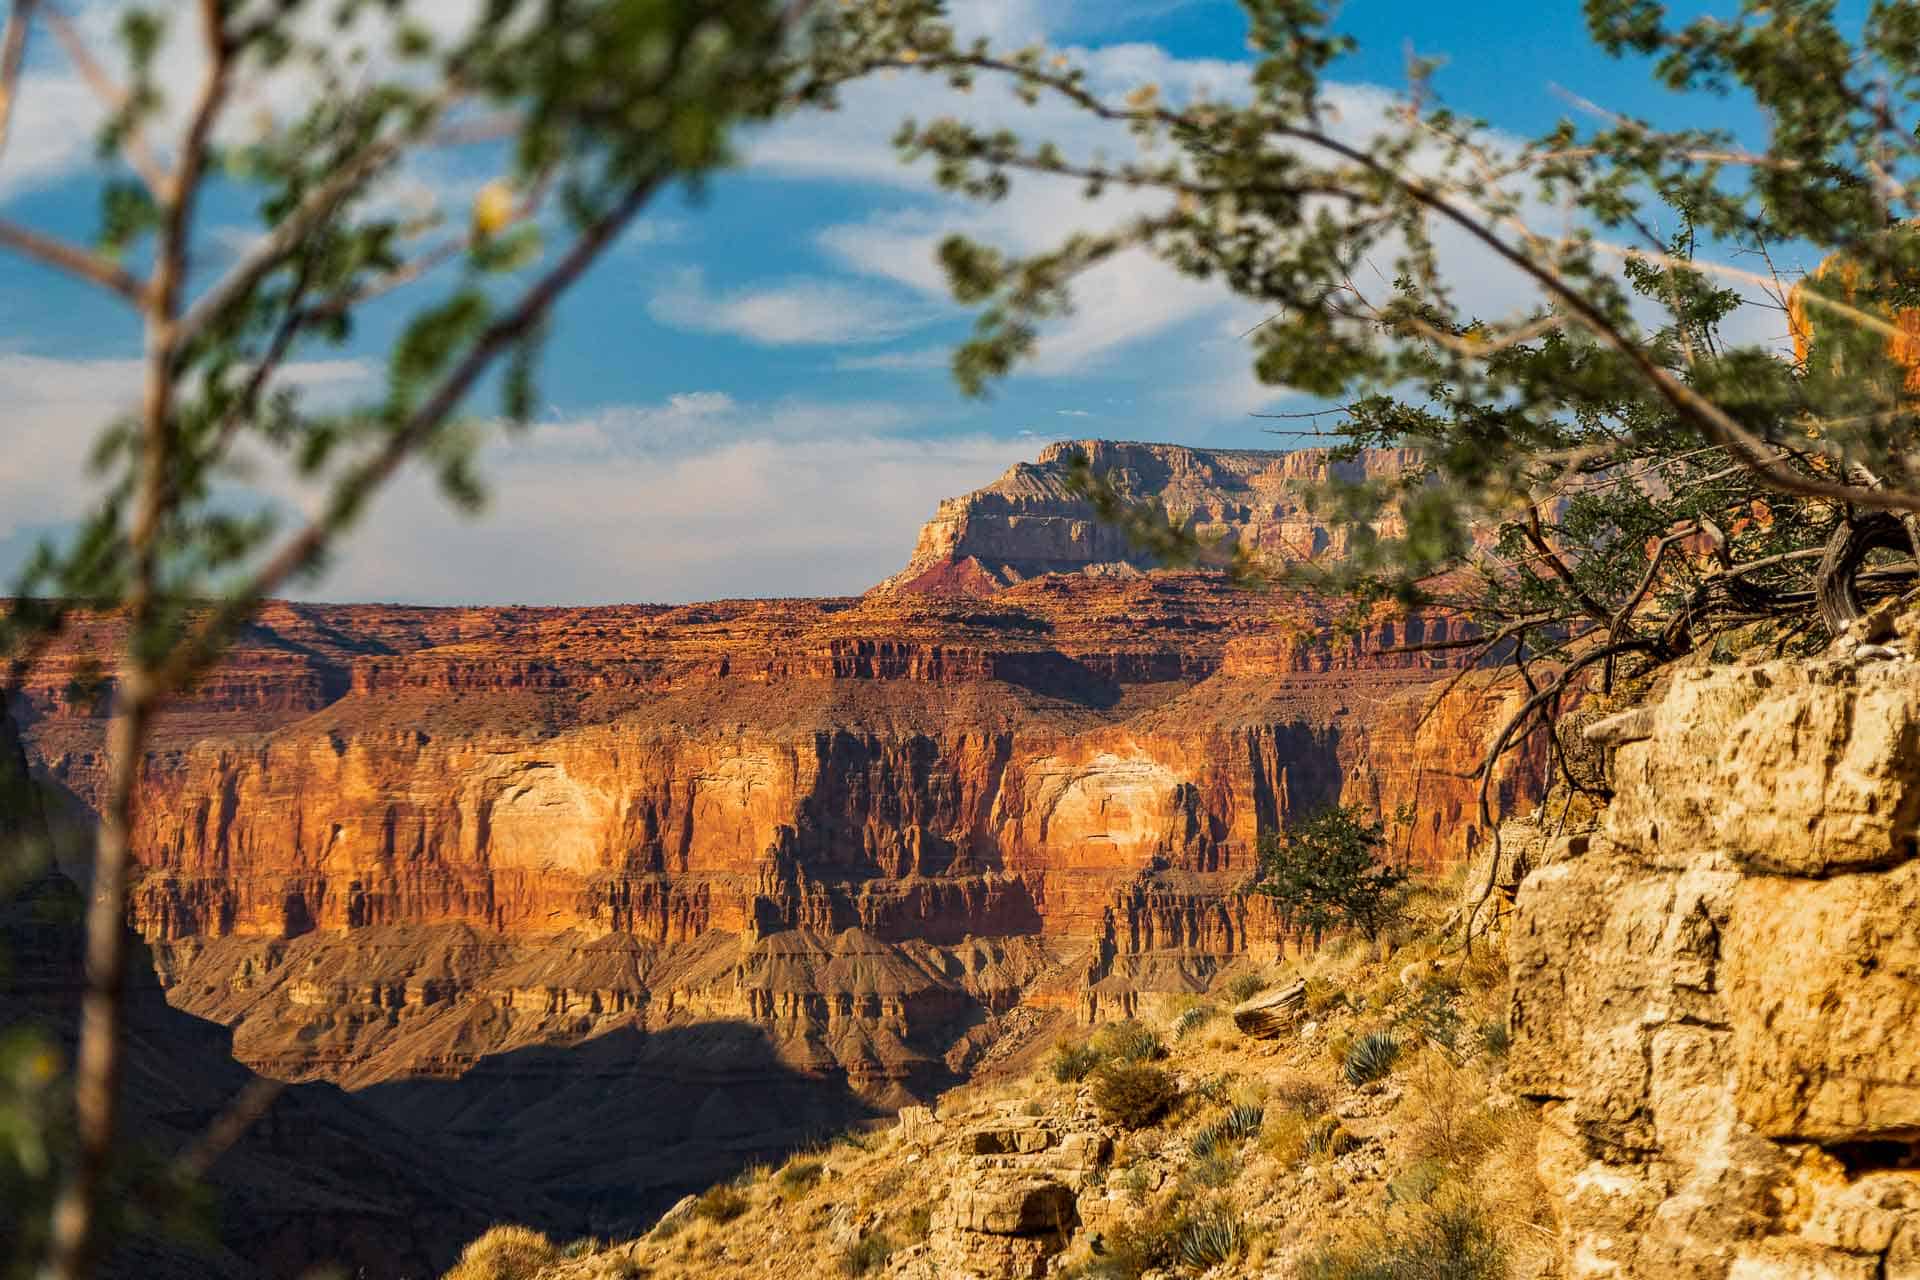
The Royal Arch Loop is a beautiful, remote, and challenging hike. There are opportunities to see petroglyphs, incredible geological formations, hidden desert waterfalls, and lots of Grand Canyon creatures (I caught a glimpse of a bighorn near Elves Chasm).
Because of the remote nature of the hike, the little access to water, and the rappel, it’s not a hike for everyone. The Grand Canyon Backcountry Office will likely try to scare you out of doing this hike. If their tactics work, it’s probably for the best.
I’m always looking to improve upon the information and resources provided in these guides so if you have any questions, suggestions, or updates, please leave a comment below or get in touch.
Resources
Affiliate Disclosure: This page may contain affiliate links, which means I may receive small commissions for purchases made via these links at no additional cost to you. This helps to pay the bills and keep the site up and running. Thank you for your support!