Southern Sierra High Route (SoSHR) Backpacking Guide
The Southern Sierra High Route (SoSHR) is a 100 mi / 160 km route through California’s Sierra Nevada that runs parallel to (and sometimes overlaps with) the John Muir Trail (JMT) and the Pacific Crest Trail (PCT). It is commonly referred to as a more rugged JMT since a large part of the SoSHR is off-trail and it stays higher than the JMT.
The SoSHR was originally put together by Alan Dixon and Don Wilson intending to create a complement to Steven Roper’s Sierra High Route (which ends further north at Road’s End in Kings Canyon National Park – hence the Southern Sierra High Route). I wrote a detailed guide to connecting these two routes here.
Around 80 miles of the Southern Sierra High Route are off-trail (or at least off of maintained trails); you should definitely be comfortable hiking off-trail in the backcountry before attempting this route.

Route Basics
- Location: Inyo National Forest / Sequoia National Park / Kings Canyon National Park (California, USA)
- Length: 100 mi / 160 km
- Type: One-way
- Recommended Time: 6 to 8 days
- Possible Time: 3 days?
- Most Popular Months: August/September?
- Max Group Size: 8
- Permit Required: Yes
- Permit Cost: $11 (+$5 per additional group member)
- Northern Terminus: South Lake (Bishop Pass Trailhead)| 37.169205, -118.566051
- Southern Terminus: Horseshoe Meadow (Cottonwood Lakes Trailhead) | 36.453163, -118.169872
- Low Point: Woods Creek (8,537 ft / 2,602 m)
- High Point: Mount Whitney (14,505 ft / 4,421 m)
- Elevation Gain: 20,950 ft / 6,386 m
- Elevation Loss: -22,015 ft / -6,710 m
- Difficulty: Strenuous


How to Get to the Trailhead
The Northern Terminus
- Location: Bishop Pass Trailhead (South Lake)
- Accessible via public transportation: Yes
- Closest population center: Bishop, CA
- Trailhead parking: Yes
- Trailhead facilities: Vault toilets, trash cans, water (from South Lake)
- Cost to park: Free
- Parking time limit: None
By Car
The Southern Sierra High Route’s northern terminus at South Lake is approximately 22 mi / 35 km from the town of Bishop, California located along Highway 395 in the Eastern Sierra.
You reach the terminus by following West Line Street west out of Bishop and taking it for 14.7 mi / 23.7 km before turning left on South Lake Road and following it until it dead-ends at the parking for South Lake (the northern terminus). The road is paved the entire way.
The road climbs from an altitude of around 4,100 ft / 1,250 m in Bishop to 9,800 ft / 2,987 m at the trailhead. There’s room for around 75 cars at the trailhead, but since it’s a popular day-hiking area, parking is not guaranteed.
The road is closed in winter.
By Public Transportation
The Bishop Creek Shuttle – operated by Eastern Sierra Transit – is a twice-daily shuttle that runs between South Lake and Bishop (with stops at various other trailheads in between).
The shuttle makes four stops in Bishop (one of which is at Vons – a supermarket) before heading up toward South Lake. It stops twice each day at the northern terminus for the SoSHR – at 8:45 am and 4:45 pm.
A one-way adult fare is $5. You can also buy a 10-ride pass for $45.
By Hitchhiking
Hitchhiking along Highway 395 (if you’re not already in Bishop) generally isn’t too difficult. The same Eastern Sierra Transit that runs the Bishop Creek Shuttle also runs routes on 395 if you need to get from anywhere between Reno and Lancaster.
Once in Bishop, I would suggest walking west on West Line Street toward the end of town for better odds at getting a ride out. Just remember that to get to the northern terminus you’ll have to make a left onto South Lake Road – so get dropped off at the junction if you’re not with someone who is going that way.
The Southern Terminus
- Location: Cottonwood Lakes Trailhead (Horseshoe Meadow)
- Accessible via public transportation: No
- Closest population center: Lone Pine, CA
- Trailhead parking: Yes
- Trailhead facilities: Vault toilets, bear boxes, trash cans, potable water (turned off in late season)
- Cost to park: Free
- Parking time limit: None
By Car
Driving to the southern terminus of the Southern Sierra High Route is simple. From Lone Pine, follow Whitney Portal Road west out of town and then make a left on Horseshoe Meadows Road. This road leads you nearly 20 mi / 32 km up more than 6,000 ft / 1828 m to the Horseshoe Meadow where you can find multiple campgrounds, trailheads, and parking areas. The road is paved the entire way.
If you’re coming from the south and don’t want to stop in Lone Pine on your way up to Horseshoe Meadow, you can turn left off Highway 395 a bit earlier on Lubken Canyon Road.
The SoSHR’s southern terminus is the Cottonwood Lakes Trailhead leading over New Army Pass (not to be confused with the Cottonwood Pass trailhead).
The road is closed in winter.
By Hitchhiking
Hitchhiking along Highway 395 (if you’re not already in Lone Pine) generally isn’t too difficult. The same Eastern Sierra Transit that runs the Bishop Creek Shuttle also runs routes on 395 if you need to get from anywhere between Reno and Lancaster.
Getting a ride out of town on Whitney Portal Road shouldn’t be too difficult, but you’ll need to make sure that you get dropped off at the turn for Horseshoe Meadow Road if your first ride is heading up to Whitney Portal and not Horseshoe Meadow. The Horseshoe Meadow area is a popular trailhead/campground and usually sees plenty of traffic.
Notes on the route
- The Southern Sierra High Route can be hiked in either direction (although it’s most-commonly hiked southbound).
- The route crosses the summit of Mount Whitney and enters the Whitney Zone. You do not need a special Mount Whitney permit so long as you are not exiting via Whitney Portal or camping in the Whitney Zone (between Russell-Carillon Col and Discovery Pinnacle/Trail Crest).
- You cannot poop in the Whitney Zone without doing so in a wag bag and then carrying it out (between Russell-Carillon Col and Discovery Pinnacle/Trail Crest).
- You can easily connect the Southern Sierra High Route with the Sierra High Route – read my guide on doing so here.
- You are required to carry a bear canister for the entirety of the Southern Sierra High Route. I recommend trying to pack as much as you can into a BV450 (or a Bearikade Scout if you have money to burn).
- You can park for free for an indefinite amount of time at either terminus.


When to Hike: Weather and Conditions
The Southern Sierra High Route can be hiked for a large part of the year – as early as May and as late as November depending on snowfall and when the roads to/from the trailheads open. More broadly, the season for the route is probably considered to be July through September.
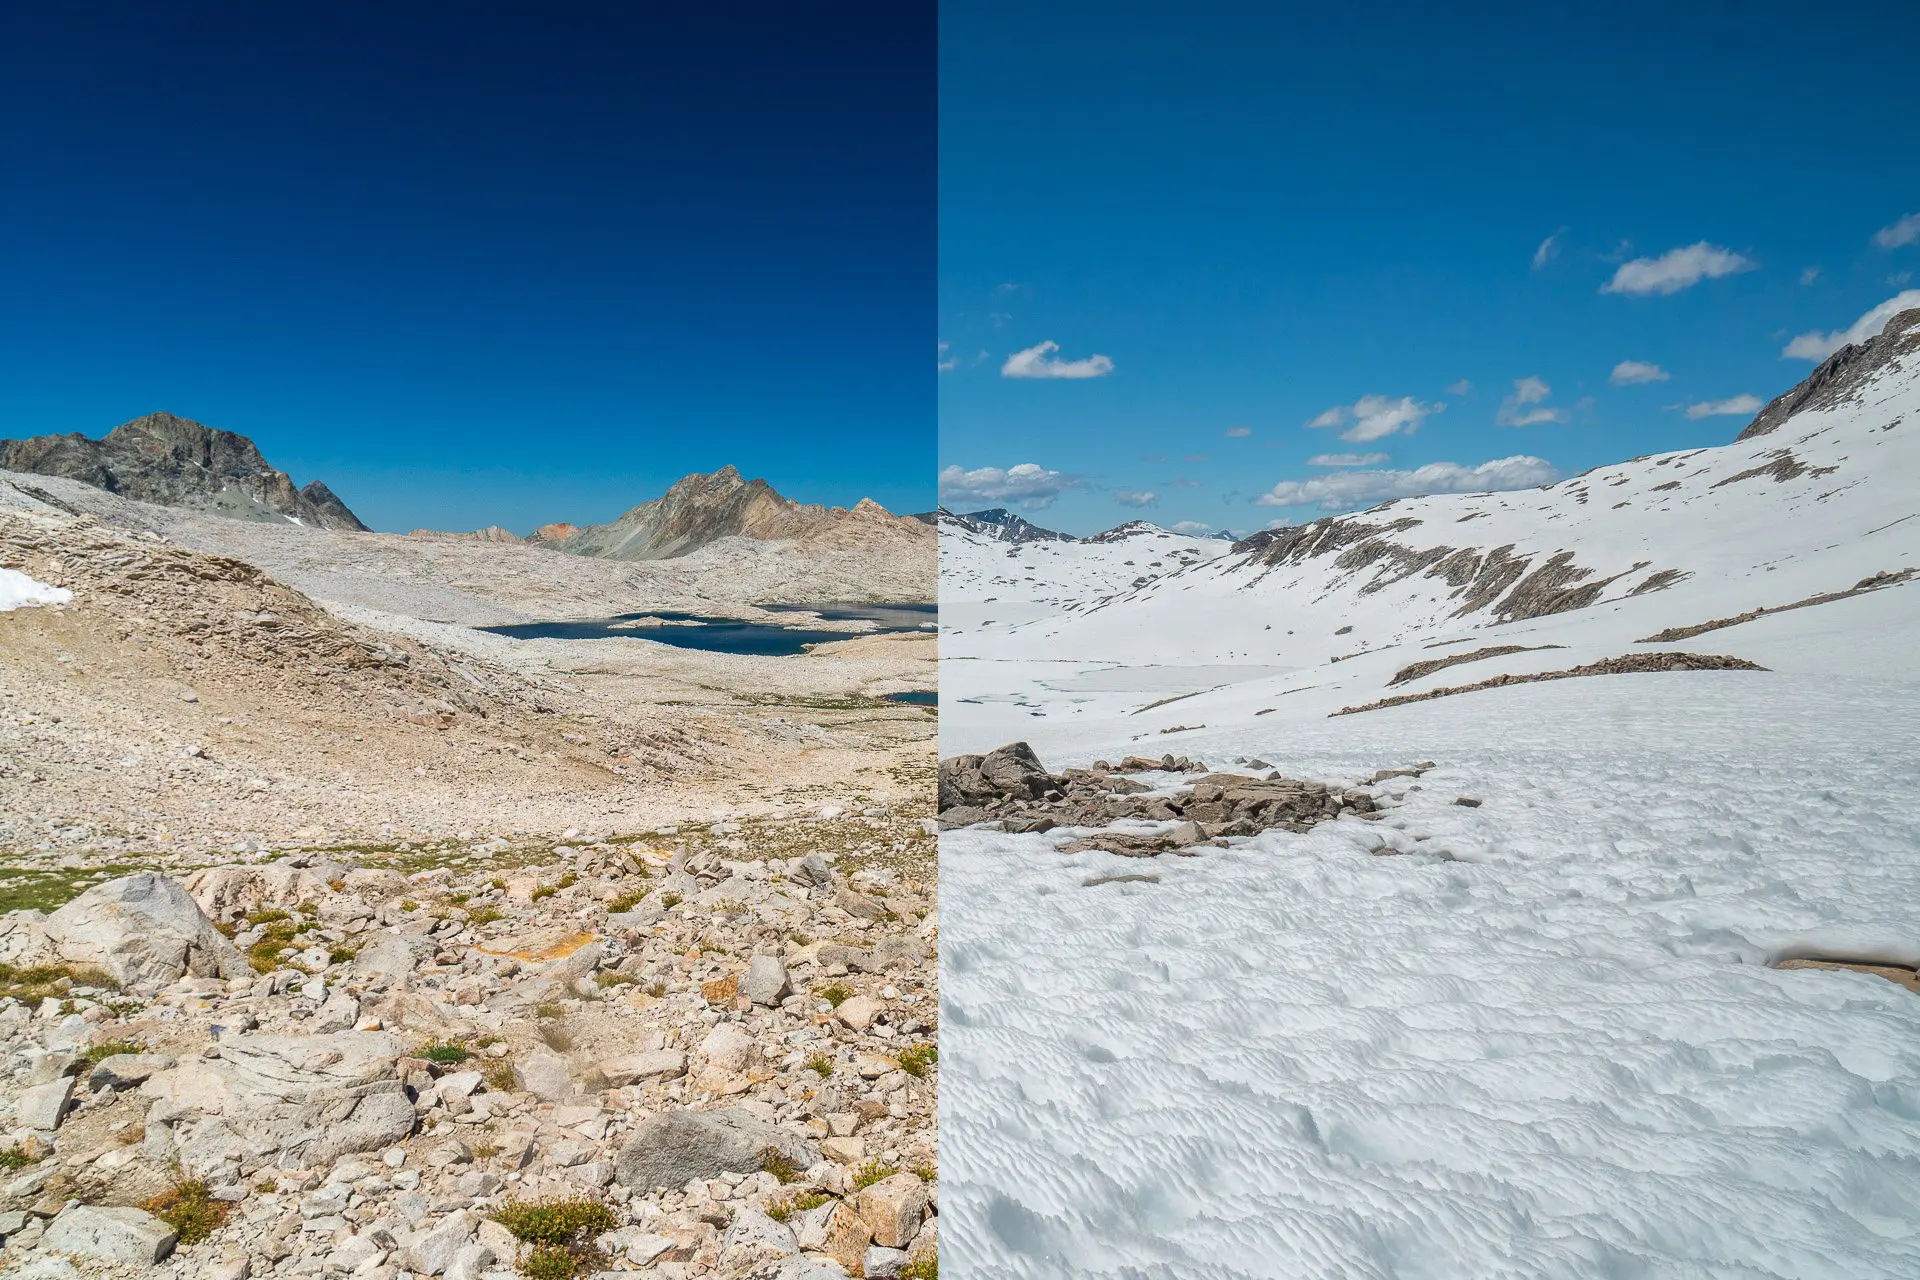
Early Season Hiking (May/June): The first thing you’ll need to wait for is the roads to open (unless you’re turning this into an over-snow adventure), and then you’ll need to decide how much snow you want to contend with. You’ll need a permit beginning May 1, but there usually isn’t much demand if the mountains are still snow-filled. Experience traveling on snow as well as gear including traction and an ice axe is a must for early Southern Sierra High Route Attempts. There’s also the possibility of having to deal with more challenging stream crossings earlier in the season – another thing to consider when planning your trip.
Mid-Season Hiking (July-September): In the summer, your biggest obstacle will be thunderstorms and permit competition (more on permits below). Generally, the Sierra isn’t terrible for summer thunderstorms, but you may be met with afternoon storms for many days in a row – not a fun thing to experience when you’re high above treeline.
Late Season Hiking (October/November): Later in the year you have the advantage of (probably) not having to deal with bugs, a better shot at getting a permit for the date you want, and fewer crowds. However, you will be dealing with shorter days and colder temperatures. The Sierra is beautiful in the fall and I would highly recommend hiking later in the season if there isn’t any snow in the forecast and the cold doesn’t much concern you.
Permits
The Southern Sierra High Route is not an officially established trail and there is no “Southern Sierra High Route Permit”. That said, you still need to get an Inyo National Forest Wilderness Permit if you intend to hike the SoSHR.
These permits can be acquired at Recreation.gov. For your starting point, you’ll use either Bishop Pass – South Lake for a trip beginning at the northern terminus or Cottonwood Lakes for a trip beginning at the southern terminus.
If you’re flexible with your starting point but not your dates, you can also hike in from Horseshoe Meadow via Cottonwood Pass or Trail Pass. If you go this route, you’ll hike until reaching the Pacific Crest Trail/John Muir Trail and then follow it north until splitting off and joining the SoSHR north of New Army Pass near Soldier Lake.
NOTE: You do not need a Whitney Zone permit to hike the Southern Sierra High Route unless you plan on overnighting in the Whitney Zone or enter/exit via Whitney Portal (there isn’t a good reason you would do this unless you have to get off and then back on the route because of some emergency). The section of the SoSHR that crosses this zone runs from Discovery Pinnacle at the southern end (north of Upper Crabtree Lake) to Russell-Carillon Col at the northern end.
To obtain a Whitney Zone permit, you need to enter a lottery between February 1 to March 15. More on Whitney Zone Permits here.
Walk-up Permits
Approximately 40% of Inyo National Forest permits are reserved for walk-ups. These permits can be obtained at any one of the five Inyo National Forest Visitor Centers located on the East Side. They are located (from north to south) in Lee Vining, Mammoth Lakes, Bishop, Big Pine, and Lone Pine. More on the Inyo National Forest Visitor Centers here.
NOTE: If you are getting a walk-up permit for the Whitney Zone, this permit can only be obtained at the Eastern Sierra Interagency Visitor Center in Lone Pine.
Itinerary
How many days does it take to hike the Southern Sierra High Route? I would recommend hiking the entirety of the 100 mi / 160 km route without exiting the Sierra to resupply (although there are various points at which you could do this). However, if you’re hiking early season and slogging through the snow the entire trip, a resupply might be necessary.
You’re required to carry a bear canister for the entirety of the route and if you have a larger bear canister like a BV500, you can probably get away with 8 or even 9 days worth of food in it (if you pack efficiently and are conscious of what you’re eating). Nine days should be plenty for finishing the route, but if you really want to resupply somewhere, your best bet is probably hiking out to Onion Valley via Kearsarge Pass. More on this below.
I hiked the Southern Sierra High Route in five days with the following itinerary (note that the two 20+ mi / 32+ km days included a lot of on-trail miles which made for easier hiking).
- Day 1: Horseshoe Meadow to Crabtree Lake via New Army Pass and Crabtree Pass (~16.4 mi / 26.4 km)
- Day 2: Crabtree Lake to Wallace Creek via Discovery Pinnacle, Mount Whitney, and Russell-Carillon Col (~12.9 mi / 20.8 km)
- Day 3: Wallace Creek to Dollar Lake via Wright Lakes Pass, Shepherd Pass, Junction Pass, and Glen Pass (~27.4 mi / 44.1 km)
- Day 4: Dollar Lake to the lake just north of Cirque Pass via Pinchot Pass, Mather Pass, and Cirque Pass (~27.7 mi / 44.6 km)
- Day 5: Lake just north of Cirque Pass to South Lake via Potluck Pass, Thunderbolt Pass*, and Bishop Pass (~10.6 mi / 17.1 km)
*I took Thunderbolt Pass into Dusy Basin instead of Knapsack Pass because I was coming back to hike the Sierra High Route (SHR) immediately following this trip (the SHR goes over Knapsack Pass) and we saw that this route would be shorter require one less elevation loss/gain (we stayed high and traversed between the saddle north of Potluck Pass and Thunderbolt Pass). If you’re interested in connecting the SoSHR to the SHR, check out this post.
Resupply
The Southern Sierra High Route is 100 mi / 160 km long and can easily be hiked without a resupply. However, if you are taking it slow or are hiking in early-season conditions, then you might require a bit more food than your bear canister (which you’re required to have for the entirety of the route) can afford.
The most convenient place to resupply on the SoSHR is Onion Valley via Kearsarge Pass. The well-traveled trail over Kearsarge Pass is near the midpoint of the SoSHR and travels 7.25 mi / 11.7 km east from the Pacific Crest Trail/John Muir Trail to the trailhead at Onion Valley.
Onion Valley is a popular trailhead with a paved road leading up from Highway 395. In addition to a campground, there are also vault toilets, trash cans, and bear boxes (in addition to plenty of parking). You could leave yourself a resupply in one of the trailhead bear boxes, leave a car at the trailhead, arrange for a ride, or hitchhike down to Highway 395.
The trailhead is directly west of Independence where there’s little more than a gas station and a post office, so unless you mail yourself a resupply box or are happy eating gas station meals for the second half of your trip, I would suggest heading north to the town of Bishop for your resupply (or south to Lone Pine).
You can find more about Onion Valley here.
Gear & Packing List
You’ll need a complete multi-day overnight backpacking kit for this route, and if that sentence doesn’t make sense to you, then the Southern Sierra High Route may be something you want to revisit in the future. That said, there are a few pieces of gear that you’ll definitely want to have with you for your SoSHR hike.
- Shelter: Yes, you can find extended periods in the Sierra without rain, but you would be ill-advised to not bring a shelter on the Southern Sierra High Route. According to the Pacific Crest Trail thru-hiker survey, the Big Agnes Copper Spur is a favorite among thru-hikers. I have the 2-person Platinum version (that I use as a single-person shelter) and I love it.
- Bear Canister: I haven’t met anyone who gets terribly excited about carrying a bear canister, but you’ll be required to carry one for the entirety of the Southern Sierra High Route. I got away packing all my food for the trip into a BV450, but you might want a BV500 if you are thinking of taking more days of food with you (or you’re carrying food for two).
- Insulated Jacket: No matter what time of year you’re hiking the Southern Sierra High Route, you’re going to want an insulated jacket. I brought an Arc’teryx Cerium LT which I’ve been consistently happy with. It’s lightweight but not so much so that it won’t actually keep you warm when you need it.
- Maps: I’m a huge fan of maps, and before I hike a new route, I’ll generally buy and then (sometimes) bring the relevant maps with me on the trail (yes, like a physical map). If you’re also into maps, the Trails Illustrated SEKI map is a great place to start. It might also be worth downloading the PCT Sierra or John Muir Trail app from FarOut Guides since there is a lot of overlap.
- Water Filter: A lot of people will try to tell you that you don’t have to filter water in the Sierra Nevada, but the truth is that you can get sick from drinking water in the Sierra. It might not be common or even likely, but unless you want to risk it, carrying a lightweight filter like a Sawyer Squeeze is highly recommended. The SoSHR is short enough that you might even be able to stand the flow rate of the Sawyer MINI (it’s only 2 oz / 57 g).
If you want more recommendations on backpacking gear, check out my current gear list or gear reviews.
Route Description
I hiked the Southern Sierra High Route from south to north, despite it originally being conceived as a north-to-south route. The route described here will be done from south (beginning at Horseshoe Meadow via New Army Pass) to north (ending at South Lake via Bishop Pass).
Horseshoe Meadow to Mount Whitney
The route begins at Horseshoe Meadow and follows the Cottonwood Lakes Trail toward New Army Pass. Follow signs for New Army Pass (you could go via Cottonwood Lakes and Army Pass if you want to mix things up, but New Army is a much better view) and then follow the Army Pass Trail on the north side for 2.1 mi / 3.4 km until you hit a T-junction. Head north to Soldier Lake and head around either side to the gully at the northeast corner. There’s a faint trail here that you’ll follow up to a plateau to the west of The Major General.


Follow the plateau north, paralleling Rock Creek until picking up a trail momentarily and continuing north to Sky Blue Lake. The trail here comes and goes, and you’ll want to follow the drainage up to Sky Blue Lake before contouring around the eastern side of the lake. There are some excellent camping opportunities around here.
Leaving the north side of Sky Blue Lake you’ll follow the drainage west until contouring back east as you pick your way up to a high point overlooking an unnamed lake at 12,136 ft / 3,699 m. From here, you can see Crabtree Pass to the north. You’ll want to stay high here, contouring around the western side of the lake. There are two notches at Crabtree Pass. It’s easy to get sucked into climbing up the one to the west, but the descent on the northern side is more difficult from there. There’s a faint trail that you can follow to the eastern notch (what’s actually Crabtree Pass) but it requires a small dip in elevation before climbing back up to the pass. No matter which notch you hit, you’ll be able to get down, but it’s easier from true pass further east (dropping down to the east notch from the west is not easy as it’s lower and there’s a large drop-off).

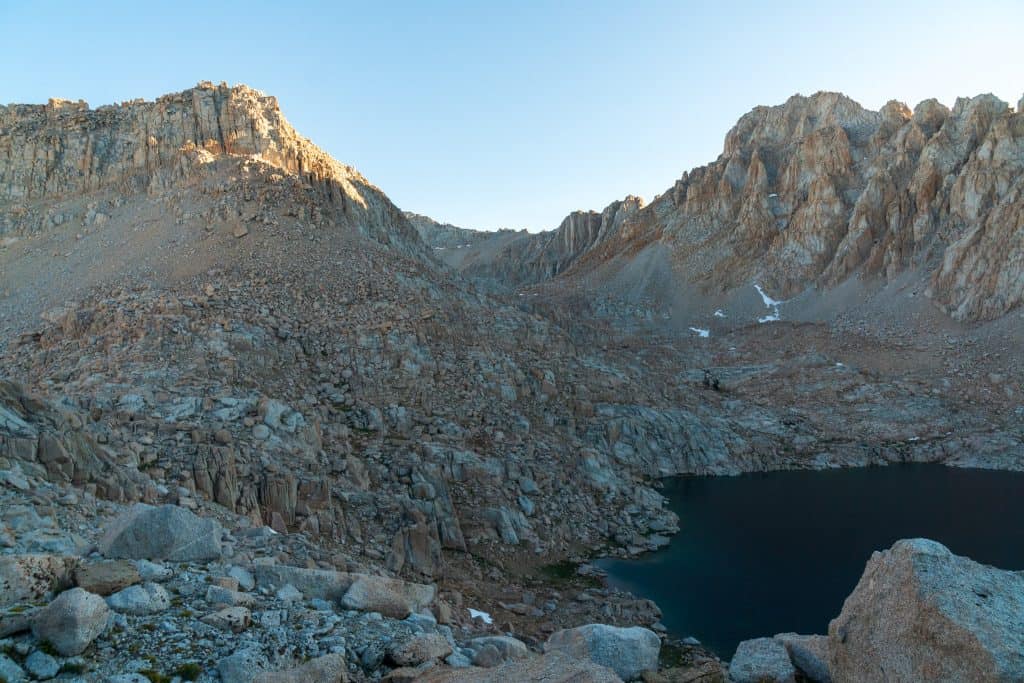
From Crabtree Pass, you’ll see Crabtree Lake below you and an imposing-looking wall of scree just past it. This is what you’re going to climb. It may look impassible and impossibly steep from Crabtree Pass, but trust me when I say that it’s not as bad as it looks.
Head up the talus in a northeasterly direction until around 12,500 ft / 3,810 m before switchbacking west and slowly gaining the upper (flatter) reaches of the sandy slopes at around 13,100 ft / 3,993 m (I’ve done this twice now and it’s worked out each time). Once the terrain mellows out, head north toward Discovery Pinnacle where you’ll get fantastic views of your next destination, Mount Whitney.


Note, that once you begin your descent here to the Mount Whitney Trail, you will be in the Whitney Zone. That means no pooping and no camping unless you’ve gotten a permit ahead of time (for camping, not pooping).
Having dropped down twice now to the Mount Whitney Trail from Discovery Pinnacle, I have yet to discover a perfect spot. Just follow the ridge north a bit until you find somewhere you feel comfortable dropping down to the Mount Whitney Trail below. And be careful to not kick any rocks down onto anyone who may be passing on the trail below you.
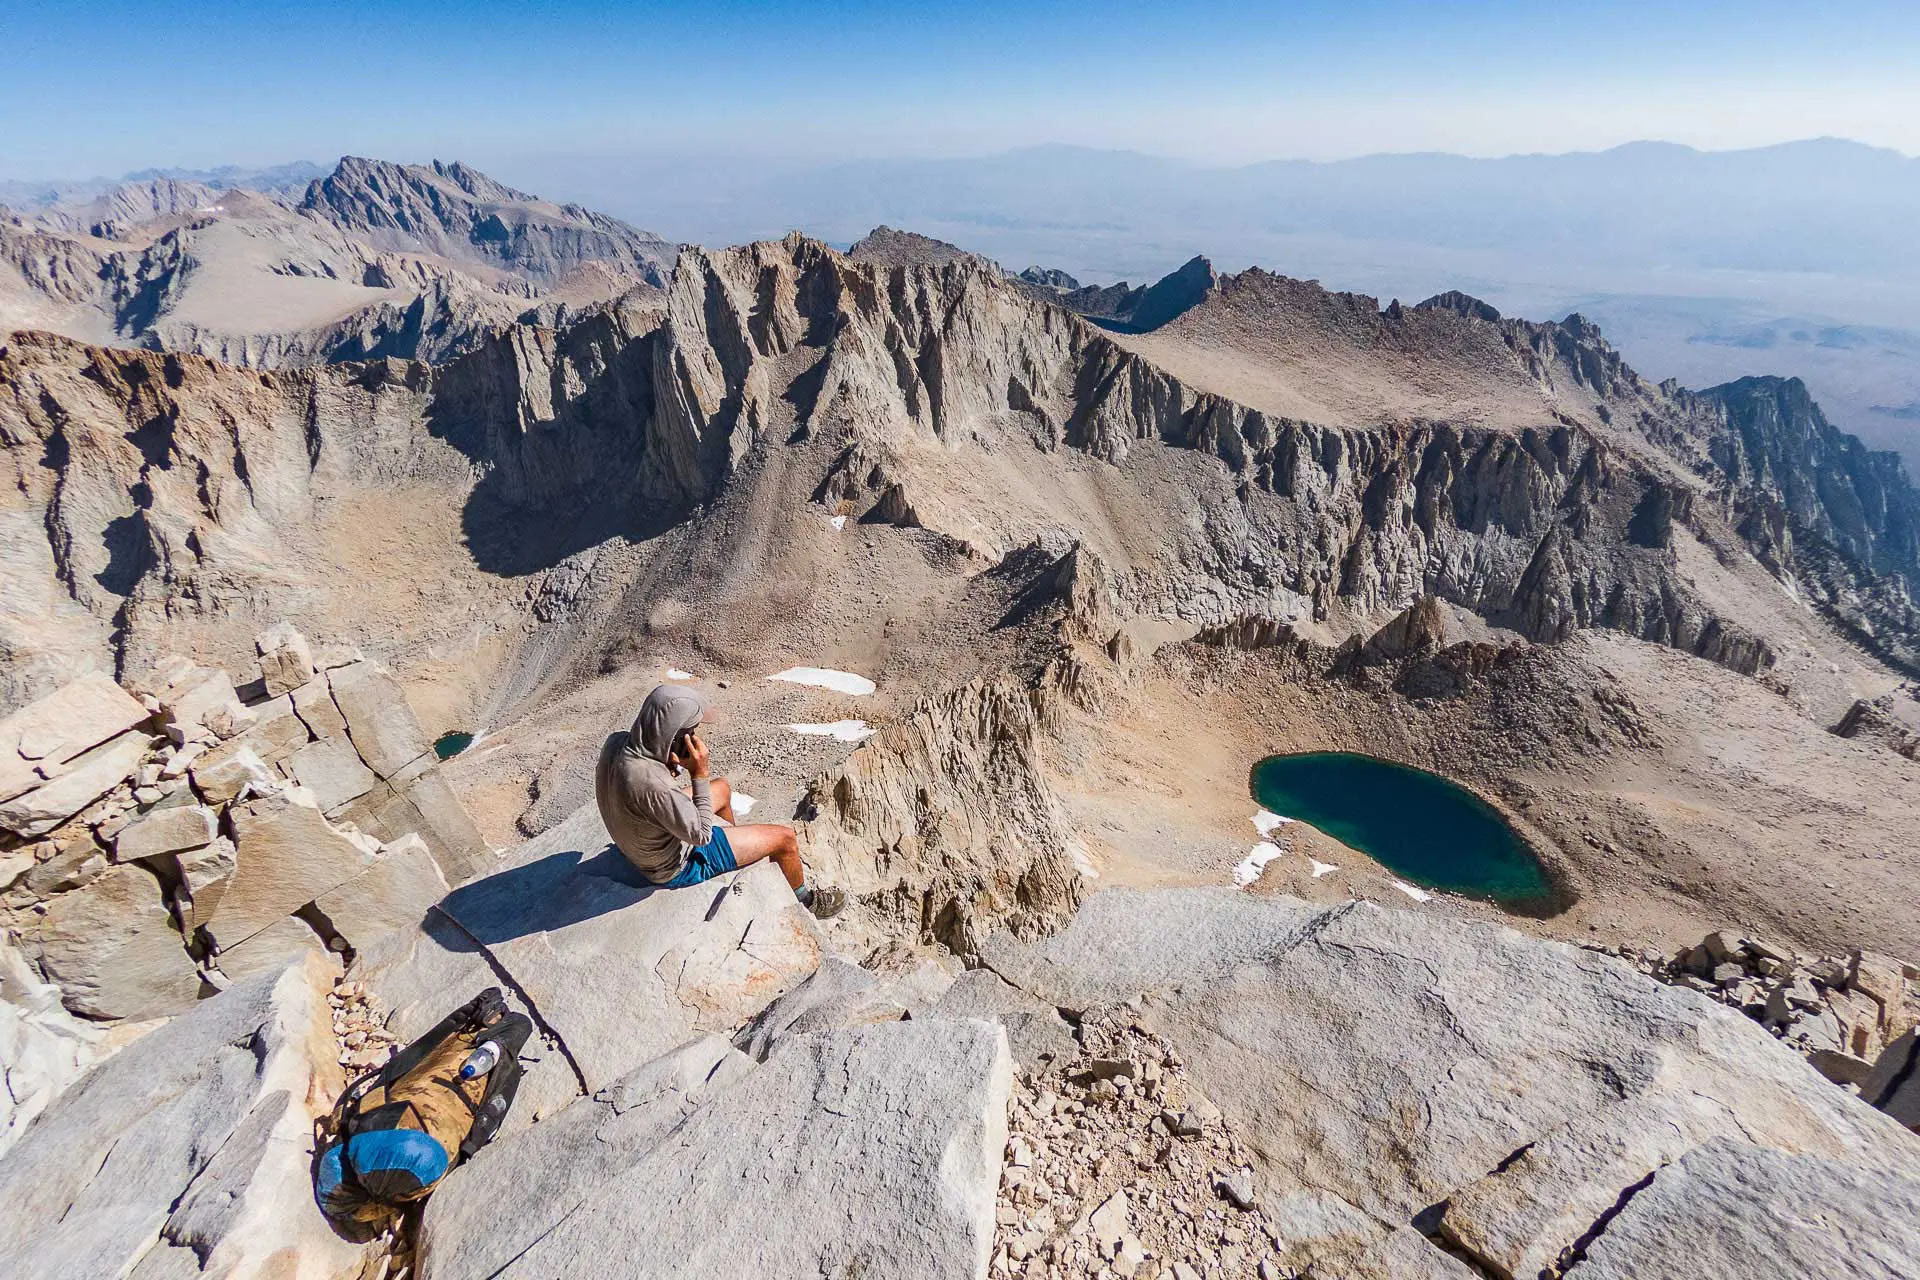
You’ll follow the Mount Whitney Trail up to the summit where you will (probably) find a bunch of other hikers, some cell reception, and the Mount Whitney Summit Shelter (which, remember, will not protect you in a thunderstorm).
Mount Whitney to Shepherd Pass
The next section of the Southern Sierra High route covers some of the most challenging terrain on the entire route. If you’re not comfortable with this next section, you can, alternatively, take the trail to the west down from Mount Whitney, past Guitar Lake, to Crabtree Meadow. From Crabtree Meadow, you can take the PCT/JMT north and then rejoin the SoSHR at either Wright Creek (south of Wright Lakes Pass) or at Shepherd Pass via the Shepherd Pass Trail.
The route descends Mount Whitney via the Mountaineers Route. There is some Class 3 terrain in here and depending on the time of year you may encounter icy or snowy conditions. It’s possible to bypass the Class 3 terrain with a Class 2 walk around that takes you west from the summit to around 14,230 ft / 4,337 m before doubling back and heading east to the notch at the bottom of the Class 3 chute at the top of the long, steep, and sandy gully dropping east to Iceberg Lake.


Follow the trail from Iceberg Lake to Upper Boy Scout Lake (still no camping or pooping) before finding a faint trail heading northeast from the eastern side of Boy Scout Lake. You’ll now recover much of the elevation you just lost as you begin a long and sandy climb up to Russell-Carillon Col. This climb is probably my least favorite of the entire route, so enjoy. Just above 12,800 ft / 3,901 m the terrain flattens out; the rest of the way up to Russell-Carillon Col is mellow compared to what you just came up.
From Russell-Carillon Col, you’ll see the impressive Tulainyo Lake to the north. You’re also met with what can be an intimidating-looking route down. The descent here isn’t as bad as it looks and if you find yourself attempting to navigate anything beyond a Class 2 difficulty, then there’s probably an easier way that you’re not finding. If it feels super sketchy, you’re probably doing something wrong (so be safe). The good news? You’re out of the Whitney Zone and are now free to camp and/or poop again.


Follow the western shore of Tulainyo Lake before then following a gentle slope northwest toward the top of a drainage bound for Wallace Lake below. Pick your way down through the boulders and then stay on the south side of Wallace Lake as you head west and slowly descend into the trees (one of the few times you’ll find yourself below treeline on this route). There is a faint trail to be found here, and it can be frustrating as the brush can get thick. Stay north of the creek if you can as you head west toward and through the boulders and talus east of Wright Creek and the PCT/JMT. Once the terrain to your north mellows out, turn north and head into Wright Lakes Basin.
Following Wright Creek north, the terrain opens up and slowly climbs through the Wright Lakes Basin and toward Wright Lakes Pass. There’s a faint trail leading over the pass, which isn’t nearly as challenging as anything encountered south of here. North of the pass you’ll see the Shepherd Pass Trail. Make your way to the trail and follow it east up a gradual climb to Shepherd Pass.


Shepherd Pass to Palisade Lakes
Follow the trail east from Shepherd Pass until around 11,100 ft / 3,383 m where you can cut across the boulders north across Shepherd Creek and up to a small flat meadow-y area.
On the north side of Shepherd Creek, there’s a faint trail (the old John Muir Trail) you can find and follow up to around 11,700 ft / 3,566 m where the terrain mellows out and leads you west through the gully toward Junction Peak.

There’s a faint trail on the north side of this gully that I would recommend finding and following; it’s far easier than navigating the talus along the lowest point. Somewhere between 12,300 and 12,400 ft / 3,749 and 3,780 m you’ll want to turn north and begin climbing steeply up to Junction Pass. There’s apparently a faint trail somewhere in here, but we missed it and ended up climbing up some Class III terrain instead.
At the top of the pass, you’ll find a wooden sign and some excellent views into the valley to the north – your next destination. There’s a more obvious trail on the northern side of Junction Pass that you will follow along the ridge before switchbacking down to the valley below and the headwaters of Bubbs Creek.


Stay on the faint trail and follow it along the northern side of Golden Bear Lake before descending into the trees and making your way back to the Pacific Crest Trail/John Muir Trail. The Southern Sierra High Route now follows the PCT/JMT north over Glen Pass, Pinchot Pass, and Mather Pass into the Palisade Basin. There are a couple of alternates between Glen Pass and Pinchot Pass that you can take, but I won’t go into detail on the route here since the hiking and navigation are straightforward compared to what you have come through.
If you are interested in details on any of these three passes, check out these posts: Glen Pass, Pinchot Pass, and Mather Pass. The next time the Southern Sierra High Route leaves the PCT/JMT is at the northern/western edge of Lower Palisade Lake (before the PCT/JMT descends the Golden Staircase).
Palisade Lakes to South Lake
You’ll leave the well-worn Pacific Crest Trail/John Muir Trail at the northwest side of Lower Palisade Lake and climb up to a small tarn (pond?) at approximately 10,800 ft / 3,292 m. Note that here you are not going up the gully due north of the westernmost point of Lower Palisade Lake, you’re going up the gully west of this one. There are a number of ways up through the boulders here, so choose the path of least resistance. If you find yourself very exposed and/or feeling sketched out, you’re probably going the not-the-best way.
After climbing around 600 ft / 183 m, you’ll reach a bowl with a few more small ponds – you could camp here (but I think the better camping is lower down, shortly after leaving the lakes – great views looking south).


You can see Cirque Pass above you at this point – all you have to do is make your way up to it. I’ve done this section twice now and both times I’ve stayed to hikers’ left (heading northbound) as I’ve made my way up through the terrain. That said, I’ve seen people coming down the eastern flanks as well, so, again, do whatever feels most comfortable.
The top of Cirque Pass is beautiful – there’s a large unnamed lake below you and you can see Potluck Pass just across the cirque. The way down from Cirque Pass is a game of pick your way through rocky benches and avoid any large drops. It’s not too bad. Cross the lake’s outlet and then turn north to follow the western shore before climbing a bit and then descending to the tarns below Potluck Pass.


Potluck Pass isn’t much of a climb in terms of elevation, but both times I have been up it, I ended up trudging uphill through sand and scree. But both times I approached it from hikers’ left (heading northbound).
North of Potluck Pass, you have great views of the Palisades as you’ll descend just a bit and contour around – staying at around 12,000 ft / 3,658 m until reaching the saddle north of Potluck Pass below Barrett Peak. Below, you’ll see Barrett Lakes. It’s possible to go around the larger, upper lake on either side (north or south), but if you stay on the south side, do not try to follow the shore of the lake – stay higher or you’ll get cliffed out.
Cross the outlet at the southwest side of the lake and continue along the southern shore of the lower Barrett Lake.


Cross the outlet at the southwest side of the lake and continue along the southern shore of Lower Barrett Lake. Knapsack Pass is below (to the south of) Columbine Peak. Continue gaining ground as you head west toward the pass from Lower Barrett Lake. When you reach the top of the pass, you’ll get a great view into Dusy Basin to the west.
Descend the gully from the pass, careful to avoid any steep drop offs, and aim toward the northern side of the lakes below. Stay above the lakes as you make your way toward the bottom of the gully and begin to encounter brush for the first time since just before Wright Lakes Pass.
There are some use trails in here you can pick up, but you’re basically just making your way toward the Bishop Pass Trail ahead of you. Hit the well-defined trail wherever you choose and turn right as you begin your ascent to Bishop Pass. At the top of the pass, you have 5.5 mi / 8.9 km of downhill hiking until reaching South Lake and the northern terminus of the Southern Sierra High Route.


Alternate Routes
Despite the Southern Sierra High Route not being an officially established trail, there is an official route that the SoSHR follows. That said, there are a couple of alternate routes that you can choose to take instead of following the “official” route. Both of the alternates below are between Glen Pass and Pinchot Pass, and both of them avoid simply following the Pacific Crest Trail/John Muir Trail for this section by adding additional off-trail miles. Each alternate adds off-trail navigation challenges, additional elevation gain/loss (particularly in the case of a Mount Baxter summit), and should not be attempted if you are for any reason in a rush to finish the route.
60 Lakes Basin Alternate
The northern terminus of this alternate is between Arrowhead Lake and Dollar Lake along the Pacific Crest Trail/John Muir Trail. The southern terminus of the alternate is at the bottom of the switchbacks on the northern side of Glen Pass. The entire length of this alternate is approximately 4.2 mi / 6.8 km. Staying on the SoSHR (which, at this point is the PCT/JMT) will be a lot quicker than taking this alternate, but if you don’t want to do more trail walking than you have to, I understand.
From the south, the route leaves the trail north of Glen Pass and heads around the western side of a long and skinny lake before climbing around 400 ft / 122 m up to a saddle and then descending into the 60 Lakes Basin. Following the eastern shore of the lakes, you’ll hit the 60 Lakes Trail and follow it north. You can also follow this east back to the PCT/JMT if you’re feeling sketched out by the alternate, or you can opt to take this into the 60 Lakes Basin instead of leaving the PCT/JMT at the bottom of Glen Pass.
You’ll stay in the 60 Lakes Basin, following the 60 Lakes Trail until it disappears, and then continuing north and descending the gully directly west of Arrowhead Lake (not visible from the 60 Lakes Basin) before heading around the north side of Arrowhead Lake and meeting back up with the PCT/JMT/SoSHR.
Mount Baxter Alternate
The northern terminus of this alternate is south of Pinchot Pass near the headwaters of Woods Creek (where the PCT/JMT hits around 11,080 ft / 3,377 m). The southern terminus of the alternate is just north of Dollar Lake (along the PCT/JMT).
This alternate is far more challenging than the “official” Southern Sierra High Route through here – which simply follows the PCT/JMT. From the north, the alternate crosses Woods Creek to the east before contouring around toward Colosseum Mountain – east of Mount Cedric Wright – and heading up the gully to the saddle between the two.
You’ll then head south, crossing the Sawmill Pass Trail and passing east of Woods Lake. You can take the Sawmill Pass Trail west back to the SoSHR/PCT/JMT here if you’re feeling sketched out. Alternatively, you can wait until hitting the Sawmill Pass Trail and head east to the alternate (either skipping Mount Baxter if coming from the south or skipping the saddle if coming from the north).
From the north, you’ll head up toward the northern ridge of Mount Baxter to the east of Stocking Lake (the stretched-out lake north of Mount Baxter/Acrodectes Peak). You’ll then follow the northern ridge of Mount Baxter around 1,500 ft 457 m up to the summit of Mount Baxter.
The route down from Mount Baxter drops around 100 ft / 30 m to the south from the summit before heading southwesterly down to the lake at 11,860 ft / 3,615 m. Then head south to the northern shore of the larger lake at 11,119 ft / 3,389 m where you’ll pick up (or not pick up) the faint Baxter Lakes Trail and follow it west back to the PCT/JMT.
Thunderbolt Pass Alternate
Thunderbolt Pass is an alternate you can take between Bishop Pass (the northernmost point of this alternate) and the saddle north of Potluck Pass overlooking Barrett Lakes. Thunderbolt Pass is a slightly shorter alternate to Knapsack Pass – the first off-trail pass of the route south of Bishop Pass.
Heading southbound, you reach Thunderbolt Pass by immediately heading cross-country to the southeast from Bishop Pass. Stay high, if you can, and follow use trails (if you can find them) as you contour around the southern slopes of Thunderbolt Peak. Thunderbolt Pass, located at 12,370 ft / 3,770 m, is located below Thunderbolt Peak and overlooks Barrett Lakes to the south. Upon reaching the pass, you can either drop down to Barrett Lakes below and then immediately climb back up to the saddle at 11,950 ft / 3,642 m or you can contour southeast through the boulder field slope until reaching the saddle.
Heading northbound, from the saddle north of Potluck Pass, you can either drop down to Upper Barrett Lake and then climb back up to Thunderbolt Pass from the northern shore, or you can contour northwest from the saddle traversing the boulder field below North Palisade and Thunderbolt Peak. When you reach Thunderbolt Pass, descend – keeping well above the lake below as you pass it to the north and then work your way up to Bishop Pass.
Map
The following is an overview of the Southern Sierra High Route with alternates, landmarks, and trails leading out of the Sierra highlighted. Where there is an actual trail (or where there was a trail), I have left a line. For the rest of the route, I have used markers. Note that these markers are approximate and navigating to them in a straight line from one another will in all likelihood not be the best way to navigate each section. The off-trail adventure is part of the fun, so enjoy it!
Conclusion
The Southern Sierra High Route is an approachable and incredible journey through the Sierra Nevada. Much of the route runs adjacent to or along existing trails, which means that if at any point you decide the SoSHR is too much for you, you can simply hop onto an existing, established trail.
Backpacking the Southern Sierra High Route is incredible and I would definitely recommend it. That said, it can be extremely challenging at times, so be sure you know what you’re getting yourself into. You must be comfortable navigating off-trail and you must be comfortable navigating Class III terrain. There’s nothing technical, but there are a few spots where you may find yourself dealing with some high-consequence exposure.
I’m always looking to improve upon the information and resources provided in these guides so if you have any questions, suggestions, or updates, please leave a comment below or get in touch.
Resources
- Horseshoe Meadow (Inyo NF)
- Horseshoe Meadow Campground Guide (Inyo NF)
- Whitney Portal Campground (Recreation.gov)
- Bishop Pass Trailhead (Inyo NF)
- Onion Valley (Inyo NF)
- Onion Valley Campground
- Bishop Creek Shuttle (Eastern Sierra Transit)
- Eastern Sierra Transit (Highway 395 Transportation)
- Whitney Portal Road Status
- Lone Pine Weather
- Mount Whitney Weather