
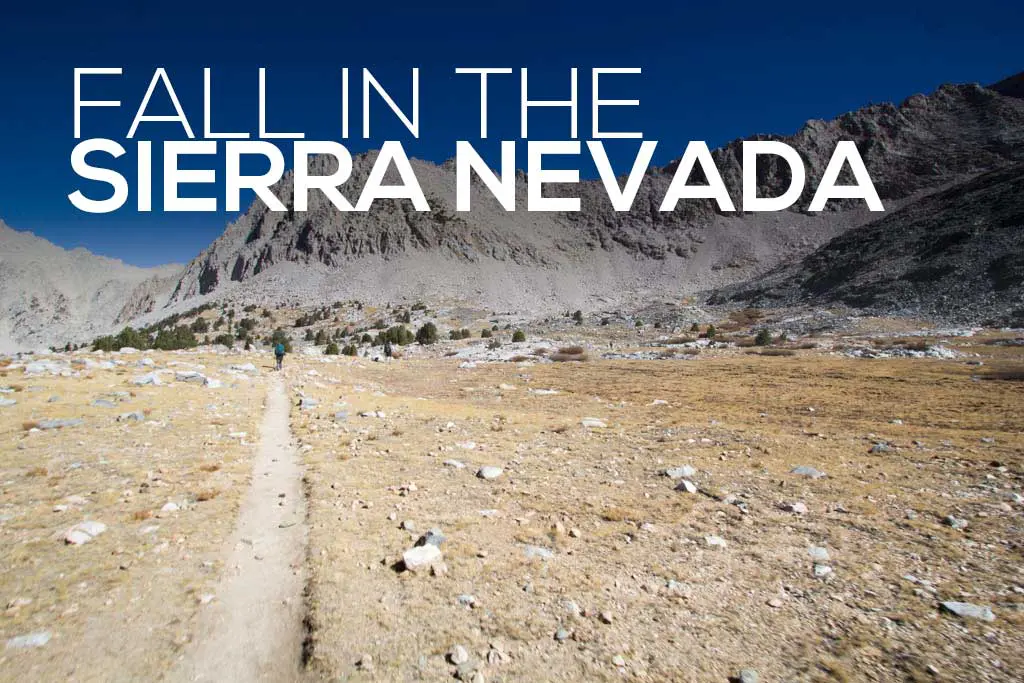
Guide to Hiking the Lowest to Highest Route
The Lowest to Highest Route is a 135 mi / 217 km hike beginning at Badwater Basin in California’s Death Valley National Park and ending at the summit of Mount Whitney – the highest point in the Continental United States (but technically you’ll end back down at the trailhead since you’ll need to get back out of the mountains).
Before continuing, know that this is a route, not an established trail. This means that much of the Lowest to Highest Route (Low to High/L2H) requires route-finding, cross-country travel, and being able to look at a map and understand where you are on that map (or device). Yes, some of Low to High follows established trails or roads, but as a whole, it requires that you find your own way – you will not be mindlessly following signs down a well-worn path.
This route should not be confused with the Badwater Ultramarathon which is a 135-mile (217 km) long race from Badwater Basin (the same starting place as Low to High) to Whitney Portal; the race takes place on roads and takes a different route than Lowest to Highest despite their starting and ending points being (almost) the same.

Lowest to Highest Route Basics
- Location: Death Valley National Park / Inyo National Forest, California, USA
- Length: 135 mi / 217 km
- Type: One-way
- Recommended Time: 6 to 8 days
- Possible Time: 3 days
- Most Popular Months: October/November?
- Max Group Size: 12
- Permit Required: Yes
- Permit Cost: $21*
- Start: – Badwater Basin 36.229700, -116.767172
- End: Mount Whitney Summit 36.578552, -118.292271
- Low Point: Badwater Basin (-278.9 ft / -85 m)
- High Point: Mount Whitney (14,505 ft / 4,421 m)
- Elevation Gain: 33,000 ft / 10,058 m
- Difficulty: Strenuous
*Outside the dates of May 1 to November 1, this permit is free. More on permits below.


How to get to the Lowest to Highest Route
The only way to reach Badwater Basin, the start of the Lowest to Highest Route is by car. There are no public transportation options for getting to Death Valley National Park. The closest city is Lone Pine in the Eastern Sierra (a stop on Low to High). The closest major city (and the closest airport is actually Las Vegas; however, if you’re planning on hitchhiking, you’ll probably have better luck coming from the Eastern Sierra (there is an airport in Mammoth Lakes – north of Lone Pine on Highway 395).
That said, you are probably going to want to be caching water for yourself in at least one spot – a car (or a friend with a car) makes this a lot easier task.
- Accessible via public transportation: No
- Trailhead parking: No
By Car
To get to Death Valley National Park via car, you will need to pay an entry fee of $25 (per vehicle, not per person). If you’ve got your own car and frequent the national parks, you should probably get an America the Beautiful National Parks Pass if you don’t already have one (unlimited entry to all national parks for a year). You need to get dropped off since there’s no overnight parking at Badwater Basin (even if there was, getting back to your car here would be a huge pain in the ass).
Public Transportation
Unfortunately, this is not an option. This is America, people here don’t believe in public transportation. That said, if you need help getting around the Eastern Sierra and aren’t a fan of hitchhiking, you can use Eastern Sierra Transit. Getting into Death Valley National Park is another matter.
Private Transportation
It’s a $120 Uber ride from the Strip in Las Vegas to Badwater Basin and ~$200 from Mammoth Lakes. Just saying.
Hitchhiking
From anywhere on Highway 395 between Lone Pine and Mammoth Lakes, it shouldn’t be terribly difficult to get a ride into Death Valley National Park. All the way to Badwater, you may find more difficult.
Notes on the Route
- The Lowest to Highest Route is a one-way route hiked from Badwater Basin to Mount Whitney.
- The route finishes at the summit of Whitney, but you’ll still need to hike 11 mi / 17.7 km back to Whitney Portal if you don’t have a permit to camp overnight in the Whitney Zone (more on permits below).
- It is suggested that you cache water for yourself before starting Low to High, due to the lack of reliable water sources along the route (remember to pack out your bottles!). More on water caching.
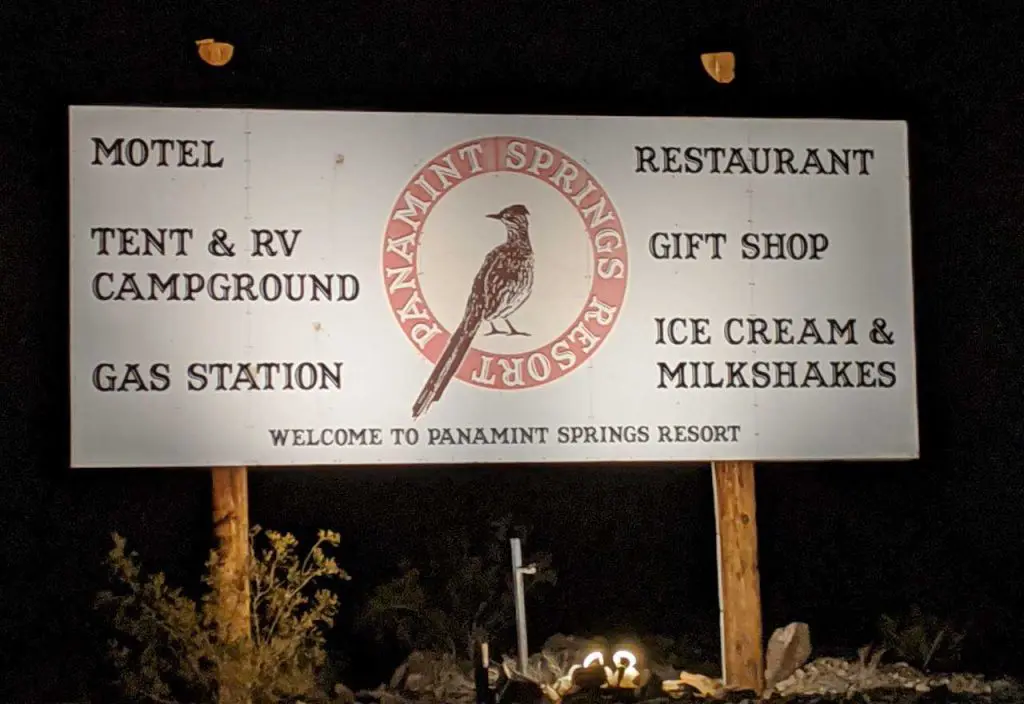
- Panamint Springs is located along the route and is home to a gas station, convenience store, restaurant, motel, and campground (more on Panamint Springs below).
- Whitney Zone permits are controlled via a quota system between May 1 and November 1.
- There are several alternate routes on Low to High, and there’s no right or wrong way to hike it (hike your own hike, friend). More on alternates below.
- simBLISSity has a Low to High Navigation Bundle available that I would highly encourage you to take a look at.


Lowest to Highest Route Weather
The weather, more specifically the temperature, is a major factor to consider when deciding when to attempt the Lowest to Highest Route. Badwater Basin is 282 ft / 86 m below sea level and is literally one of the hottest places on Earth (Furnace Creek, just up the road, holds the current record for “hottest temperature ever recorded” at 134.1 °F / 56.7 °C). It’s no joke.
Unless you want to do some serious winter mountaineering, Lowest to Highest is pretty much off-limits during the winter due to the ending terminus being the highest point in the Continental United States. Depending on the snowpack, it may be possible to summit Mount Whitney in April, but if you don’t want to compete with snow and ice, I recommend a late-fall hike. Why not summer or early fall? Because of the whole “hottest place on Earth” thing, remember?
From May to September, the average daily high in Badwater Basin is over 100 °F / 37.8 °C (that’s just the average). In October, this drops to 92.8 °F / 33.8 °C, and in November it slides down to 77.1 °F / 25.1 °C.
The sweet spot for hiking Lowest to Highest is probably during the first two weeks of November – you don’t need to worry (too much) about the heat, you won’t need a paid, quota-subject permit for the Whitney Zone, and you will (hopefully) be early enough to beat the first big snowfall of the year.
That said, if it’s an early winter, good luck.


Permit
As the Lowest to Highest Route is not an officially established trail, there is no “Lowest to Highest Route Permit”. However, you are required to have a permit to enter (and/or stay overnight in) the Whitney Zone once you enter Inyo National Forest.
You are not required to have a permit for Death Valley National Park, but free and voluntary backcountry permits are available at the visitor center or any ranger station. Probably a good idea if you’re going solo (so they know where to look for your body). For rules and regulations governing overnight camping in Death Valley, check here.
Applying Online
If you plan to enter the Whitney Zone between May 1 and November 1, you will be subject to the area quota and it is advised you obtain your permit in advance. This applies to both overnight stays and day use. Permits can be obtained via Recreation.gov. From February 1 to March 15 you can enter a lottery for permits during the quota season. The most in-demand dates will be during July and August (i.e. the hottest months), and there should be some permits available at the beginning and end of the season in case you miss the lottery.
Walk-up Permits
The only place you can obtain a Whitney Zone permit in person is at the Eastern Sierra Visitor Center (map/website) just south of Lone Pine. You can walk (or hitch) here once you reach Lone Pine if you’re unsure of when you’ll be entering the Whitney Zone or you can stop here before heading to Badwater to begin your hike.


Water Caches
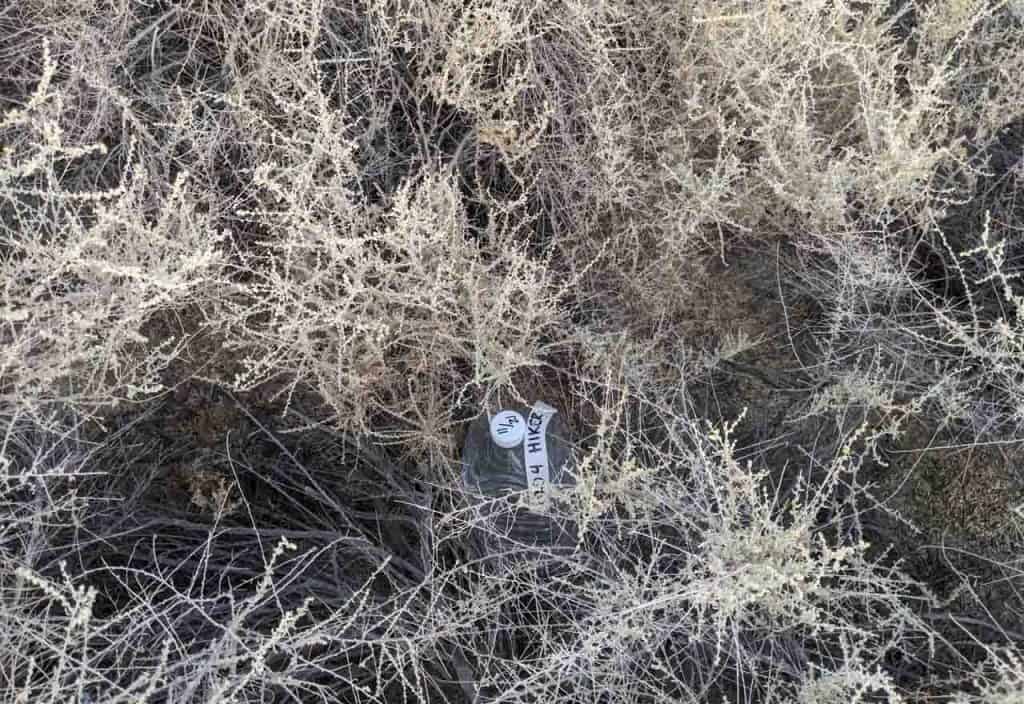
It’s possible to complete Lowest to Highest without caching any water, but if I were to hike it again, I would leave at least one cache (at Highway 190 x Saline Valley Road). The following is not an exhaustive list of places where you could cache water, but these are probably the most reasonable locations. Here is where I left myself water caches and where I would cache water if I were to hike again:
Low to High Water Cache Locations
- Shortys Well Rd x West Side Road (map): this junction is at approximately mile 7 (11.3 km) of Low to High and is directly west of where you begin in Badwater Basin. It can be accessed via a 10.7 mi / 17.2 km bumpy dirt road from the paved Badwater Road. I would not cache water here again since Hanaupah Spring is under 10 mi / 16 km away (but more on the potential hazards of this spring water below).
- Wildrose Road (map): It’s a 19.5 mi / 31.4 km detour (one-way) to get to, but if I were to hike L2H again, I would cache water here. The road is paved the entire way from where you turn off Highway 190. THAT SAID, if I were to hike again, I would take the alternate via Wildrose Campground which would eliminate the need for a cache here (there should be water at the campground). But if you’re not planning on taking the Wildrose Alternate, I would suggest a cache here.
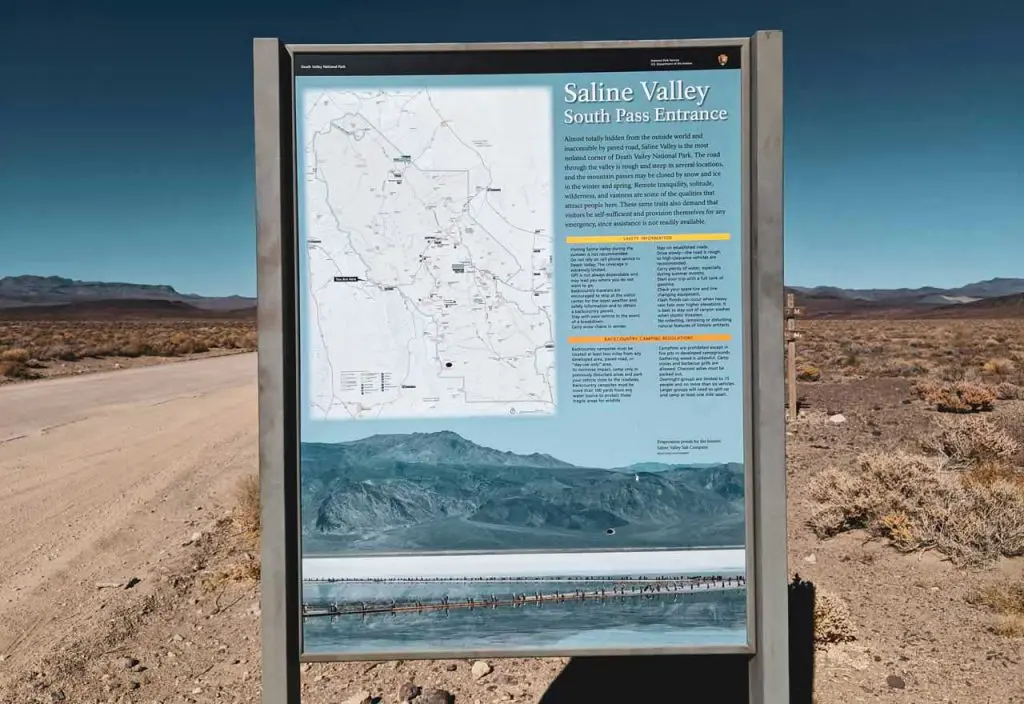
- Highway 190 x Saline Valley Road (map): This is the easiest cache location to access as you literally pass it on your way into the park from Highway 395 (I’m assuming you’re coming from California and not Nevada here). I would definitely cache water here if I were to hike again (you could even do it whilst hitchhiking).
- Cerro Gordo Ghost Town (map): There is no water available at Cerro Gordo,
but Robert(Update 2023) Steven, the man who maintains it, caches water for hikers who request it. You can reach him via email, moc.senimodrogorrec@nevets. It’s accessible via car so you could even (potentially) arrange to cache food or water here yourself.


Lowest to Highest Water Sources
There are very few water sources on the Lowest to Highest Route and you will (likely) be carrying a lot of water for most of it (best to err on the side of caution). Here is a list of the reliable (and one not-so-reliable) water sources along the route.
- Hanaupah Spring* (Mile 16): an incredible spring in Hanaupah Canyon just before beginning a huge climb up toward Telescope Peak. Generally flows year-round but more current information may be available from the Furnace Creek Visitor Center at +1 (760) 786-3200 (map).
*The “illegal activities” referred to on the signs approaching Hanaupah Spring (you’ll see them, I promise) are illegal cannabis grows that were discovered in the canyon in 2018. The signs advise you to not drink from the spring, but hikers have drunk from the spring (and lived) since these notices were posted. I drank about a liter of water filtered from the spring and am still here. Drink at your own risk and check with the Visitor Center should you have any doubts.

- Tuber Spring (Mile 30ish): after descending from the ridgeline below Telescope Peak there is a seasonal spring with several pools to be found in Tuber Canyon (I found two, but they took some searching to find). I wouldn’t rely on this as a water source unless you know for certain there’s water to be found here (map).
- Wildrose Campground: You can take an alternate via Wildrose Campground instead of heading down Tuber Canyon and there should be water available here. Check with the Death Valley Visitor Center to confirm (map).
- Panamint Springs (Mile 50): Water is available at the Panamint Springs restaurant/store/campground (map).
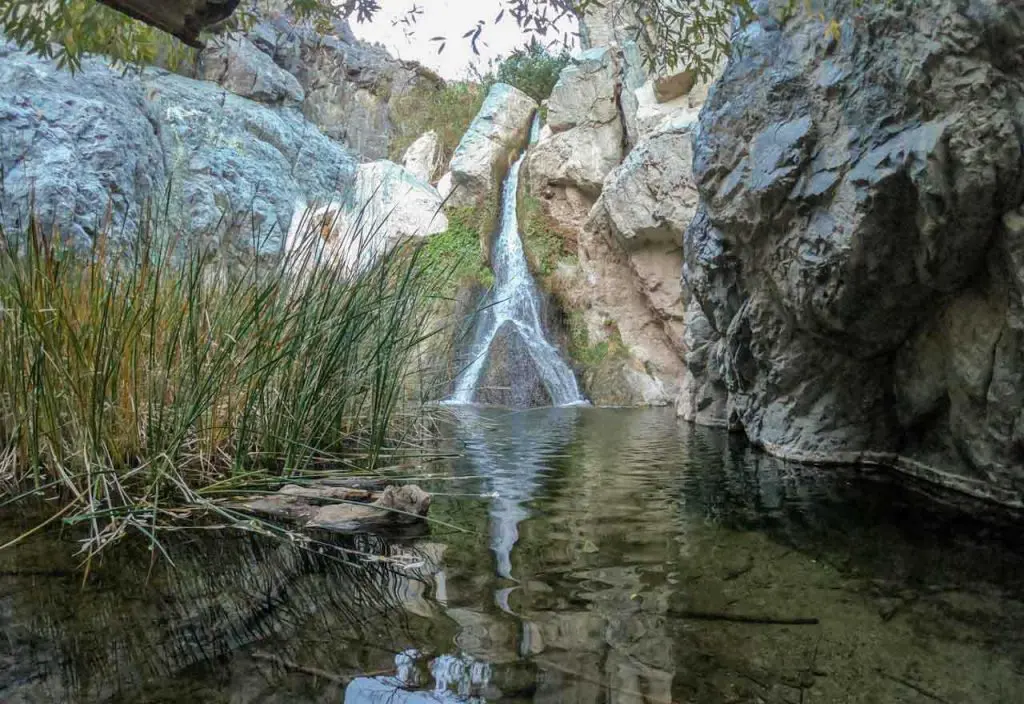
- Darwin Falls: Just after Panamint Springs, you have the option of taking an alternate via Darwin Falls (highly recommended). There’s plenty of water in the canyon leading up to the falls and at the falls itself (map). DO NOT SWIM HERE.
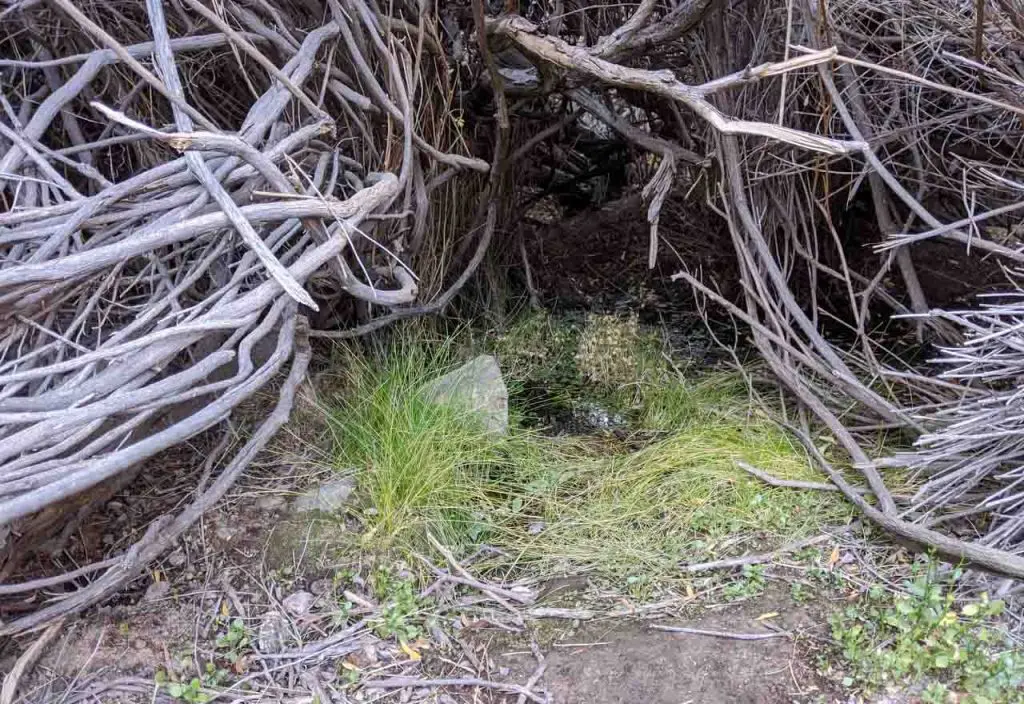
- China Garden Spring: If you take the alternate via Darwin Falls, you’ll also pass China Garden Spring a few miles after the climb up from Darwin Canyon. It’s an awesome year-round water source filled with fishies, shade, and graffiti (map). Good camping, too.
- Lone Pine (Mile 110): Lone Pine is a proper town with everything you’ll need to refresh yourself before making the push to Whitney – water included (map).
There are a few other unreliable water sources sprinkled around Low to High, but these are going to be your major stops (besides any caches you put out for yourself). It’s worth taking a look at the water summary provided by simBLISSity.net for more on L2H water options.

Lowest to Highest Route Itinerary
How many days does it take to hike the Lowest to Highest Route? Depending on where you stop and how long you want your days to be, you can probably count on somewhere between six and eight days.
If you’re looking to get the most out of Low to High, I suggest you plan your days around where you would like to camp. If I were to hike L2H again, this would (probably) be my ideal itinerary:
- Day 1: Badwater Basin to the ridge above Hanaupah Spring (~18 mi / 29 km)
- Day 2: Ridge above Hanaupah Spring to Panamint Valley (somewhere before Panamint Springs) optional detour up Telescope Peak (~22 mi / 35 km)
- Day 3: Panamint Valley to China Garden Spring (via Darwin Falls Alternate) – resupply at Panamint Springs (~15 mi / 24 km)
- Day 4: China Garden Spring to Lee Flat (~20 mi / 32 km)
- Day 5: Lee Flat to Saline Valley Salt Tram (~21 mi / 33.8 km)
- Day 6: Saline Valley Salt Tram to Whitney Portal Campground (or Alabama Hills) – resupply in Lone Pine (~25 mi / 40.2 km)
- Day 7: Whitney Portal Campground to Whitney Summit (~22 mi / 35.4 km return)
If you want to spend a night at Panamint Springs (and maybe even shower), you could easily alter this to arrive there after putting in two long days or three short days depending on conditions and how you’re feeling. You could even do a lazy morning out of Panamint and then take a leisurely hike through Darwin Canyon up to China Garden Spring and stay the night there, too.
That said, you’re free to make up your adventure. I haven’t hiked the above itinerary so I don’t know if it would play out as well as I am imagining, but I’m sure it’s better than what I did. What did I do? Funny you should ask.
My Hike
Note: I do NOT recommend this itinerary.
- Day 1: Badwater Basin to West End Road (I started at night which is why this was a short day – it takes a while to get to Badwater Basin).
- Day 2: West End Road to Telescope Peak Ridgeline
- Day 3: Telescope Peak Ridgeline to Panamint Springs
- Day 4: Panamint Springs to Mile 75
- Day 5: Mile 75 to a terrible campsite 11 mi / 17.7 km outside of Lone Pine
- Day 6: The aforementioned terrible campsite to Whitney Portal
- Day 7: Whitney Portal > Whitney Summit > Whitney Portal


Gear & Packing List
You’ll need a complete multi-day overnight backpacking kit for this hike (except maybe a rain jacket), but there are a few noteworthy pieces of gear to pay extra attention to when planning for Lowest to Highest.
- SHELTER: The likelihood that you’ll have to deal with rain on Low to High is very low (Death Valley averages 2.36 in / 60 mm of rain per year). For my shelter, I packed a SlingFin SplitWing UL Tarp, and it served me well on the trail. I mostly cowboy camped.
- WATER BLADDER: If you’re not big on or have the capacity for carrying large water bottles (and you don’t want to carry a gallon of water in your hand), I would suggest a collapsible water bladder like the HydraPak Seeker 2L (also available in a 3L model) that you can strap to the top of your pack. Water is not to be trifled with on Low to High.
- UMBRELLA: I’m not a huge fan of using an umbrella while hiking. However, if I were doing Low to High during the warmer months, I would probably consider bringing a Six Moon Designs Silver Shadow Carbon or a Montbell Sun Blocker Umbrella.
- MAPS: Maps are great (even when you’re not hiking). For Low to High, I recommend that you invest in the L2H map set from simBLISSity. For a detailed map of the route up Mount Whitney, I recommend the (free) Mount Whitney Guide from FarOut.
- DOWN JACKET: I did this route in mid-November, and the mornings were cold enough to warrant hiking in a puffy. I brought along a Patagonia Micro Puff Jacket, which worked just fine.
- WIND JACKET: I was very happy to have my Montbell Tachyon Wind Jacket with me. It got windy up on some of the ridges and this thing did a great job of keeping the cold out. You can read my detailed review of it here.
- WATER FILTER: My Sawyer Squeeze did just fine as a water filter. If you plan on filtering from some of the less reliable sources, you may find a lot of sediment, so I recommend a Squeeze over chemicals or UV purification.
- WATER BOTTLES: I used collapsible one-gallon water jugs for my caches, but I brought with me a one-gallon jug with an attached plastic handle (see photos below) for carrying water. I found the handle to be comfortable to carry once the excess plastic on the inside of the handle wore down. Carrying a whole gallon got tiring, which I suppose just encouraged me to drink more.
If you want more recommendations on backpacking gear, check out my current gear list or gear reviews.


Lowest to Highest Route Resupply (Food Caches)
You have two options for resupply on Lowest to Highest. Of course, you could just carry all of your food for the entirety of the hike from the start, but you walk past two places where resupplying is quite easy – make things easy on yourself and take advantage.
The two resupply points you pass are Panamint Springs Resort and Lone Pine.
Panamint Springs Resort (map/website)
Located on Highway 190 in Death Valley National Park, Panamint Springs is 50 mi / 80.5 km into Low to High and has a gas station, convenience store, restaurant/bar (I found the burger to be disappointing), campground, and motel. Collectively, this place is known as Panamint Springs Resort (or simply Panamint Springs—or, I guess, just Panamint).
You could resupply out of the store if you wanted to, but it 1) has the selection you would expect at a remote gas station convenience store in the middle of the desert and 2) has the prices you would expect at a remote gas station convenience store in the middle of the desert. I bought myself a resupply ahead of time and left it at the gas station convenience store; I suggest you do the same.
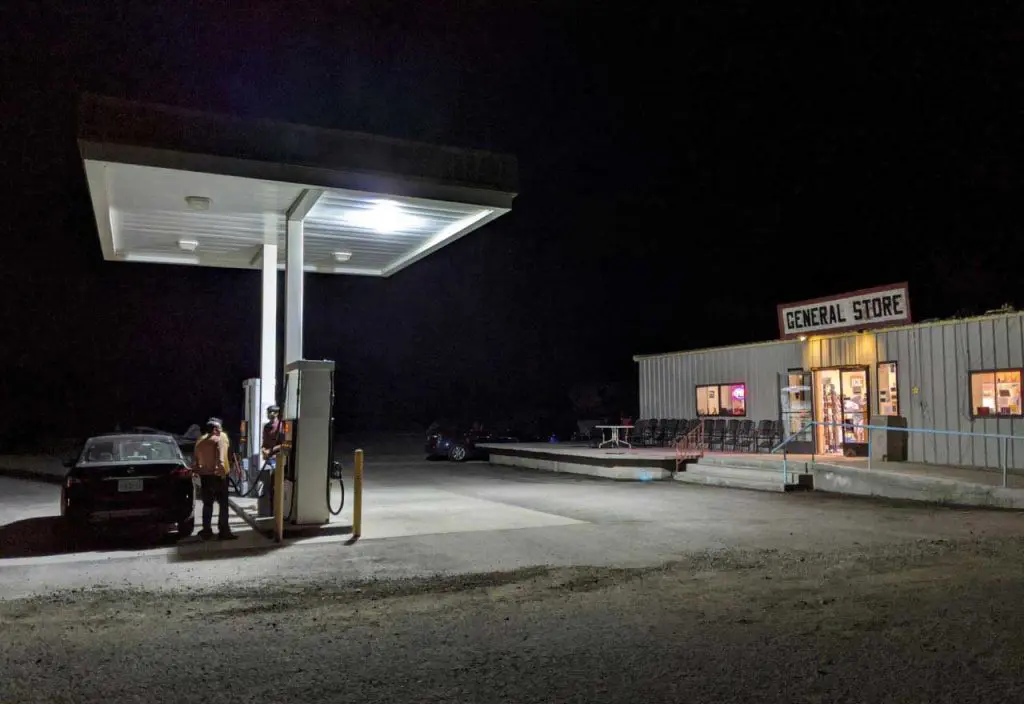

I called ahead of time to confirm this would be okay; their phone number is +1 (775) 482-7680. Since you pass Panamint Springs on your way to Badwater Basin (coming from Highway 395), it isn’t much trouble to stop and leave your food (even if you’re hitchhiking). The store is open every day from 7:00 AM to 9:30 PM (but, again, call to confirm).
You can also send mail to the resort if for some reason this works better for you. Contact them directly for shipping information via email moc.sgnirpstnimanap@snoitavreser or phone +1 (775) 482-7680.
The last thing of note – they have wifi but it’s pretty garbage. No cell reception. I was able to get my messages and emails but not able to send anything out.
Lone Pine
Lone Pine is 110 mi / 177 km into Low to High on Highway 395 and is where you can get a walk-up permit for the Whitney Zone if you haven’t gotten one ahead of time. Lone Pine is a proper town with multiple restaurants, motels, and a small grocery store. It’s a nice stop to recharge and refill on whatever you might need before making the push to Mount Whitney.
Route Description
It’s not difficult to break the Lowest to Highest Route into sections. Here’s what you can expect to find on your L2H journey.
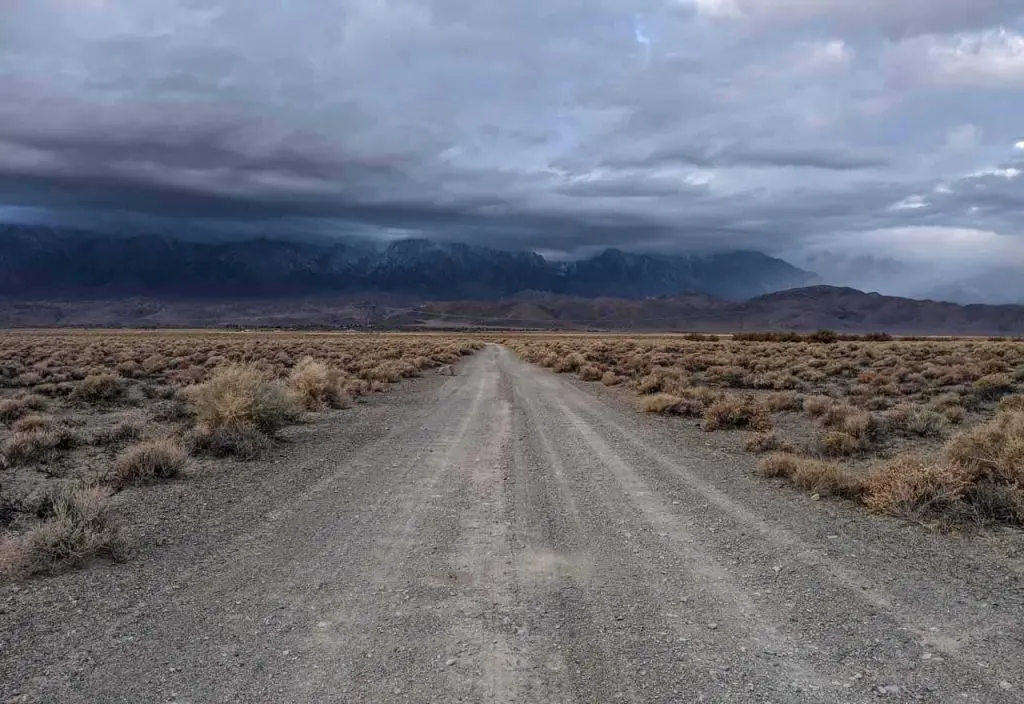
Badwater Basin: The route begins with a 7 mi / 11.3 km walk across the (completely flat) salt plains of Badwater Basin. There is no trail, no shelter, and no water to be found here.
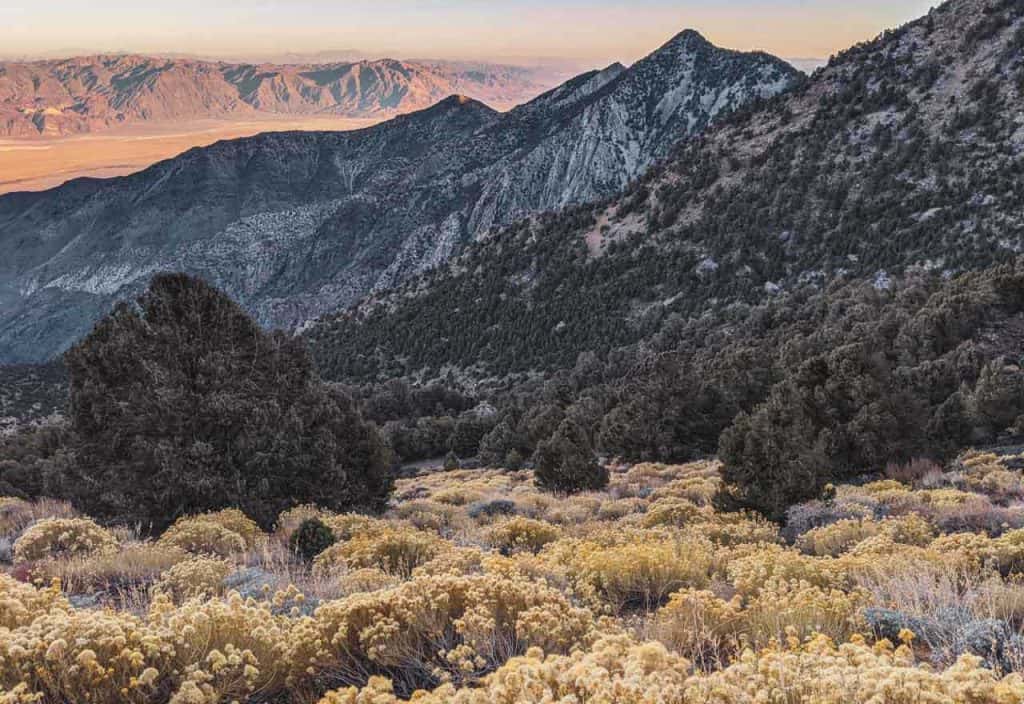
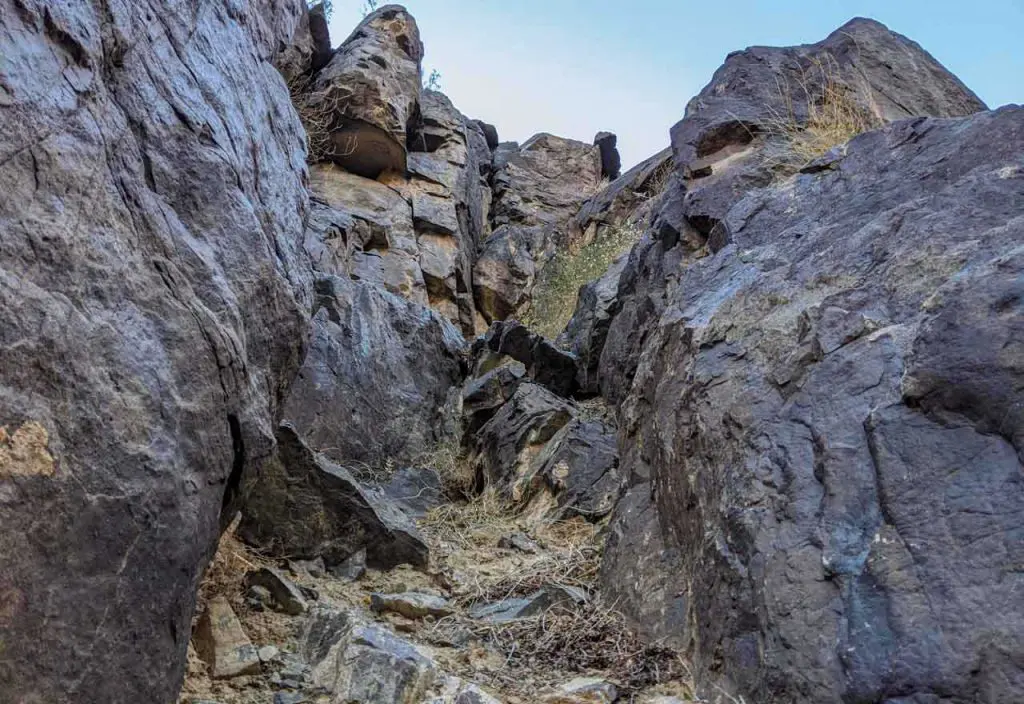
Hanaupah Canyon (Panamint Range): After crossing West Side Road, the trail enters Hanaupah Canyon and heads up to Hanaupah Spring (more on this in water sources). The route follows a 4WD road as it begins to gradually climb into the Panamint Range. The road slowly becomes less of a road and more of a clearing through the brush. You follow the bottom of the canyon as it continues to rise and you pick your way through via the path of least resistance.


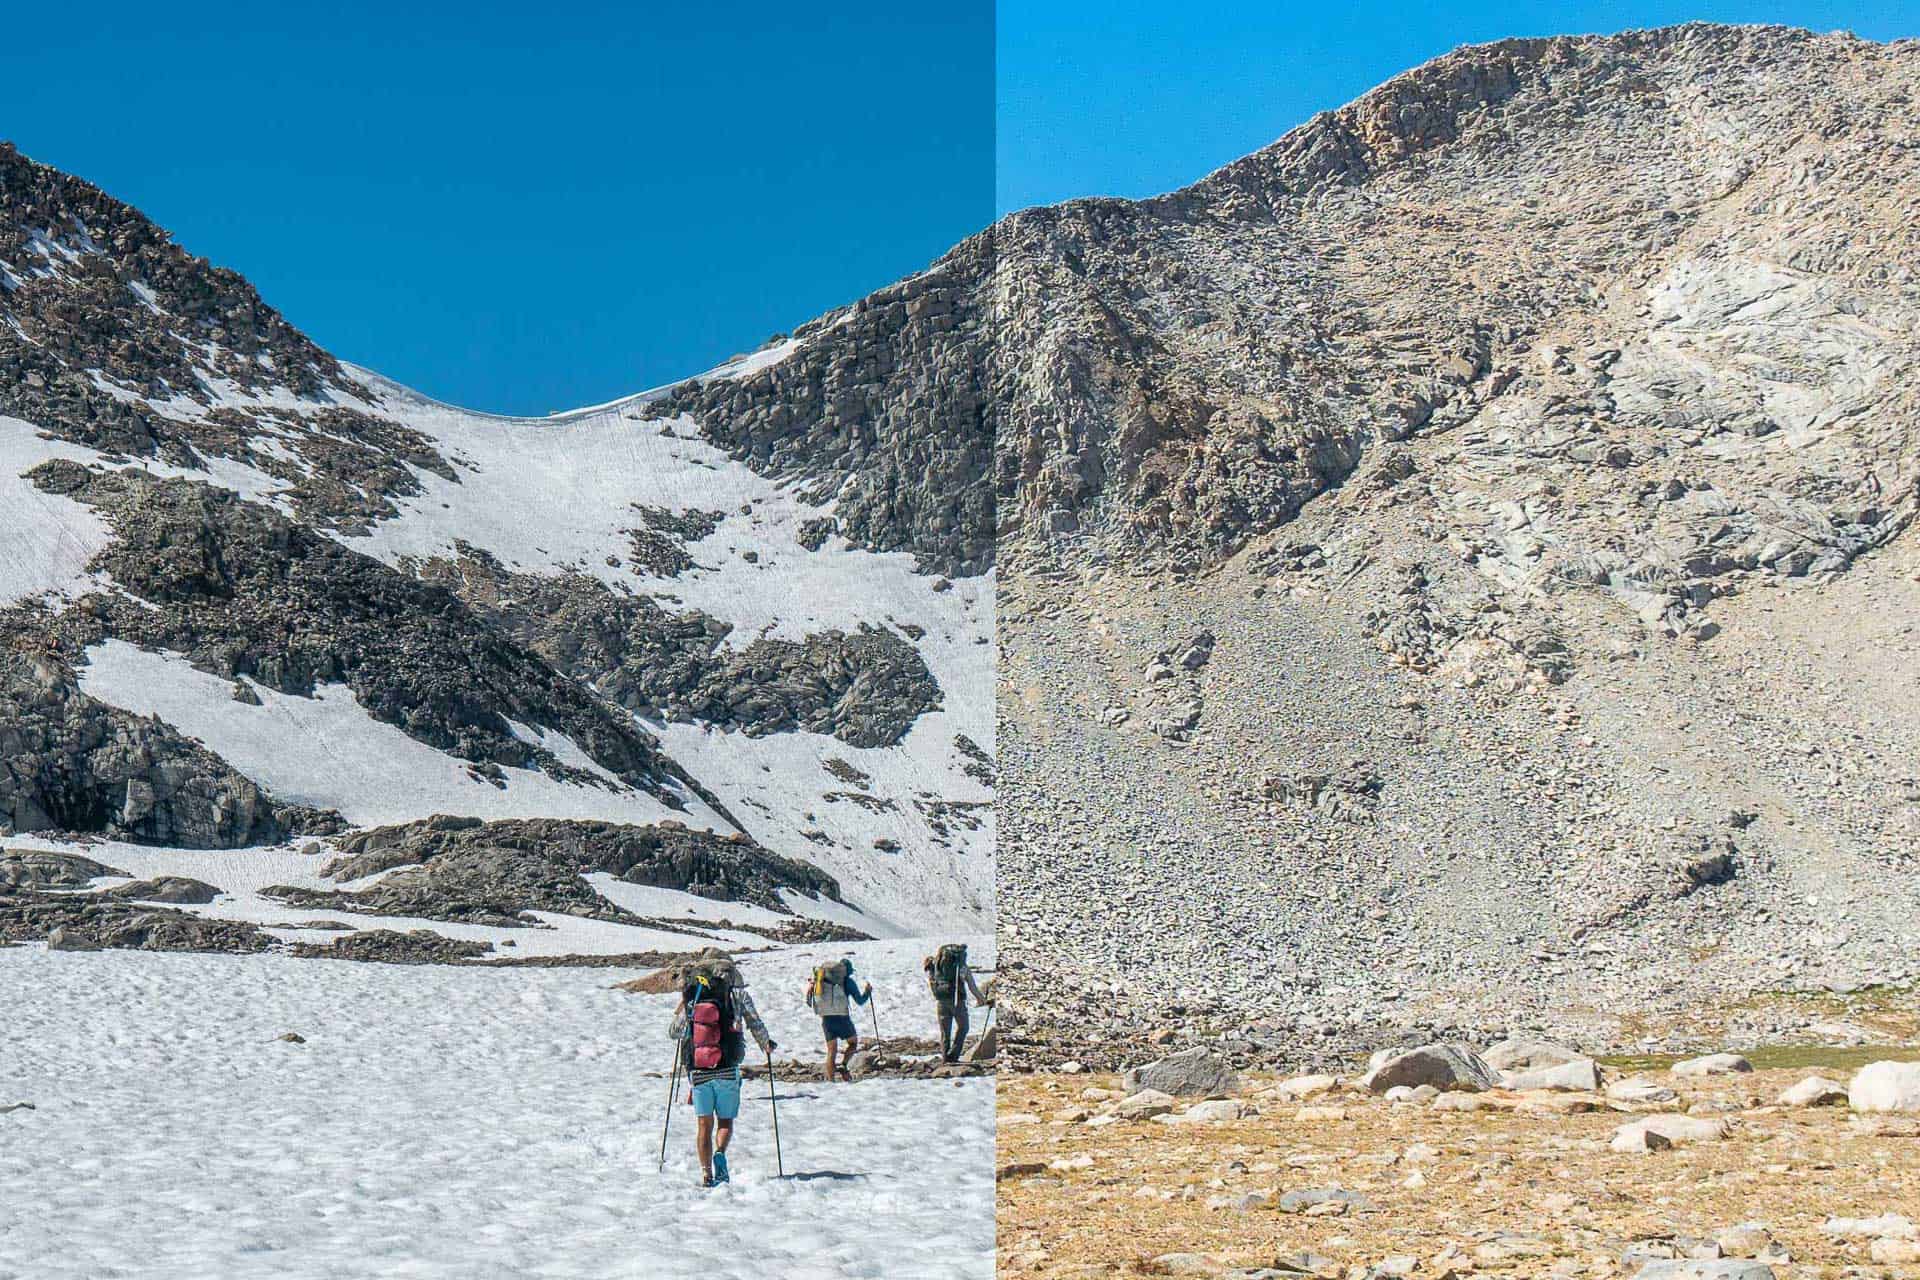
Telescope Peak (Panamint Range): After Hanaupah Spring, the route takes a hard turn north and heads straight up the hillside to gain the ridge above. There’s not much of a trail as you gain over 1,500 ft / 457 m in the next 1 mi / 1.6 km. You pick your own adventure to the top through the patchwork sand, scree, and talus before you. Lots of fun. You then follow the ridge west as you now aim for the ridge below Telescope Peak. There were times I felt like I was on an established trail here, times I thought I was on more of a game trail, and times when I was certain I was on absolutely no trail whatsoever. This climb is no joke and I would suggest getting it done before sunset.


Tuber Canyon (Panamint Range): If you take the official L2H route instead of the Wildrose Alternate (more on that here), you’ll turn west off the ridgeline near Rogers Peak and begin a steep, cross-country descent into Tuber Canyon. At the bottom of the canyon, you’ll (eventually) find an old road to follow the rest of the way out. I found a couple of small pools of water here, but I would not suggest counting on them as a water source. There were a couple of tricky bits in the canyon where I got cliffed out or turned around because of dense vegetation, but I eventually made it out.


Panamint Valley: Leaving the Panamint Range you are on a proper 4WD road (as in you could actually drive a 4WD vehicle on it because it’s not hugely rutted out or covered in dense brush). You’re now following dirt roads with a little bit of cross-country travel in the middle all the way to Panamint Springs. There are no water sources and no shelter for the entirety of this section.


Darwin Canyon: This is an alternate and I go into more detail above, but I recommend that you take this route if you’re a fan of water, scrambles, and random ponds of fish in the middle of the desert. You follow a road and then a trail to Darwin Falls before scrambling up and around it for a fun scramble through the canyon before popping out onto a 4WD road and rejoining the official route after hiking through and out of a wash. Make sure not to stay in the wash once you rejoin the official route – climb up to the right!


Santa Rosa Flat / Lee Flat: The route descends to Highway 190 (where I suggest you cache water) and then follows Saline Valley Road through Santa Rosa Flat and Lee Flat. You’re on a maintained and rolling dirt road this entire section.


Cerro Gordo (Inyo Mountains): The Cerro Gordo Alternate follows well-maintained dirt roads (although they become less well-maintained as you climb) toward Cerro Gordo Peak before giving you an excellent view of the Sierra Nevada across the valley and then descending to Cerro Gordo Ghost Town below. More on the Cerro Gordo Alternate here.

Inyo Mountains: After leaving Cerro Gordo Ghost Town, the route follows a 4WD road north through the Inyo Mountains. The road turns into a narrow trail for a bit before rejoining a 4WD road and gaining the ridge. You pass some old abandoned mining buildings on the way. Once you’re up on the ridge you continue following 4WD tracks before passing a cabin (that’s only half falling apart) at the ruins of the Saline Valley Salt Tram. The route passes a series of dirt road junctions before heading cross-country down and out of the Inyo Mountains. Navigation in this last section got a bit tricky again (I did a lot of it in the dark), but you will find the occasional cairn as you work your way out of the wash and to a 4WD track leading you toward Highway 395.


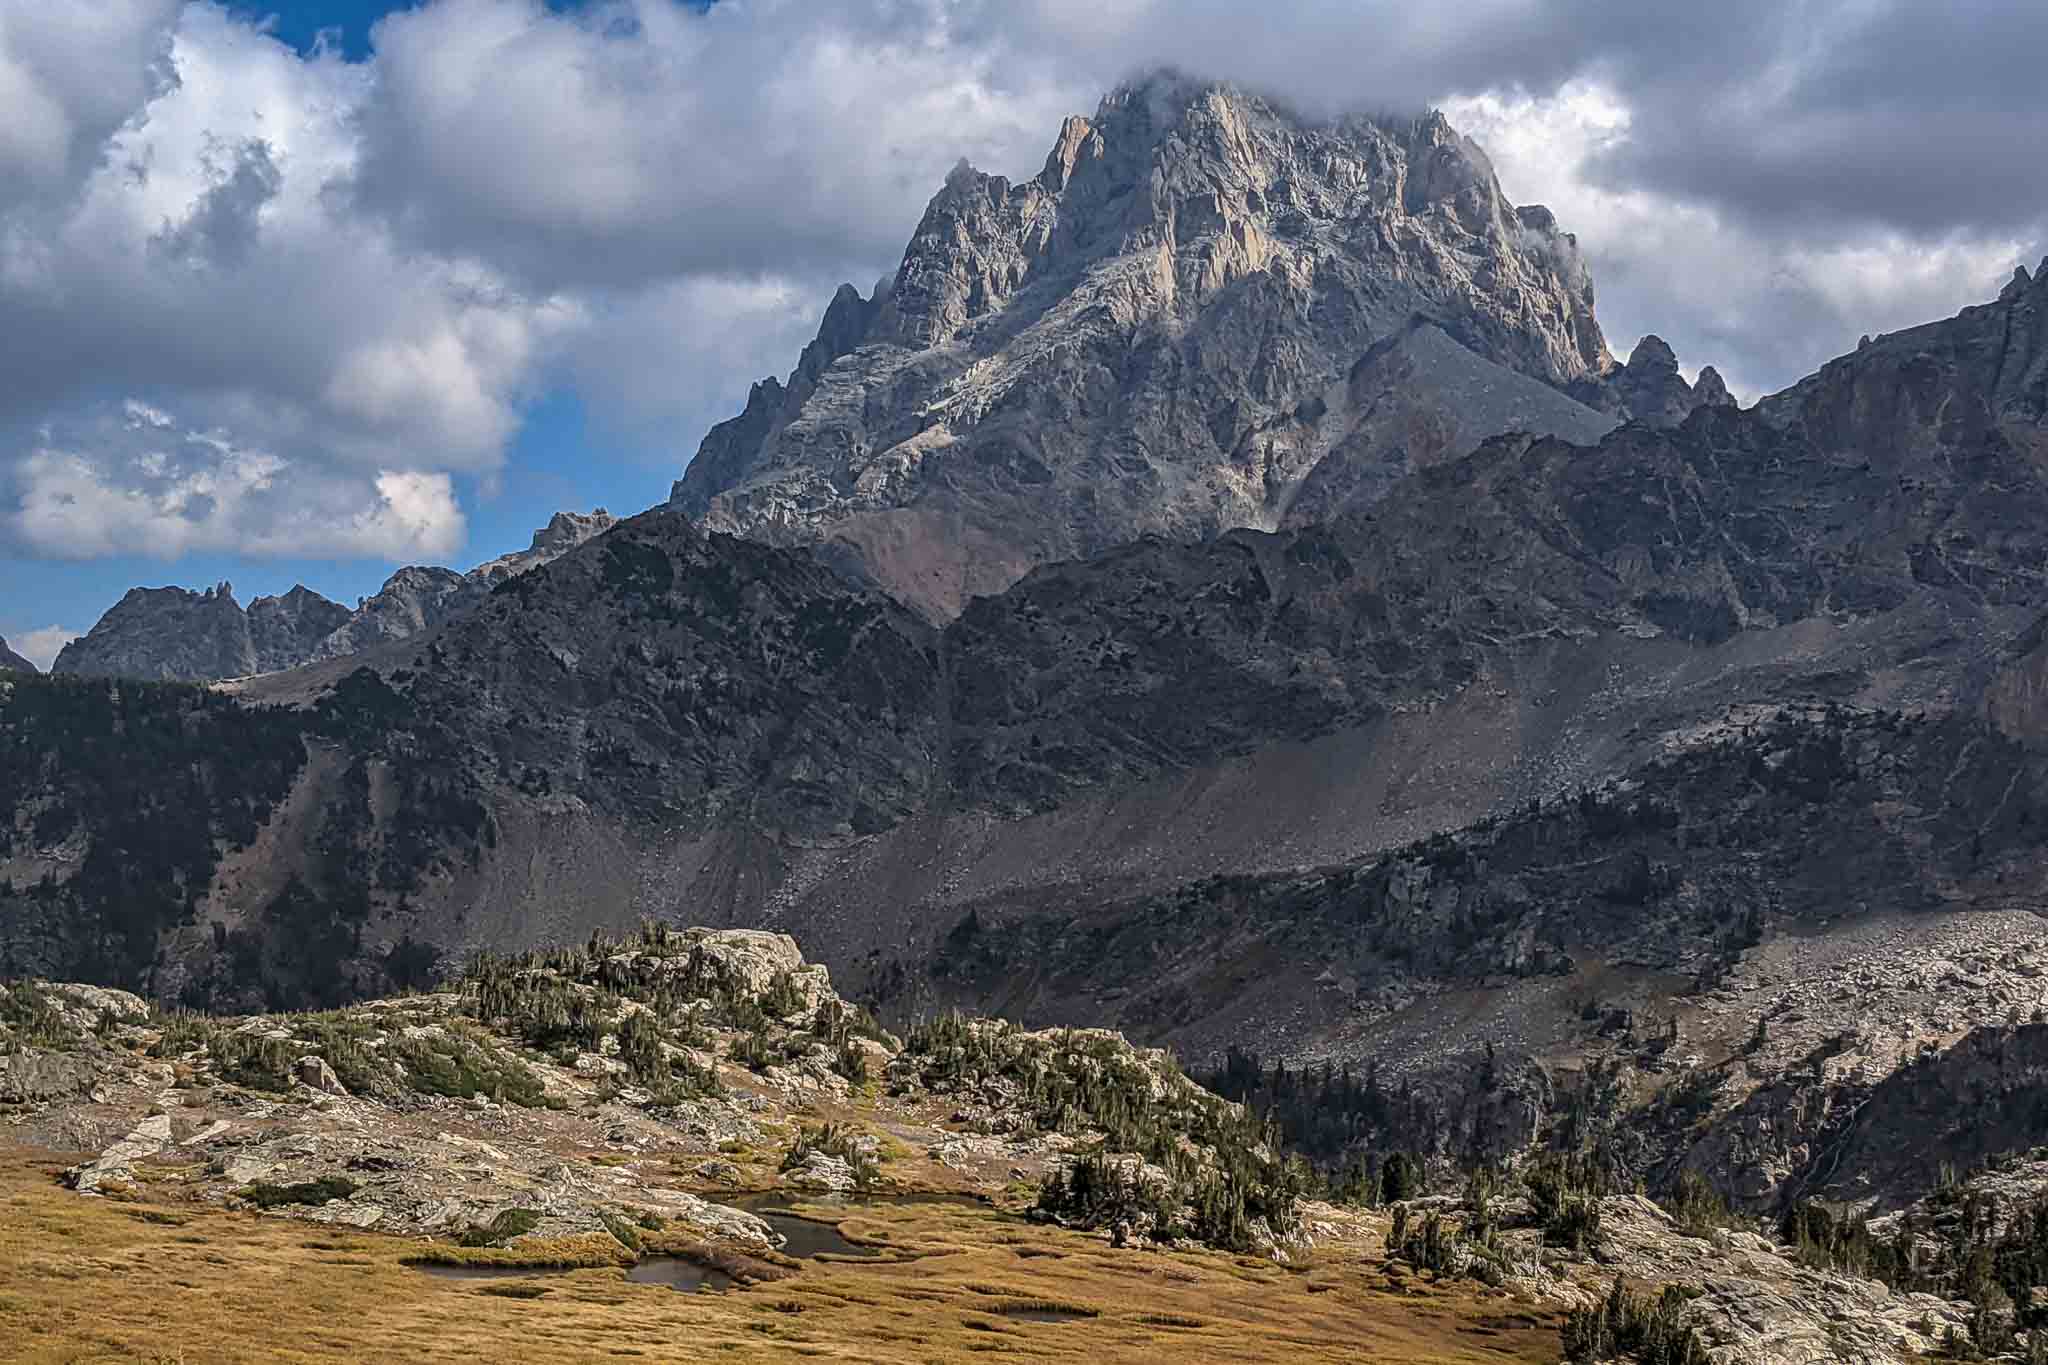
Lone Pine/Mount Whitney: There’s a ton of information on climbing Mount Whitney out there, but if you want the most straightforward solution, I suggest you simply download the (free) Mount Whitney app from FarOut Guides. If you’re taking the main trail up Mount Whitney it is well-defined and heavily trafficked. If you made it this far, you shouldn’t have any trouble finding your way to the top.
Lowest to Highest Route Alternates
Despite the Lowest to Highest Route not being an officially established trail, there is an official route that L2H follows. However, there are several detours and alternates available to you. Most of them (I think) make the hike a lot more interesting and enjoyable, but you be the judge.
Badwater Basin Alternate Route
There’s an alternate route you can take in Badwater Basin that avoids the end of the salt flat. This route is just slightly longer (less than 1 mi / 1.6 km), but you may make up for it if you find the ground more suitable for walking. I stumbled through Badwater Basin in the dark and was stuck in salty goodness the entire time. The seven-mile (11.3 km) crossing took me just over two hours. Ultimately, this alternate probably won’t make much of a difference on your hike one way or the other.
Telescope Peak Alternate
Not an alternate as much as it is a detour, a round trip journey to the summit of Telescope Peak (11,049 ft / 3,368 m) will add 2.6 mi / 4.18 km and 1,235 ft / 376 m of elevation gain. The route leading up to the summit (from Badwater Basin) is the fourth greatest valley-to-summit elevation gain in the United States (number three is Mount Rainier in Washington). It takes a serious effort to want to climb to the summit of Telescope Peak after scrambling up to the ridge. More on Telescope Peak from Death Valley National Park.
Wildrose Alternate
This alternate is after gaining the ridge where you can detour to Telescope Peak. Instead of heading down Tuber Canyon, you can follow the Telescope Peak (day) hiking trail to Mahogany Flat Campground. Then, you follow a series of dirt and paved roads until you meet back up with the official route on Wildrose Road. This alternate should have reliable water at Wildrose Campground (check with the park beforehand) which eliminates the need for a huge carry, an additional cache, or relying on a potentially unreliable water source (Tuber Spring). If I were to hike again, I would take this alternate. That said, it was quite the adventure dropping into Tuber Canyon. This alternate is about 2 mi / 3.2 km longer than the official L2H route.
Darwin Canyon Alternate
After passing Panamint Springs, you can take the Darwin Canyon Alternate – and I highly recommend that you do. Not only do you get to pass Darwin Falls and China Garden Spring (a great place to spend the night), but you also get to do some very fun scrambling (that said, some people may classify this as “terrifying” instead of “fun”). This route is about 1 mi / 1.6 km longer than the official route (and will probably take longer due to the more technical terrain), but it’s well worth the effort.
For this alternate, climb up to the left of Darwin Falls and follow the water until you see another set of falls to your left. From the water, climb the scree slope to the right and look for a path leading left (to the right of the upper falls). Make sure you make the left and stay in the slot with the waterfalls. Do not continue high up the scree slope (it gets sketchy and it’s the wrong way – I made this mistake). Once you’re above the upper falls you’ll have to cross the water once more and scramble up the left-hand side of the canyon. From there, it’s not too complicated to work out a path tracing the canyon rim. Before long you’ll hit a proper (dirt) road that you follow to China Garden Spring before linking back up with the official L2H route.


Cerro Gordo Alternate
At around Mile 77.5 (Kilometer 125), you have the option to turn off the main route and take a slightly shorter, more scenic route via Cerro Gordo Peak (you pass next to it, not over it). There’s a bit more elevation gain heading this way, but it’s all on old mining roads and paths so it’s nothing compared to the slog up from Hanaupah Spring. This route takes you past old mining shafts and infrastructure before giving you a great view of the Sierra Nevada (and Whitney) before dropping down to Cerro Gordo Ghost Town to rejoin the official route (you pass Cerro Gordo Ghost Town regardless of which route you take).


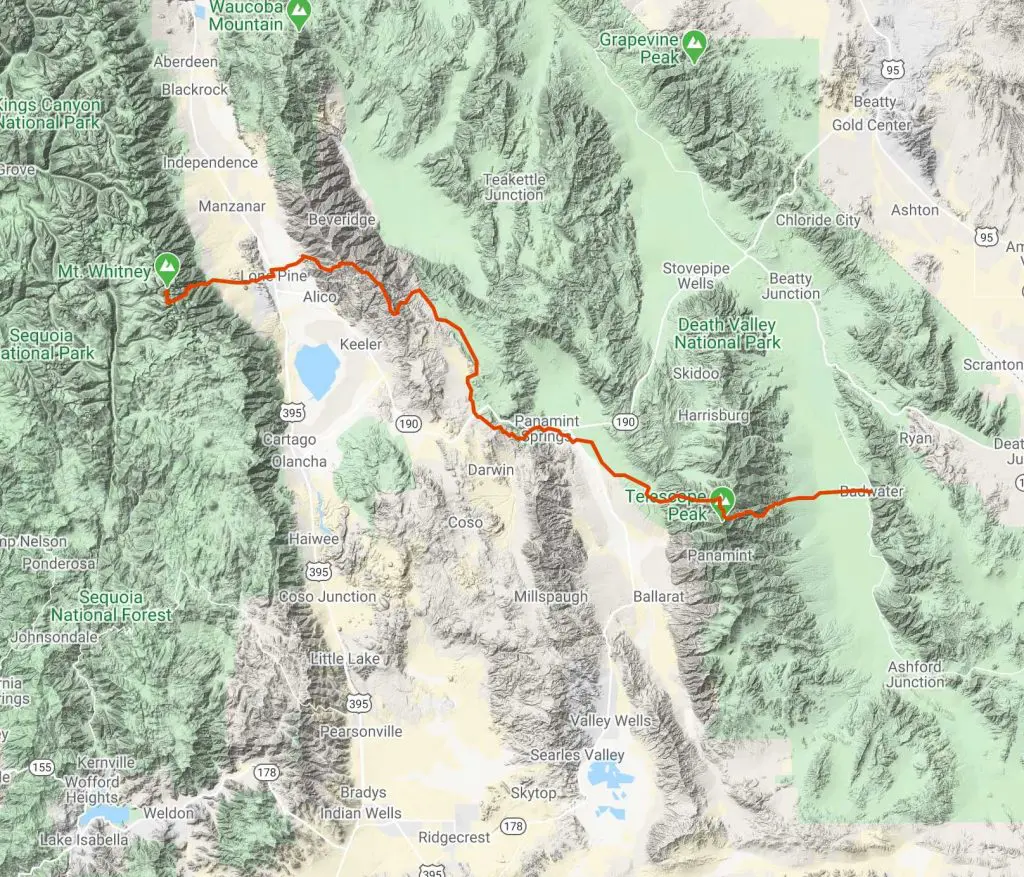
Lowest to Highest Route Map
The following is an overview of the Lowest to Highest Route with alternates, water sources, landmarks, and resupply points highlighted.
simBLISSity has a Low to High Navigation Bundle available that I would highly encourage you to take a look at.
Conclusion
The Lowest to Highest Route is an awesome trip and I would recommend it. That said, it can be extremely challenging at times (and monotonous at others), so be sure you know what you’re getting yourself into. If you’re feeling particularly cool and/or ambitious, you could even use Low to High as a precursor to a hike into the Sierra Nevada.
I’m always looking to improve upon the information and resources provided in these guides so if you have any questions, suggestions, or updates, please leave a comment below or get in touch.
Resources
- Death Valley National Park
- Alerts and Conditions (Death Valley NP)
- Backcountry Camping (Death Valley NP)
- Badwater Basin (Death Valley NP)
- Telescope Peak (Death Valley NP)
- Death Valley NP Map
- L2H Water Summary (by simBLISSity)
- L2H Databook (by simBLISSity)
- Panamint Springs
- Mount Whitney Permits
- Whitney Portal Campground
- Whitney Portal Road Status
- Telescope Peak Weather
- Lone Pine Weather
- Mount Whitney Weather
- Inyo National Forest
- Lone Pine Chamber of Commerce
Affiliate Disclosure: This page may contain affiliate links, which means I may receive small commissions for purchases made via these links at no additional cost to you. This helps pay the bills and keep the site up and running. Thank you for your support!

This is simply awesome. I’m saving it as a pdf and shall use it en route. Much thanks!
Be safe out there!
Awesome write-up, everything I was looking for, for my hike, hopefully next spring.
To answer your question; I think this is the most elevation of any single-mountain, single-day hike. Like you said, you can put a lot of “qualifiers” on the title. I looked around briefly; Rainer and the other big volcanoes don’t have as much, even if you start way below the official/common trailheads.
There is one “hike” in the US I found that has more; it’s called the “Lowest to Highest” or L2H. Starting in the Badwater Basin, you hike over and summit Mt Whitney, totaling about 14,775ft of elevation. It takes about 5-7 days of hiking.
Best of luck out there!