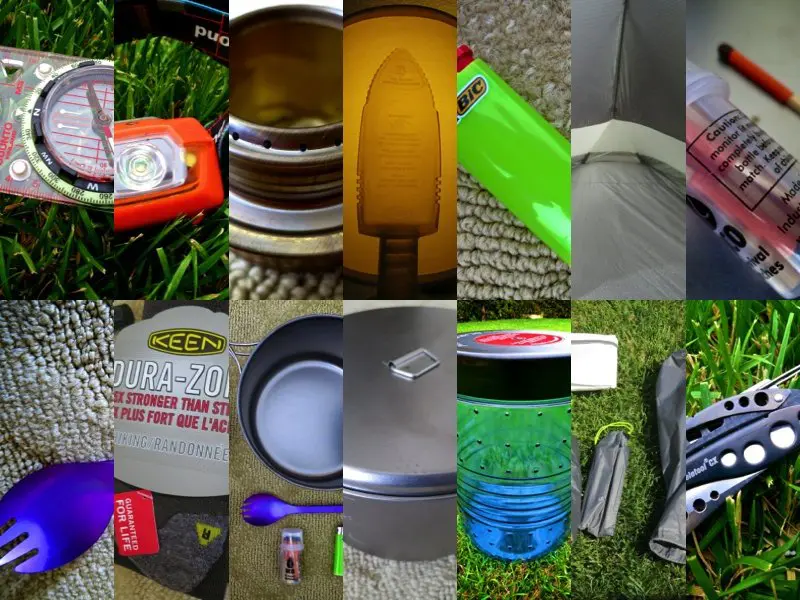
Tour Divide Packing List: Gear, Bike, Bags, and More
The Tour Divide presents a unique gear challenge compared to a long-distance backpacking trip – which is why I did a separate bicycle breakdown to cover which Tour Divide rig I’m using and what modifications I’ve made to it. However, arguably just as important as the bicycle itself is the gear that will be carried on the bike for the nearly 2,700-mile (4,300 km) bikepacking trip (race, adventure, whatever you want to call it).
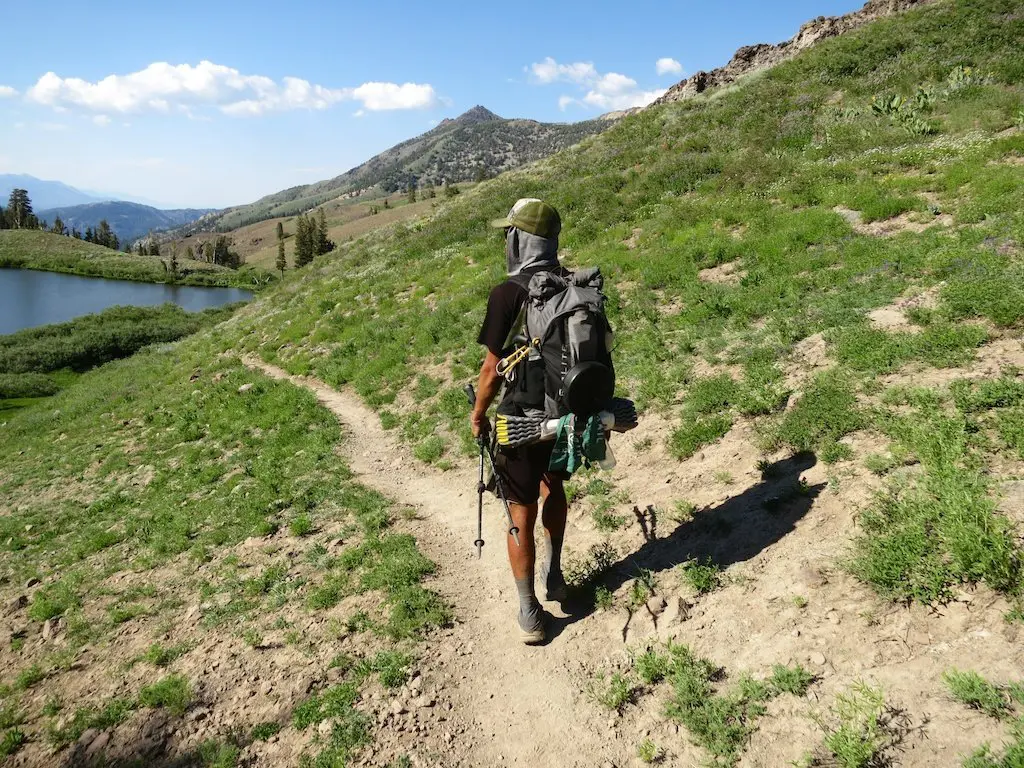
Despite having some experience covering vast distances on a bicycle, I have much more experience camping in the backcountry. In a perfect world, I would have perfectly comfortable weather, and I would do huge miles every day to reach a town where I could sleep indoors and shower. Unfortunately (or maybe fortunately), this is not the adventure I have signed up for.

The Bicycle
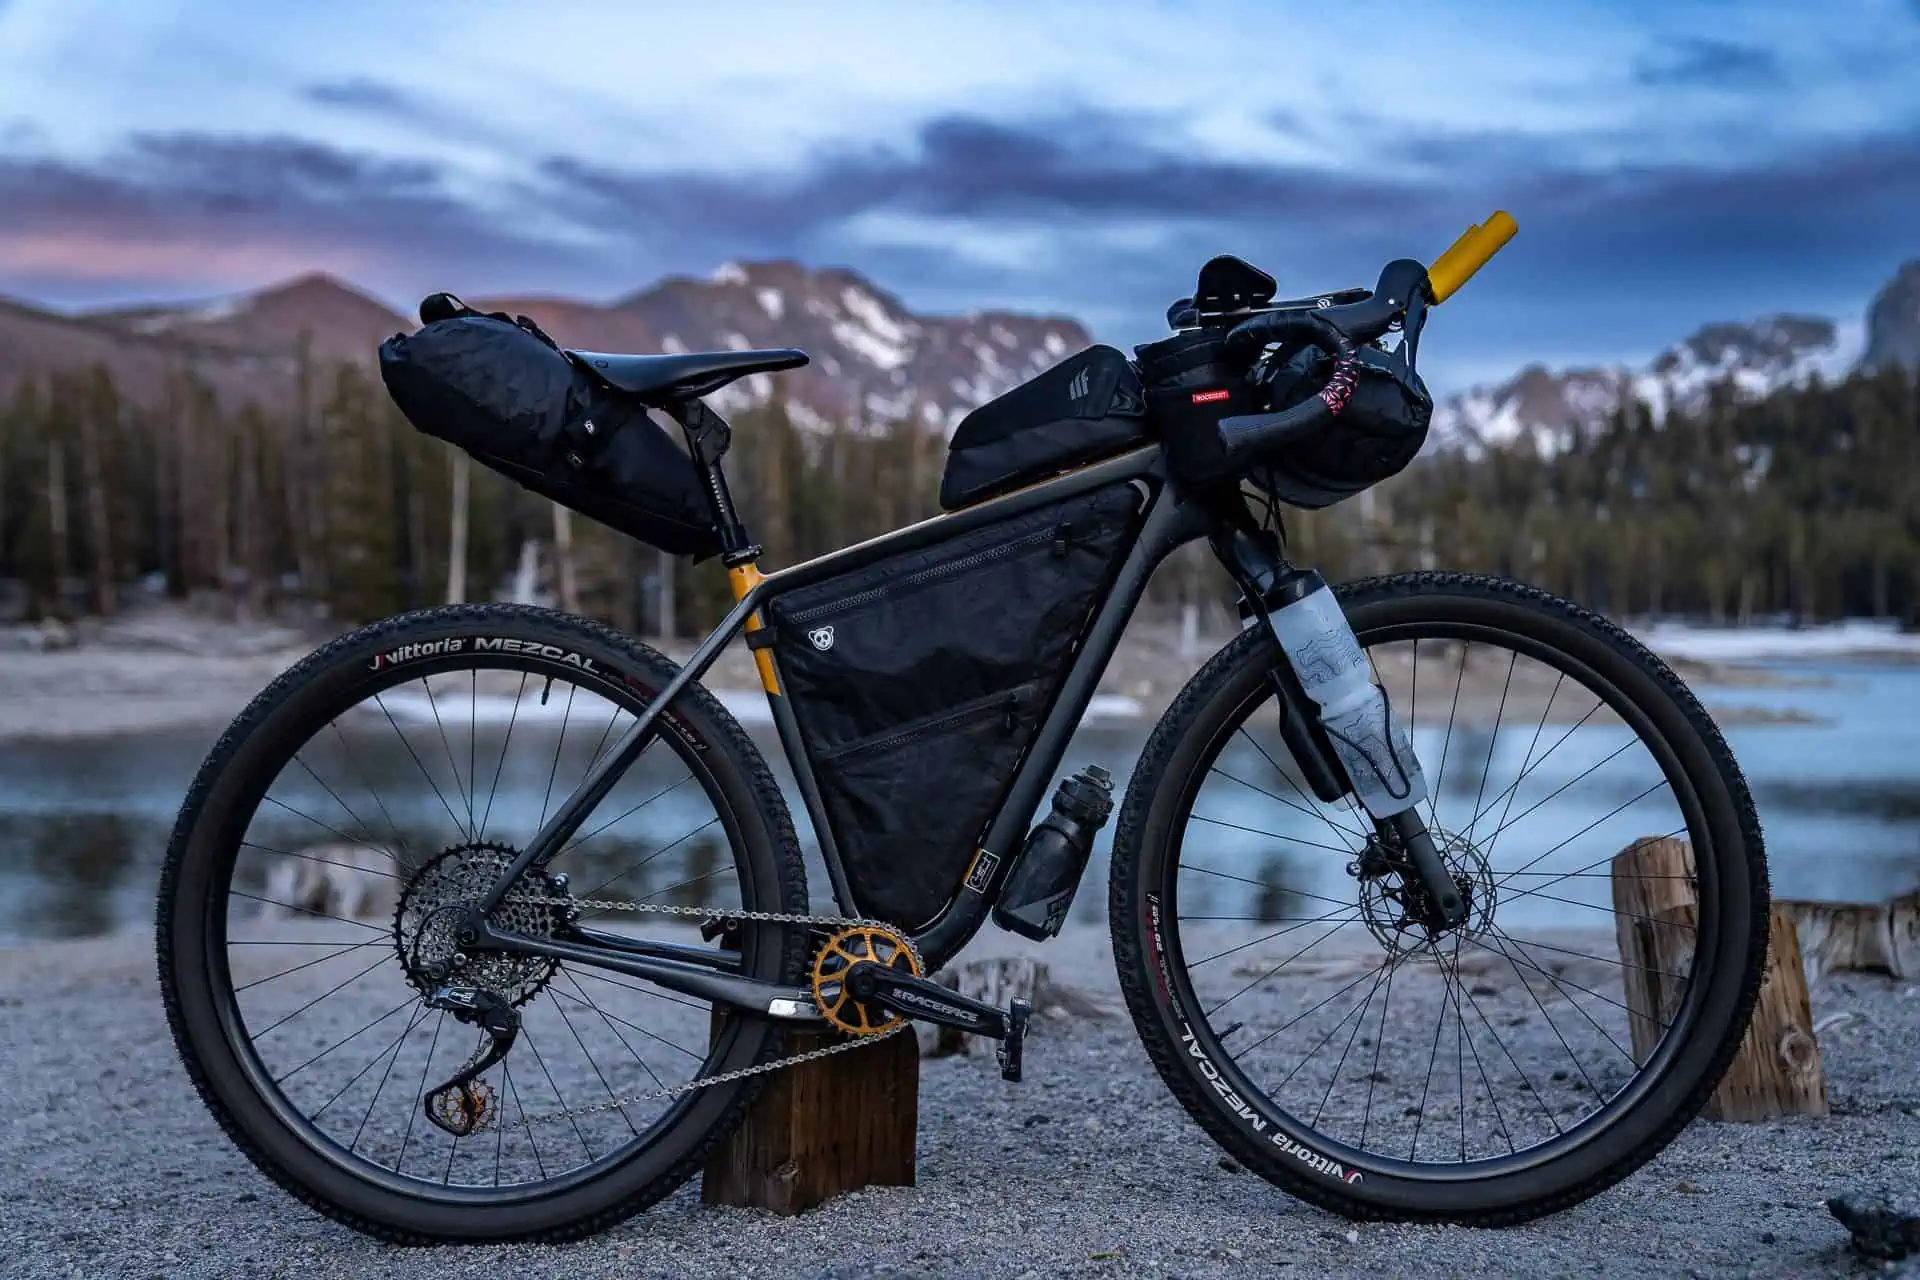
I won’t go into too much detail on my Tour Divide rig here, but a quick overview of my bike is as follows: a rigid, drop-bar Salsa Cutthroat GRX 600 (56 cm) with a 32-tooth chainring, 10-50T cassette, 11-speed mechanical shifting, a dynamo hub, and 29×2.25″ tires.
You can read a more detailed breakdown of my Tour Divide rig here.
The Bags
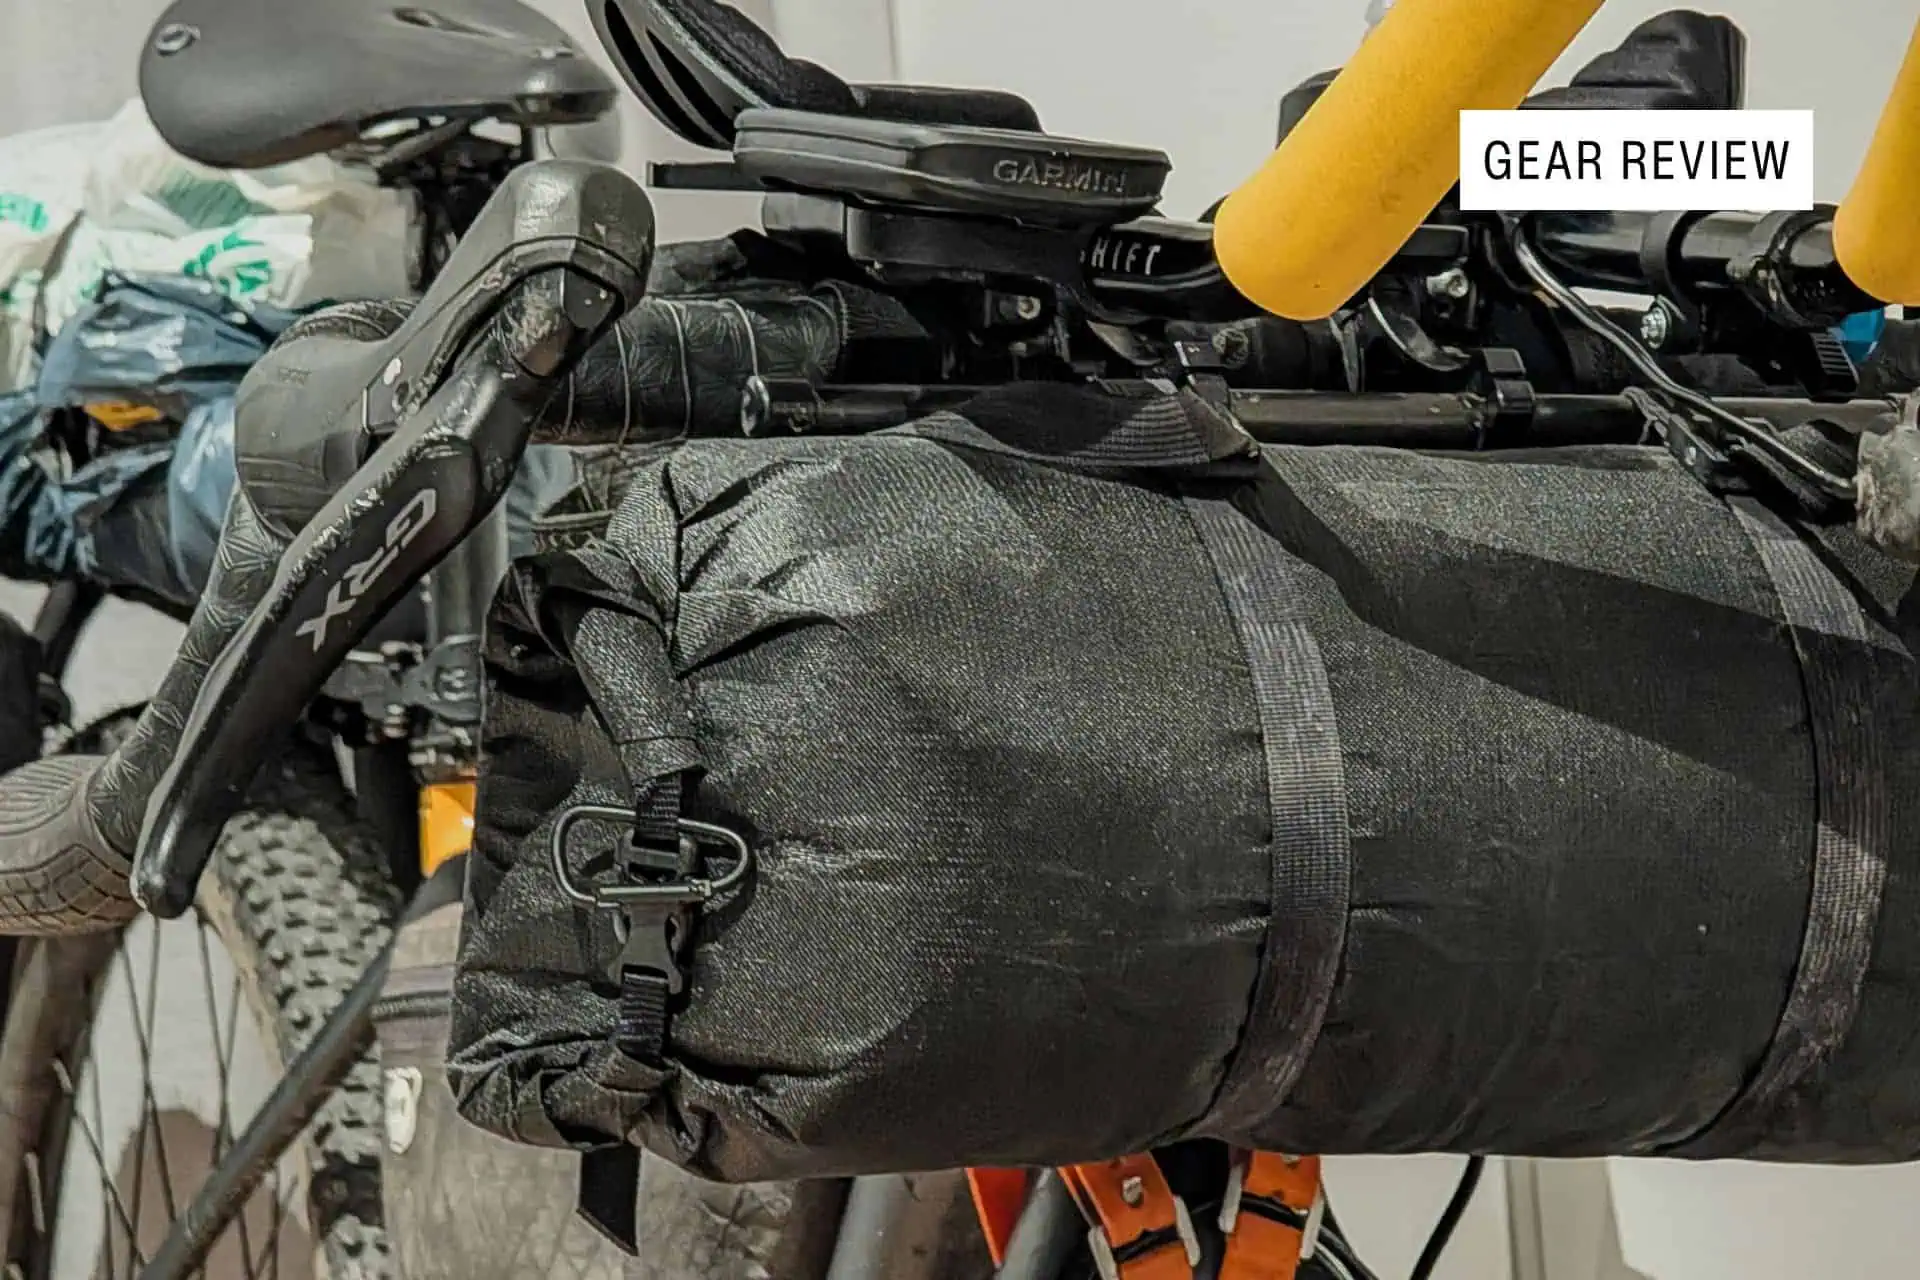
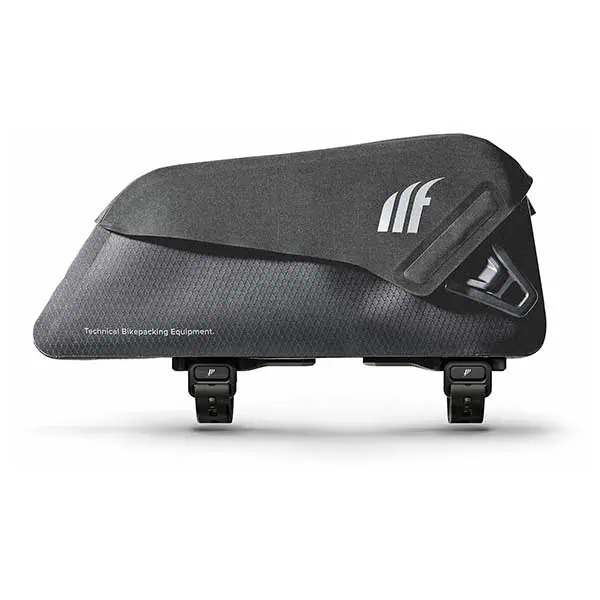
My big bags come from Rogue Panda, making some awesome and customizable bikepacking bags. That said, I have found my top tube bag and feed bags to be excellent and superior to the Rogue Pants versions of these bags. I have opted not to run a rack because I think (I hope) I will be able to fit all my gear into these bags, but I did consider the Tailfin Rack for a minute (and might use it on a subsequent bikepacking trip through Europe where speed won’t be as important).
- Frame Bag: Rogue Panda Custom Frame Bag (Full, Ultra 200X Black, Bolt-On, Standard Double Decker with Side Pocket)
- Handlebar Harness: Rogue Panda Blue Ridge Handlebar Harness (Austere Mfg Cam Buckles)
- Handlebar Roll: Rogue Panda Gila Dry Bag (Small, Ultra 200X Black)
- Feed Bag 1: Rockgeist Honeypot Feedbag (Ultra 400 Black)
- Feed Bag 2: Rockgeist Honeypot Feedbag (X50 Marigold)
- Feed Bag Accessory: Rockgeist Spacelink
- Seat Pack: Rogue Panda Ripsey Seat Bag (Ultra 200X Black)
- Top Tube Bag: Tailfin Top Tube Bag (Flip, 1.5L)
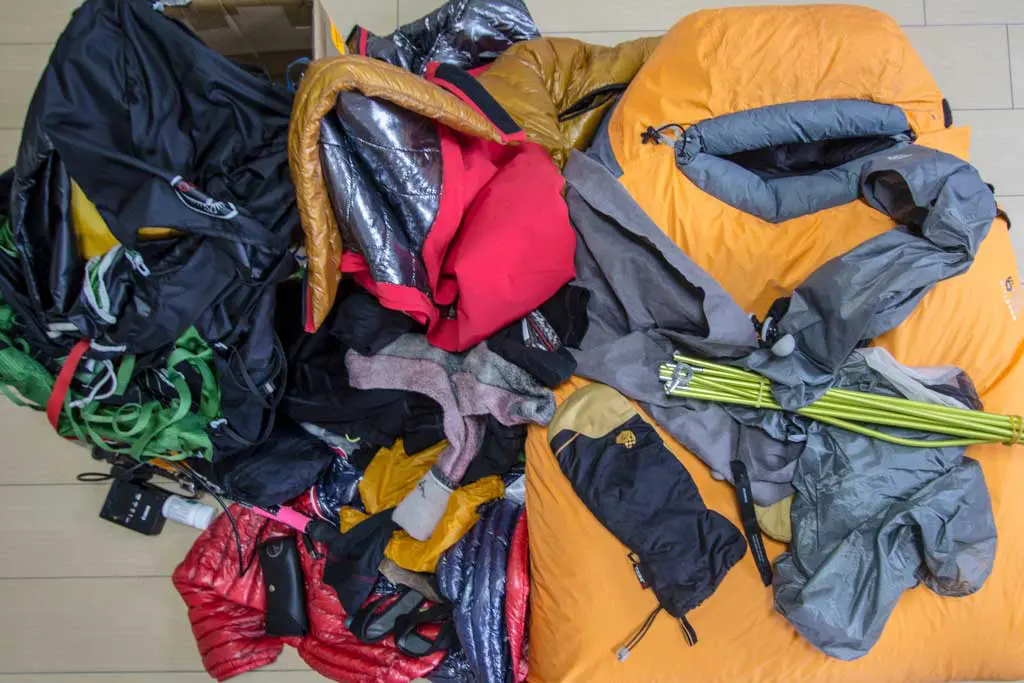
Sleep System
I’ve adopted most of my sleep system from my backpacking setup. However, I’ve made some alterations for the Tour Divide that aren’t necessarily my default for three-season backpacking.
Notably, I’m going with a 40°F/4.4°C Katabatic Flex quilt instead of my more typical 30°F/-1.1°C or 20°F/-6.6°C quilt, and I’m bringing a short Therm-a-Rest XLite NXT instead of the regular sized version.
- Shelter: SlingFin SplitWing
- Shelter Poles: SlingFin SplitWing Carbon Poles
- Sleeping Bag: Katabatic Flex 40
- Sleeping Bag Liner: Cumulus Liner GL Wide
- Sleeping Pad: Therm-a-Rest NeoAir XLite NXT (Short)
- Pillow: NEMO Equipment Fillo Elite
- Stakes: Ruta Locura Sorex Stakes x 4
- Stakes: MSR Groundhog x 4
- Stuff Sack (Stakes): Hartford Gear Co. Stake Bag
Clothing (Worm)
This is everything I will be wearing every day on the bike. Yes, I will have additional layers and/or pieces of clothing on many days, but this is my base. All my extra layers and packed clothing are in the section below.
- Helmet: Giro Syntax Mips
- Cap: Assos Cap
- Sunglasses: Oakley Sutro (photochromic)
- Sunglasses: Oakley Sutro (polarized)
- Top: Ridge Merino Solstice
- Bib Shorts: Assos MILLE GTC KIESPANZER C2
- Gloves: Pearl iZUMi Expedition Gel Full Finger
- Socks: Darn Tough Light Hiker Quarter Lightweight
- Shoes: Lake MX238 Wide
- Watch: Garmin fenix 7X Sapphire Solar
Clothing (Packed)
I ended up with a lot of GOREWEAR products for this ride. I haven’t used any GOREWEAR products in the past, but it looks like they’ll be a great fit for cycling; the rain pants are something I’ll likely add to my backpacking kit.
- Headband: Ridge Merino Inversion Reversible Merino Headband
- Neck Gaiter: Ridge Merino Neck Tube
- Head Net: Sea to Summit Head Net
- Wind Vest: Pactimo Divide Wind Vest
- Insulated Vest: Feathered Friends Eos Vest
- Arm Warmers: Castelli Espresso Arm Warmer
- Shell: GOREWEAR GC5 GORE-TEX SHAKEDRY 1985 Viz Jacket
- Base Layer (Top): Patagonia Capilene Midweight Crewneck
- Gloves: GOREWEAR C5 GORE-TEX Thermo Gloves
- Boxers: Ridge Merino Boxer Briefs (for sleeping in)
- Rain Pants: GOREWEAR Endure GORE-TEX Rain Pants
- Base Layer (Bottom): Patagonia Capilene Midweight Bottoms
- Leg Warmers: Castelli Fast Legs Sleeves
- Socks: Darn Tough Light Hiker Quarter Lightweight x 2
- Waterproof Socks: Showers Pass Crosspoint Brights
Bikepacking Gear
I’m not bringing a stove on the Tour Divide because a stove would require me to spend more time stopping to make food, and the goal of the Divide is to keep moving forward for as long as possible.
- Water Bottle: Trek Voda 34 oz / 1 L x 2
- Water Bottle: Camelbak Podium 21 oz / 600 ml
- Water Bottle: CamelBak Dirt Series Podium 21 oz / 600 ml
- Water Treatment: Platypus QuickDraw
- Utensil: Snow Peak Long Titanium Spork
- Headlamp: BioLite HeadLamp 325
- Satellite Messenger: Garmin inReach Messenger
- Bear Spray Holster: Bearclaw Bear Spray Cage
- Bear Spray: Frontiersman 7.9 fl oz Bear Spray
- Lock: Hiplok Z LOK
Cockpit
I’ll post a separate article breaking down my cockpit configuration, as it took me a bit to figure out. That said, here’s what’s included in my cockpit (i.e., the front part of my bike where my hands will mostly hang out).
- Light: kLite ULTRA Adventure Lighting System
- Grip Tape: Supacaz Super Sticky Kush
- Grips: Redshift Cruise Control Drop Bar Grips
- Aerobars: Redshift Quick-Release Clip-On Aero Bars (L Bend)
- Grips: Wolf Tooth Components Karv Grips (for aero bars)
- Phone Mount: Peak Design Out Front Bike Mount V2
- Garmin Mount: Garmin Edge TT/Tri Bar Mount x 2
- Stem Cap: jefe Headset Cap Airtag Mount
- Tracker: Apple AirTag
Bathroom
- Stuff Sack (Poop Kit): Space Bear Bags Poop-moji Pouch
- Repellent: Ben’s 100 Max Formula (1.25 fl oz)
- Pre-Trail Repellent: Sawyer Products Permethrin (not carried)
- Lip Balm: Sun Bum Mineral SPF 30
- Anti-Chafe Balm: Body Glide for Her (0.35 oz)
- Hand Sanitizer: Dr. Bronner’s Organic
- Sunscreen: Coppertone SPORT (3 oz)
- Toothbrush: GUM Folding
- Toothpaste: Dr. Bronner’s Travel (0.85 oz)
- Antibiotic Ointment: Neosporin
- Tape: 3M Medical
- Bandages: Band-Aids
- Toilet Paper: Charmin Ultra Soft
- Wet Wipes: Sea to Summit Wilderness Wipes
- Ear Plugs: Mack’s Maximum Protection Soft Foam Earplugs
Repair Kit
- Multitool: Park Tool I-Beam Mini Tool
- Multitool: Wolf Tooth Components Master Link Combo Pliers
- Pump: Lezyne Carbon Drive Lite Hand Pump
- Quick Link: SRAM Powerlock Link for 11-Speed Chain x 2
- Brake Pads: SHIMANO K04Ti Metal Disc Brake Pads x 2
- Tire Levers: Pedro’s Tire Levers x 2
- Tire Boot: Park Tool Emergency Tire Boot
- Tire Plugs: Dynaplug Racer Pro
- Tube: SCHWALBE Bicycle Tube
- Tube: Tubolito Tubo-MTB
- Sealant: Orange Seal – Endurance Formula (4 oz)
- Rag: Old rag
- Lube: Dumonde Tech Original Bicycle Chain Lubrication
- CO2 Inflator: MSW INF-200 AirStream Inflator Head
- CO2 Cartridge: Planet Bike 16g Threaded CO2 Cartridge
- Gear Repair: Therm-a-Rest Patch Kit
- Gear Repair: Gorilla Tape
Electronics
- Computer: Garmin Edge 1040 Solar Bike Computer
- Camera: GoPro HERO12 Black
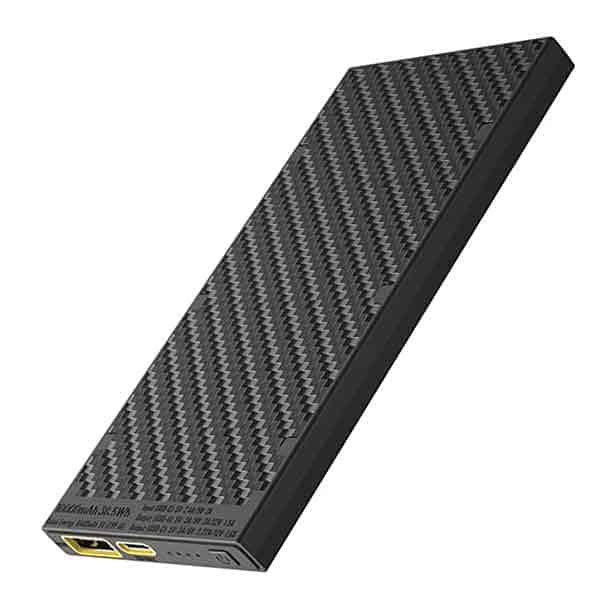
- Power Bank: Nitecore Carbo 20000
- Power Bank: Nitecore Carbo 10000
- Headphones: Pixel Buds Pro
- Phone: Google Pixel 8 Pro
- Phone Case: Peak Design Everyday Case
- Wall Plug: Anker Nano II 65W
- Cable: USB-A to USB-C
- Cable: USB-A to Micro USB
- Cable: USB-C to USB-C
Apps
Odds & Ends
- Bags: Ziploc Quart Food Storage
- Glasses Wipe: Microfiber cloth
Detailed View

Rogue Panda Frame Bag (Full, Ultra 200X Black, Bolt-On, Standard Double Decker with Side Pocket)
I went with the Rogue Panda Custom Frame Bag because they already have the measurements for my bike, and they offer a ton of customization options. I went with a full-size bag in Ultra 200X Black, with a bolt-on attachment, two independent pockets (double-decker), and a side pocket. I almost went with the stretch fabric below the zippers, but I was worried about water ingress and that my legs would hit the bag if I packed it to bulging capacity.

Rogue Panda Blue Ridge Handlebar Harness
The Rogue Panda Blue Ridge Handlebar Harness is new this year, and I am excited to use it on the Tour Divide. Two connected 12 in / 300 mm carbon fiber poles attach to your bike’s handlebars (which complicated my cockpit setup a bit). The harness keeps your front roll out of the way of your handlebars, cables, and hands. It comes with either plastic or Austere Mfg cam buckles. I opted for the latter for the sake of durability. Rogue Panda recommends a load of no more than 6 lb /3 kg. I’ll store my shelter, poles, and quilt in it, which is only about half that.
8.5 oz / 240 g
Rogue Panda Gila Dry Bag (Ultra 200X, Small)
I’ll use a Gila Dry Bag, also from Rogue Panda, to store my gear on the Blue Ridge Handlebar Harness. The small size (the one I have) is still a bit large at 12 liters. There’s no way I would have room for the medium or large on my bike. Its diameter is 6.5 in / 16.5 cm, measures 22 in / 56 cm when rolled three times on each side, and measures 33 in / 84 cm when laid completely flat. I got the bag in Ultra 200X, but it’s customizable and available in various fabrics and prints.
5 oz / 140 g

Rockgeist Honeypot Feedbag (1 x Ultra 400 Black, 1 x X50 Marigold)
Feedbags are small bags behind your handlebars (closer to you) where you can store water bottles, food, rocks, unpopped popcorn, or whatever else your heart desires. I got two Rockgeist Honeypot Feedbags with the Rockgeist Spacelink Adapter for my Tour Divide setup. The Spacelink works well to keep the bags firmly attached to my bike, and the two bags hold 1.8 liters (when fully extended), allowing me to reach my hand to the bottom, have an exterior pocket, a drainage hole, and weigh approximately 3.6 oz / 102 g (but this depends on fabric choice).
3.6 oz / 102 g (each)

Rogue Panda Ripsey Seat BagRogue Panda Ripsey Seat Bag
The Rogue Panda Ripsey Seat Bag is attached to your bike’s saddle and is comprised of a harness and removable dry bag. It weighs 13 oz / 369 g and can hold up to 6 lb /3 kg. I’ll mostly store my extra clothing in my seat bag, but I may also use it for overflow food if I can’t get everything into the top pocket of my frame bag. My Ripsey is made of Ultra 200X. It’s a bit tricky to attach the harness to my seatpost with my seatpost suspension, but I don’t think it will be a huge deal (but we’ll find out).
13 oz / 369 g
Tailfin Top Tube Bag (Flip, 1.5L)
The Tailfin Top Tube Bag is one of my favorite bags, despite my feeling that I shouldn’t be that excited about it. It appears to be waterproof, can be easily opened/closed with a single hand, has a cable port at the front, has a soft interior pocket for (presumably) a phone, and has plenty of interior space for snacks and small electronics. I was worried my knees would hit the larger 1.5L version (instead of the 1.1L version), but I haven’t had any issues.
6.6 oz / 187 g
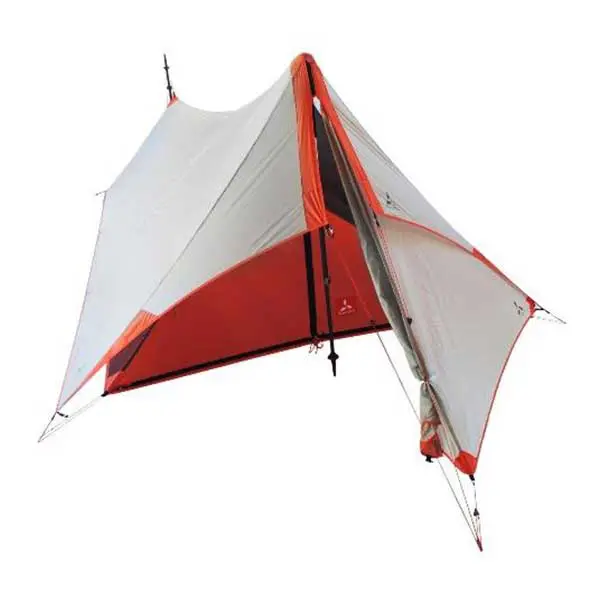
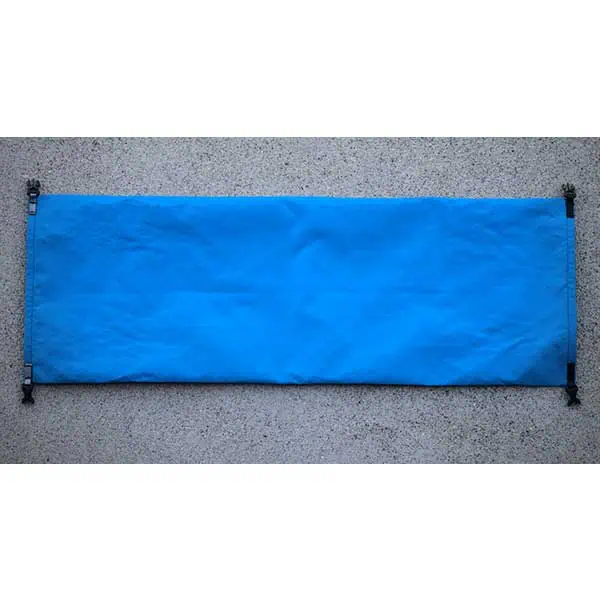
SlingFin SplitWing Shelter
I am a huge fan of the SlingFin SplitWing and the SlingFin Portal 1. Since I don’t anticipate needing something freestanding, I’m back with the SplitWing instead of the Portal. It’s a front-entry shelter with an interior height of 47 in / 119 cm and 24.8 ft² / 2.3 m² of floor space. The shelter can be used with the mesh interior and tarp or with either one on its own. I’m not using the optional vestibule, and I can fit the entire shelter (with poles and stakes) in my front roll along with my quilt.
Detailed review | 24 oz / 680 g

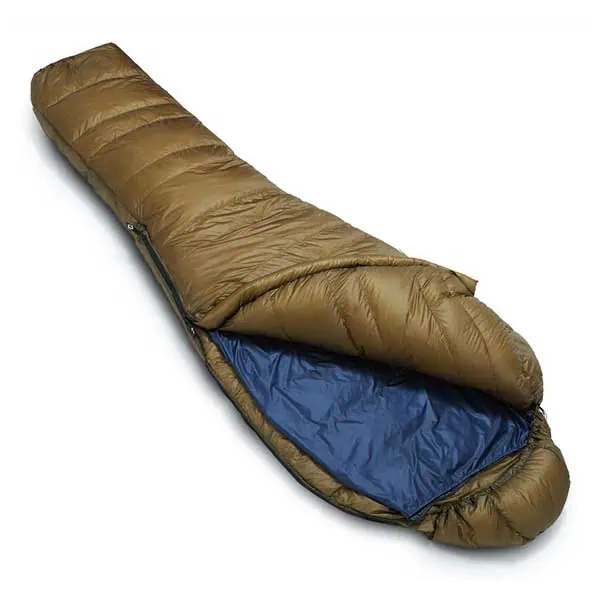
Katabatic Flex 40 (6′ 900FP)
I typically use a Katabatic Quilt when backpacking, and I am a fan of both the 15-degree Flex Quilt and the 30-degree Palisade. However, I am betting I can get away with something a little lighter on the Tour Divide, and I’ll use a Flex 40. This is because 1) space is at a premium, and 2) I expect it to be warm in New Mexico. Opening this quilt up and using it as a blanket will hopefully mean I’m not sweating all night further south. That said, I might have to sleep with all my clothes on in the northern half.
17.8 oz / 505 g
Cumulus Liner GL Wide
A sleeping bag liner isn’t necessary, but I am using a Cumulus Liner GL Wide sleeping bag liner. Why use a sleeping bag liner? There are a couple of reasons: 1) to keep my quilt clean (because having and eventually washing a dirty sleeping bag is no fun), and 2) for when I end up too hot at night and want to use the liner as my sleeping bag. It appears that, sadly, Rab doesn’t make this anymore, so I will likely be on the hunt for a replacement soon.
2.5 oz / 71 g
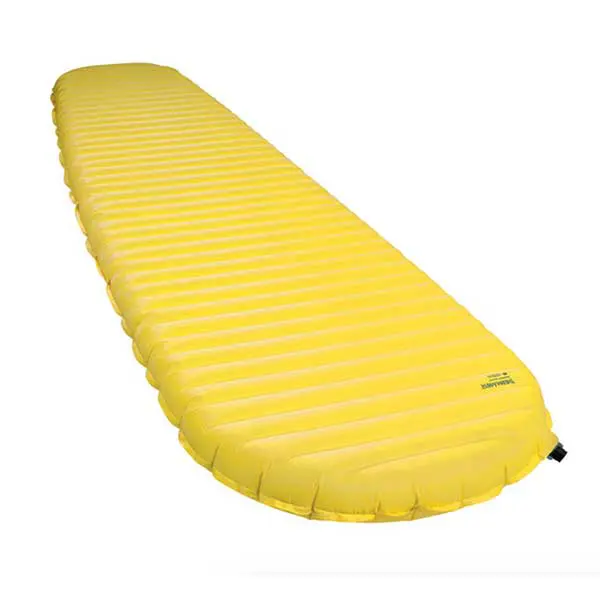
Therm-a-Rest NeoAir XLite NXT (Short)
The Therm-a-Rest NeoAir XLite NXT is the newest version (at the time of publication) of the NeoAir XLite, which promises to be – and arguably is indeed—”6x quieter” than its predecessor. It has an R-value of 4.5 (up from 4.3) and an easy-to-use one-way valve. I also carry (and recommend) a patch kit. I am experimenting with the short version on the Tour Divide, and I hope I don’t regret it.
Detailed review | 11.5 oz / 326 g
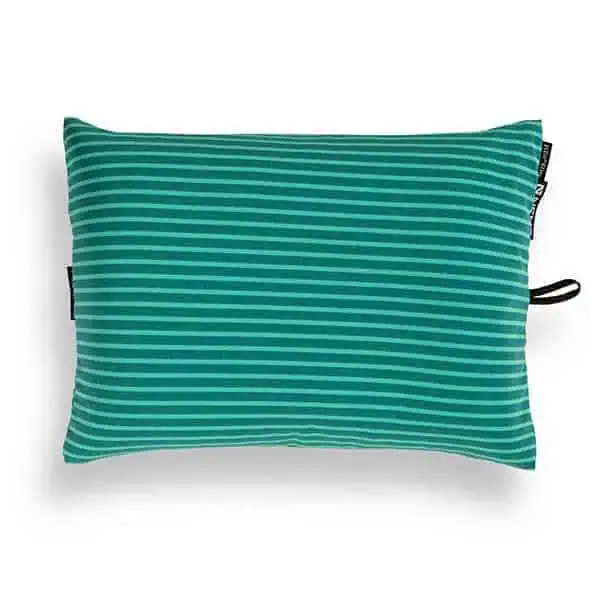
NEMO Equipment Fillo Elite Pillow (Large)
A pillow is not something you need out on the trail, but after trying and seeing how comfortable the NEMO Equipment Fillo Elite is, I’ve decided it’s well worth the weight. I have a terrible time sleeping outdoors (and sometimes indoors), so anything that can help me sleep through the night without waking up and feeling hungover from lack of sleep is welcome. If you haven’t already given a pillow a try, I suggest the NEMO pillows over the Sea to Summit pillows (which aren’t as comfy).
3 oz / 85 g

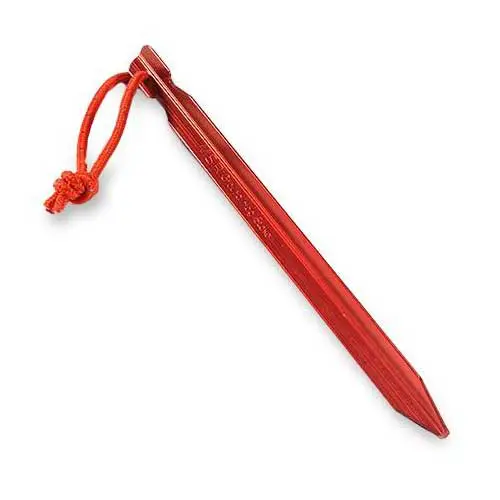
Ruta Locura Sorex Stakes
I’ve never used the Ruta Locura Sorex Stakes before, but I figured a cross-country bikepacking race would be the appropriate place to try a piece of gear for the first time. That’s what you’re supposed to do right? These stakes are incredibly light, and I plan to use them to stake out the corners of my SplitWing.
0.21 oz / 6 g (each)
MSR Groundhog Tent Stakes
In addition to the Sorex Stakes, I am bringing four MSR Groundhog Stakes for my tarp and/or guylines when the weather gets more aggressive. They’re generally great for what I need, and so long as I’m not in truly loose sand (like on a beach) or in snow, this should prove a solid combination for the Divide.
0.5 oz / 15 g (each)

Hartford Gear Co Stake Bag
Yes, a rubber band or bungee cord would suffice for storing my stakes, but the Hartford Gear Co Stake Bag is also a great option for keeping all my stakes in one place and containing their inevitable filth.
0.035 oz / 1 g

Giro Syntax Mips (Large)
I have a big head. It’s not only big around but also deep from top to bottom. A lot of helmets I tried on fit fine as far as the circumference of my head went, but they sat way too high up on my head and looked like bicycling yarmulkes. Finally, I found the Giro Syntax Mips Helmet, which fits nicely. I didn’t have much choice regarding helmets because of the fit (I think I tried on around nine different helmets from various brands), but I’m happy with this one.

Assos Cap
As with my helmet, finding a cap to wear under my helmet was also a challenge (although not as big as one). You don’t need a cap under your helmet, but it helps manage sweat, keep the sun off my scalp (I have short hair), and – perhaps most importantly – keeps my head and scalp free of bugs. Nothing worse than mosquitoes getting in your helmet and biting you on the head while you suffer in your futility. I landed on the Assos Cap as a comfortable fit despite it only coming in one size (which usually means it won’t fit my head).

Oakley Sutro Sunglasses
I’ve given a lot of thought to what glasses to bring on the Tour Divide. Ultimately, I decided on the Oakley Sutro Sunglasses because they fit my head, they have wide coverage (to prevent more of my eyes and/or face from being struck by rocks, bugs, or whatever else while riding), and they have a photochromic option (which I opted for). The photochromic lenses are the ones that change depending on the light. When it’s dark, they’re completely clear, and they get darker when the sun comes out. Since I’ll always want glasses on, these are the move on the Tour Divide. That said, the one drawback is that they’re not polarized. My solution? Bring a second pair – a polarized version.
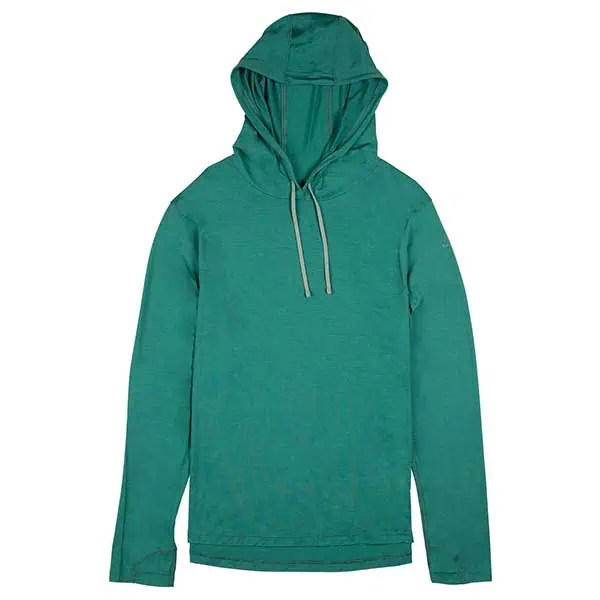
Ridge Merino Solstice Hoodie (Medium)
I’ve slowly become a connoisseur of backpacking hoodies, and the Ridge Merino Solstice is my favorite (it’s also the best). It has a high-volume hood with drawstrings that can usually keep it from flying off (you may have to loop or tie them) and thumb loops, and it is super comfy. Highly recommended – one of my favorite pieces of gear. For more on hoodies, check out the best backpacking sun hoodies.
Detailed review | 9 oz / 255 g

Assos MILLE GTC KIESPANZER C2 (Medium)
I did a lot of training in the Assos MILLE GTC KIESPANZER C2 Bib Short, and I am (pretty sure) it’s coming on the Tour Divide with me. It’s comfortable, doesn’t move around while I’m riding, has four pockets (two on my thighs and two in the back), and the straps don’t chafe me. I also rode a lot in the Rapha Cargo Bib Short, which I also liked, but the straps hit my nipples (and were a bit unruly when putting the bib on), which made me fear for them over time, so I went with the Assos. The only problem? Same problem with (presumably) every other bib; you need to get naked to poop.

Pearl iZUMi Expedition Gel Full-Finger Gloves (Large)
Despite often forgetting my gloves during training, I think it’s wise to wear gloves for the Tour Divide (if for no other reason than to get a sick hand tan). I’ve landed on the Pearl iZUMi Expedition Gel Full-Finger Gloves. They fit, they’re light, they’re comfortable, and they’ll hopefully prevent any irreversible nerve damage potentially resulting from weeks on the bike. I just need to be sure a mouse doesn’t chew a hole through them, like what happened to my gloves on the Arizona Trail.
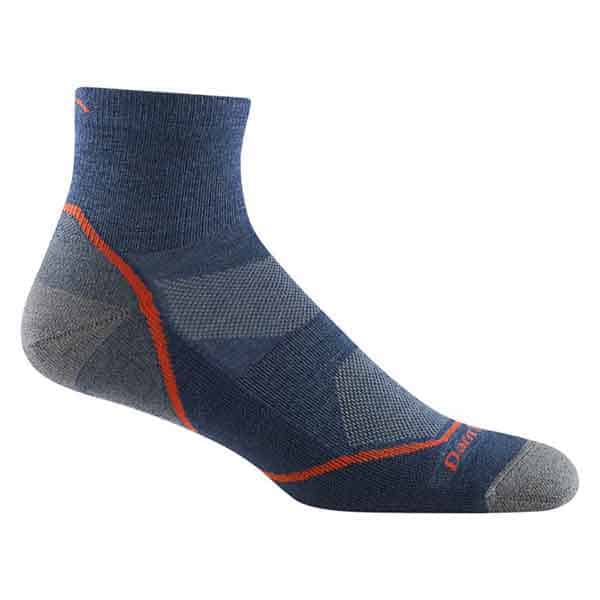
Darn Tough Light Hiker Quarter Lightweight (Large)
I’ve long been a fan of Darn Tough socks for their comfort, durability, and unconditional lifetime guarantee (it’s unbelievable). For backpacking, I typically use a slightly thicker version of Darn Toughs, but since I don’t expect (I hope) too much wear on my socks during the Tour Divide, I’m switching to the Darn Tough Light Hiker Quarter Lightweight for my ride.

Lake MX238 Wide Cycling Shoe
As with my head and hats/helmets, finding apparel for my annoyingly wide feet is also tricky. Fortunately, I found the Lake MX238 Wide Cycling Shoe, which fits me great. Unfortunately, they’re stupidly expensive. I don’t expect there will be much hike-a-bike on the Tour Divide (despite this being one of the things I am afraid of), so I’m not too worried about not having a show with a flat sole – as would be the case with a shoe more geared towards mountain biking (like I had on the Arizona Trail).
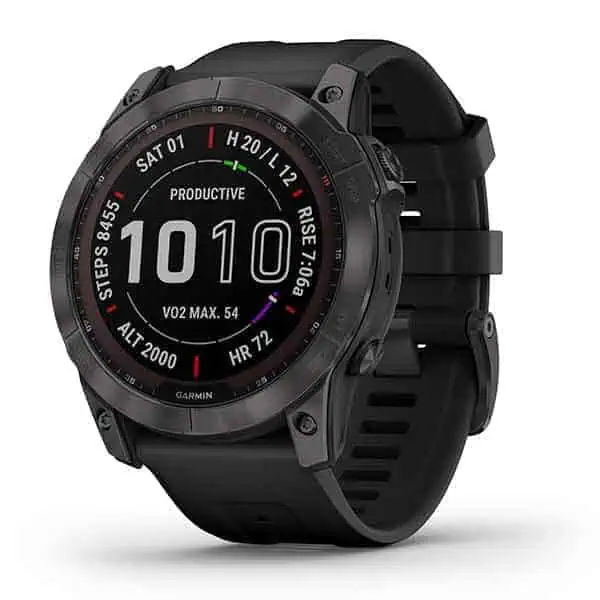
Garmin fenix 7X Sapphire Solar Multisport GPS Watch
I’m not going to use my Garmin fenix 7X Sapphire Solar to track my activities or heart rate during my ride, but I will use it as a watch, so I guess it’s worth having. I’m so used to wearing it that it’s coming along because it’s essentially part of my arm now. It’ll be useful for telling me elevation, heart rate, sunrise/sunset, and probably some other metrics at a glance.
2.9 oz / 82 g

Ridge Merino Inversion Reversible Merino Headband
I don’t typically carry this, but my forehead gets cold on the bike in the morning (or in cold conditions). The Ridge Merino Inversion Reversible Merino Headband keeps my forehead from freezing and fits nicely under my helmet. A beanie is too thick under my helmet (and unnecessary), and this can easily get pulled down around my neck when I warm up (which means I don’t have to stop to take it off). Despite being available in only one size, it still fits me well (I’ve got a big head).

Ridge Merino Neck Tube
The Ridge Merino Neck Tube is for hanging out around my face in the cold or around my head when the headband isn’t enough. If you’re looking for something thicker, there’s the double-layered Neck Gaiter available as well, but the Neck Tube is a better fit for me since I warm up fast, and the longer I can go without having to stop and/or delayed, the batter. I expect this is something I’ll be using every day.

Sea to Summit Head Net
I know that wearing a head net makes you look like a tool, but in mosquito country, nobody cares about how dumb they look – only about how many mosquitoes are not currently in and/or on their face. The Sea to Summit Head Net is a lightweight solution with an adjustable hem that it’s probably worth bringing two because you’ll be able to sell one for ten times the price to some sucker without one.
1.2 oz / 34 g

Pactimo Divide Wind Vest (Large)
In my training, the Pactimo Divide Wind Vest was one of my most-used pieces of gear. It has a two-way zipper, mesh back panel, blocks the wind and/or morning chill, and doesn’t flap around in the wind (too much). I guess it might be cooler if it had pockets in the back, but I’m not sure I would end up using them (I rarely use my bib’s rear pockets), so they might not be worth the added weight (not that it would make much of a difference).
3.1 oz / 88 g

Feathered Friends Eos Down Vest (Large)
I never really understood vests as pieces of outdoor gear until I started thinking about my bikepacking setup for the Tour Divide. My core is the only part of my body I need to keep warm, and I have a long-sleeved fleece and a rain jacket if I need to keep the chill off my arms. Enter the Feathered Friends Eos Down Vest. The Feathered Friends Eos is one of my favorite and most trusted down jackets, so why not trust the vest to keep me warm on the Divide?
7 oz / 200 g

GOREWEAR GC5 GORE-TEX SHAKEDRY 1985 Viz Jacket (Large)
Bikepacking in the Tour Divide capacity has introduced me to GOREWEAR, a brand I have never before used any products from, but a brand I am suddenly an avid user of. I’m bringing the GOREWEAR GC5 GORE-TEX SHAKEDRY 1985 Viz Jacket on the Tour Divide because it’s incredibly lightweight, and people I’ve spoken to swear by the magical properties of GORE-TEX SHAKEDRY. Why the Viz and not the regular version? I guess because the Viz is Viz? But also because GOREWEAR was out of stock on the regular when I ordered my jacket. Also, I’m not going to lie; I haven’t used this in the rain yet, so I hope everyone is telling me the truth.
4.9 oz / 139 g

GOREWEAR C5 GORE-TEX Thermo Gloves (XL)
The GOREWEAR C5 GORE-TEX Thermo Gloves are heavier waterproof gloves that will hopefully block the wind and keep my hands from freezing during the morning or rain. My hands and feet get incredibly cold, and I’m a bit worried there won’t be enough to keep the chill out, but I also don’t know if I’m willing to bring something bulkier/heavier than this. Ask me again when my hands are wet, cold, and freezing.
5.3 oz / 150 g

Ridge Merino Boxer Briefs (Large)
If there’s one thing I’ve learned from my previous bikepacking trips, it’s that you don’t want to have to sleep in your moist chamois. That’s why I’m bringing a pair of Ridge Merino Boxer Briefs to sleep in. I won’t be cooking on the Tour Divide, so instead of eating my mac and cheese every night, I can look forward to changing into my Ridge Boxers. They’ll also be handy for when I want to do laundry (if there’s ever a time to do laundry, which there might not be).

GOREWEAR Endure GORE-TEX Rain Pants (Medium)
I’m unsure if I’ll want to wear rain pants on the Tour Divide, but I’m not taking any chances; life on a bicycle differs from life backpacking. I’m bringing a pair of GOREWEAR Endure GORE-TEX Rain Pants that will (hopefully) save me from suffering (too much) on horrendously rainy days (of which I am anticipating there will be many). I predict these will either be a piece of gear I love or a piece of gear I never use.
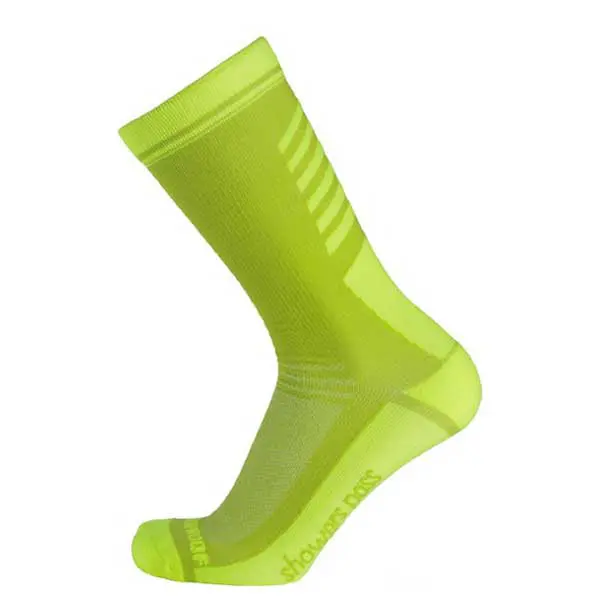
Showers Pass Crosspoint Brights Waterproof Socks (Large)
I haven’t used waterproof socks since the Continental Divide Trail, but that would make the Tour Divide (paralleling the Continental Divide Trail) an appropriate place to put them to use again, right? I’ll start the ride with a pair of Showers Pass Crosspoint Brights Waterproof Socks that will (hopefully? yes, this is a common refrain on my Tour Divide gear list) keep my feet from suffering too much in the rain (again, I am anticipating a lot of miserable days of rain on the Divide).

Trek Voda 34 oz / 1 L x 2
Water capacity is a concern of mine on the Tour Divide, and it took a while to find one-liter water bottles. I landed on the Trek Voda 34 oz / 1 L water bottles and will have one on each side of my fork. I was going to use plastic store-bought water bottles like smartwater, but those bottles don’t stay in water bottle cages as well as bottles designed for bikes. These aren’t super cool and ultralight, but it’s worth not worrying about them falling out on bumpy descents.
4.09 oz / 116 g (each)

Camelbak Podium 21 oz / 600 ml
I am carrying a Camelbak Podium 21 oz / 600 ml water bottle in one of my Honeypot Feedbags. This will be the bottle I drink out of while riding and the one I fill with whatever flavored electrolyte-filled beverage I am drinking instead of water. I’ve used this bottle extensively during my training, and I’ve been happy with it. Why not an insulated version? Why do I need an insulated version? All that does is cut down my water capacity.
3.2 oz / 91 g

CamelBak Dirt Series Podium 21oz / 600 ml
I have one more water bottle cage on my downtube, and I’m keeping a CamelBak Dirt Series Podium 21oz Water Bottle in it. Why the “dirt series” and not the regular podium bottle? I expect this water bottle to get disgusting, and the dirt series has a rubber cap covering the top. This means I (hopefully) won’t have to unscrew the cap when refilling one of my other bottles with this one, saving me precious seconds.
3.2 oz / 91 g
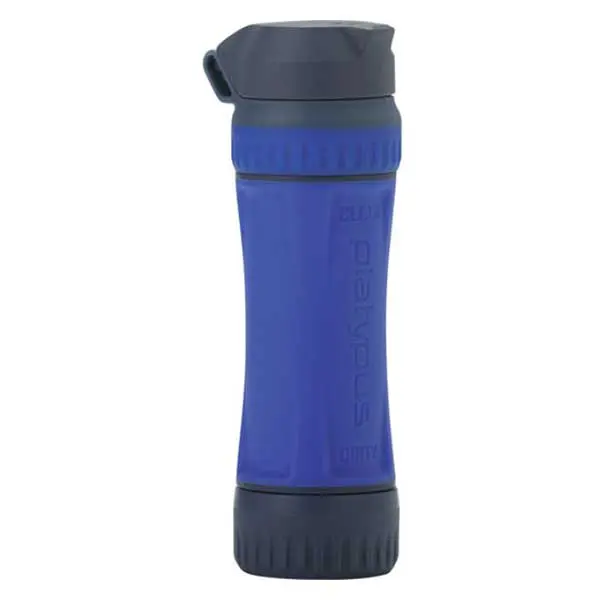
Platypus QuickDraw
I’ve used the Platypus QuickDraw extensively, including for the entirety of the Arizona Trail. In my experience, the QuickDraw is slightly less awful than the Sawyer Squeeze. It’s far from perfect, and I should probably switch to bleach, but for now, I’m sticking with the QuickDraw to filter my water as I’m not a fan of prefiltering or floaties in my beverages. I’ll bring the included Platypus soft flask to filter water since I won’t be using smartwater bottles for the ride.
Detailed review | 2.2 oz / 62 g
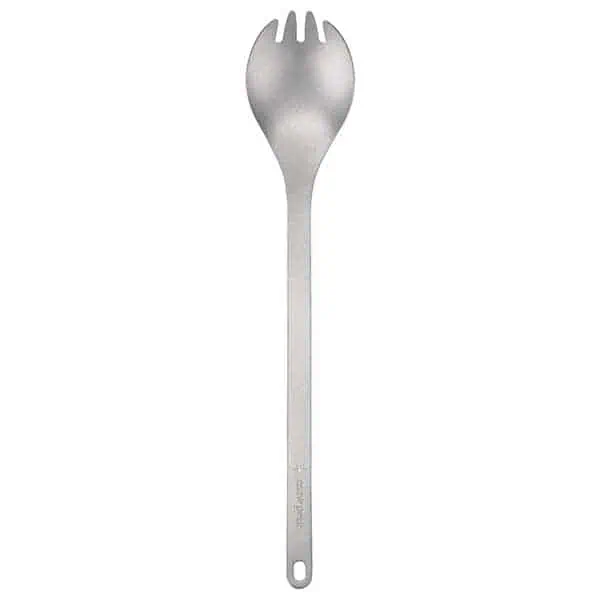
Snow Peak Long Titanium Spork
Yes, you can get a plastic spoon from McDonald’s, but if you want a utensil that will last forever (so long as you don’t lose it), get a Snow Peak Long Titanium Spork. It won’t melt, it’s easy to clean, and it’s titanium (which means you can use it to fight off wild animals). Honestly, I am not sure I’m even going to use this since I’m not bringing a stove, but if it ends up just living at the bottom of my frame bag, it’s not the end of the world.
0.7 oz / 20 g
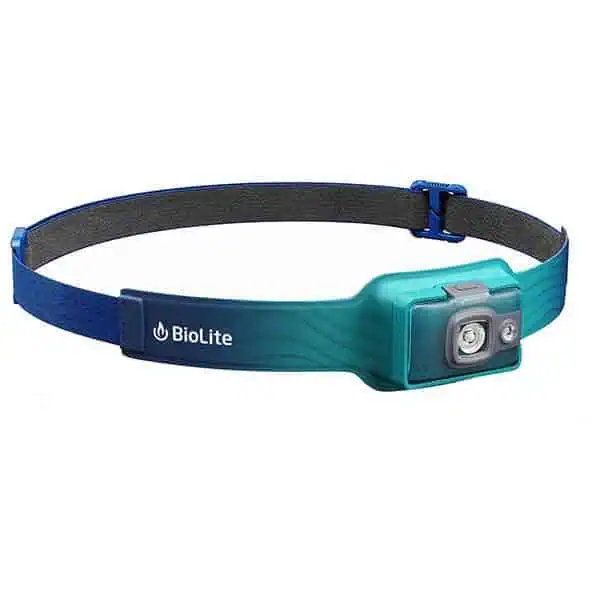
BioLite HeadLamp 325
I have a bright light on the front of my bike, but what if I want light somewhere my bike isn’t facing? Like to see the giant beast stalking me in the bushes on the side of the road? Or at camp? Guess I need a headlamp. I’ve used the BioLite HeadLamp 325 for a while now, and I think it will do just fine on the Tour Divide. It is my current go-to (and if you need something a bit brighter, there’s also the BioLite HeadLamp 425), and the only thing I need to ensure is that it will stay on my helmet. I’m thinking Velcro. It’s lightweight, comfortable, and bright. The only downside? It’s still a micro USB plug. Where’s the USB-C, BioLite?
1.76 oz / 50 g
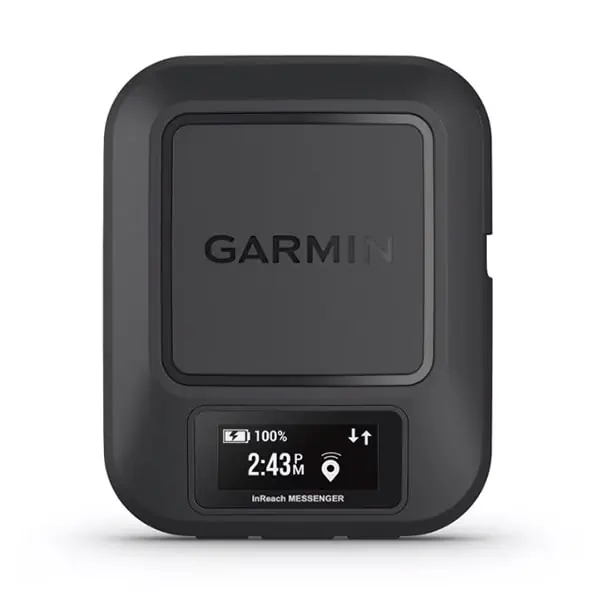
Garmin inReach Messenger
I’m bringing a Garmin inReach Messenger instead of my Garmin inReach Mini 2 on the Tour Divide because of the difference in battery life. I’ll use this to track my location on Track Leaders (I think? It’s still unclear how this works) and save me if something goes wrong. I got an attachment (I used VHB tape to attach it since the Messenger doesn’t have a screw on the back like the Mini 2), so it can be attached to one of my aero bar mounts. However, I’m still debating whether it’s better to keep it on my person instead (you know, in case I get thrown off my bike and need to call for help from down a cliff).
4 oz / 113 g

Bearclaw Bear Spray Cage
The Tour Divide begins in grizzly bear country and remains in their habitat for a while. Bear spray is a recommended item for riders, and I’m not making myself an exception here. However, the problem arises when figuring out how to carry your bear spray. Yes, you could use a chest strap or waist holster, but that would be annoying and possibly chafe you horribly. Instead, I’m mounting a Bearclaw Bear Spray Cage to my fork (with zip ties). It comes in three orientations – left, right, and center – and I’ve chosen the center option. There’s little clearance between the cage and my wheel, but I hope it won’t be an issue.
2.65 oz / 75 g

Frontiersman Bear Spray (7.9 fl oz)
Apparently, only a few sizes of spray will fit the Bearclaw Bear Spray Cage. Fortunately, I know two Tour Divide riders driving to Banff to start the Tour Divide, so I can ensure one brings me a can of Frontiersman Bear Spray (7.9 fl oz) to fit the mount. I am sure they have bear spray in Banff to buy locally, but I wouldn’t want to show up and find none that fit my holster (I’ll be flying to the start).

Hiplok Z LOK
I don’t know how effective it will be or if I’ll end up using it, but the Hiplok Z LOK is a lightweight lock that can stop someone from quickly running away with my bike. I’ll probably bring my bike into shops if nothing explicitly tells me it’s not allowed, but this will be a nice and lightweight insurance policy when I have to run into a shop without my bicycle. Could someone cut it with a hardy pair of scissors? Probably. But what are the odds someone walking or driving by would have some handy?

kLite ULTRA Adventure Lighting System
Something I learned was a thing while putting together my Tour Divide rig was a dynamo hub. What’s a dynamo hub? It’s a magical wheel hub that produces power as your wheel turns. I got the kLite ULTRA Adventure Lighting System to attach to my dynamo, which is a pretty awesome system that allows me to have a passively powered light and the option to charge USB devices. There is a switch I have attached to my bike’s stem that diverts power from the light to the USB bank.
jefe Headset Cap Airtag Mount
The jefe Headset Cap Airtag Mount conceals an Apple AirTag in a bicycle’s stem. This isn’t strictly necessary on the Tour Divide, but it provides me with a small peace of mind that should something happen to my bicycle, I will (maybe) be able to locate it. I will say that it was helpful to track my bicycle as it made its way to Canada on the airplane (I took a direct flight to minimize potential luggage issues). The only issue I had was that it was difficult to remove (unscrew) following my ride.
1.06 oz / 30 g
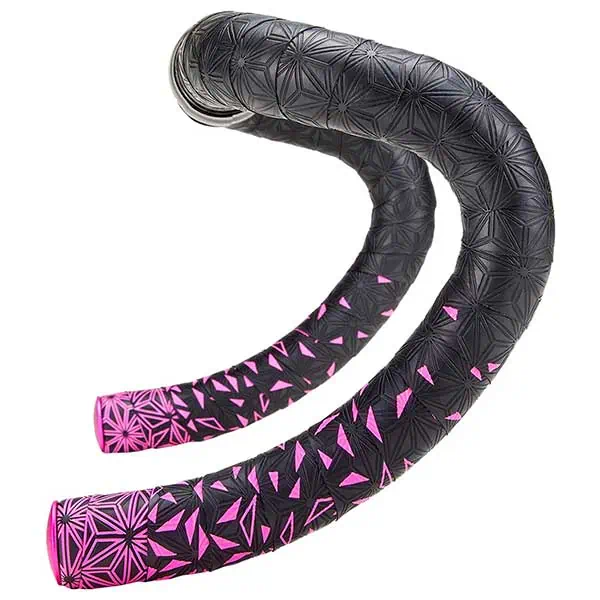
Supacaz Super Sticky Kush
I’m not going to lie; the grip tape that came stock on my Salsa Cutthroat was garbage. It was peeling off in various spots after only a few hundred miles of use. It’s disappointing for a brand-new bike and not inspiring regarding the other components. I bought and installed a roll of Supacaz Super Sticky Kush grip tape myself. I think I did an acceptable job for it being my first time; surely, it would have been an unacceptable job if I had taken it into a shop to be done, but it was okay by me.

Redshift Cruise Control Drop Bar Grips
On my previous long-distance bicycling journeys across Australia and Arizona, I learned that extended pressure on your hands from your handlebars can result in numb or tingling hands and fingers. Hopefully, the Redshift Cruise Control Drop Bar Grips will alleviate some of this risk on the Tour Divide. There are two grips, one on the handlebars’ top (straight part?) and the other at the ends after the drop. I’ve found both comfortable during training and hope this will remain the case on the Divide.

Redshift Quick-Release Clip-On Aero Bars (L Bend)
Hand grips and positions aren’t limited to the stock handlebars. The Redshift Quick-Release Clip-On Aero Bars (L Bend) give me another position to hang out in; they’re used for comfort, not for being aerodynamic. Spending all day on the bike is taxing on the body—even just sitting in a chair can be uncomfortable after long enough—which is why having multiple hand positions on the bike is important. I’m a fan of the aero bars; I can’t picture my bike without them.

Wolf Tooth Components Karv Grips
I put the Wolf Tooth Components Karv Grips on the ends of my aero bars for better grip and comfort. It wasn’t easy to get these grips onto the aero bars, but with the help of some K-Y Jelly (at the recommendation of my friend SlingFin Tim), they went on without issue. However, I think they’re now permanently affixed to my aero bars, and the only way to get them off will likely be to cut them off with a razor.

Peak Design Out Front Bike Mount V2
I was going to save this for the cockpit breakdown, but I felt it worth bringing up the Peak Design Out Front Bike Mount V2 here as it’s an awesome piece of kit. Paired with the Peak Design Everyday Case, it allows me to quickly and securely attach (and detach) my phone from my bike. My one worry is that all the vibration from the ride will be transferred into my phone via the mount and do some serious damage (this happened to my phone during my Australia bicycle tour with a similar product called the Quad Lock). We’ll find out after 2,700 miles (4,300 km) of bouncing down gravel roads.

Garmin Edge TT/Tri Bar Mount
Another thing I took a long time to figure out (as part of my cockpit) was how to mount my Garmin. I thought I had it all figured out until I realized that with the standard Garmin mounts, you need to rotate your Garmin device 90 degrees to lock it into place. With the Garmin Edge TT/Tri Bar Mount, you move a little toggle to lock the device into place, so there’s no need to rotate it. My Garmin Edge 1040 Solar Bike Computer can be mounted securely without additional space on either side.
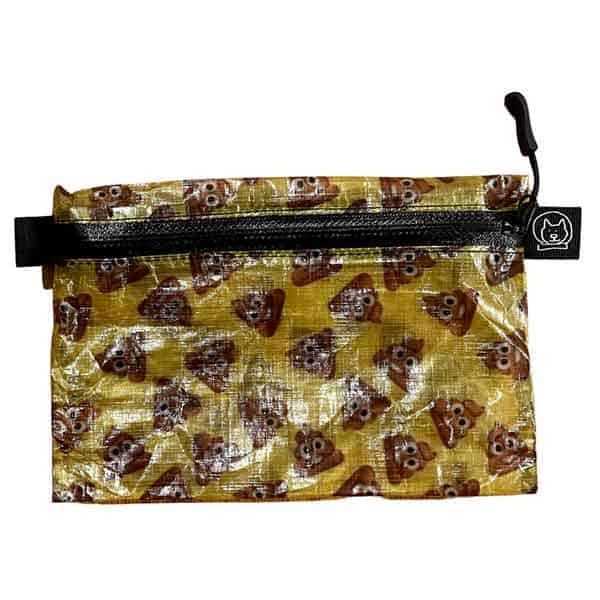
Space Bear Bags Poop-moji Pouch
As is the case with many of my bags and pouches, the Space Bear Bags Poop-moji Pouch isn’t entirely necessary, but it is, again, nice to have my entire poop kit (minus my trowel – which I’m not bringing on the Tour Divide) contained in a single space. It will fit a Deuce #2 (although I recommend this trowel instead) and all your pooping kit needs handily. If you need additional space, larger sizes are available as well.
0.07 oz / 2 g (each)
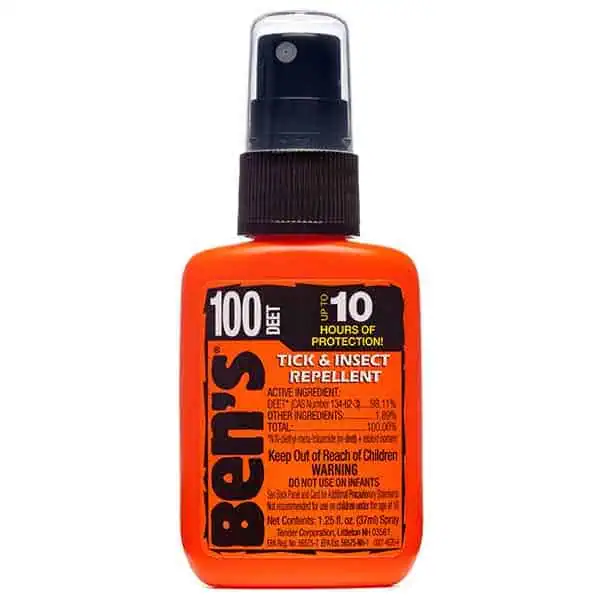
Ben’s 100 Max Formula Insect Repellent (1.25 fl. oz.)
I’m not the biggest fan of DEET, but it works. I’ve been taking a 1.25 fl. oz. bottle of Ben’s 100 Max Formula Insect Repellent with me out on the trail because the bugs have been bad, and DEET works. I never intend to head out into bug-heavy areas, but just in case, I like to be prepared. I suspect a section of the Divide will necessitate spraying myself down with the stuff, and I’m hoping I won’t need more than what’s in this bottle.
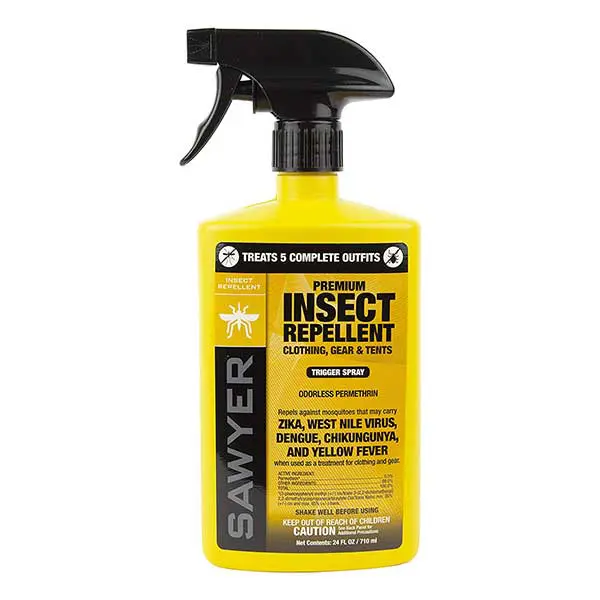
Sawyer Permethrin Pump Spray (24 oz)
I really hate bugs. Even gazing at a beautiful photo of your hike can be tormented by memories of mosquito swarms. That’s why, besides carrying repellent, I treat my clothing with Sawyer Permethrin before hitting the trail. One treatment lasts up to six washes or six weeks. Don’t use it to insect-proof your cat; it’s toxic to cats in its liquid form – but safe after it dries and binds to your clothing.
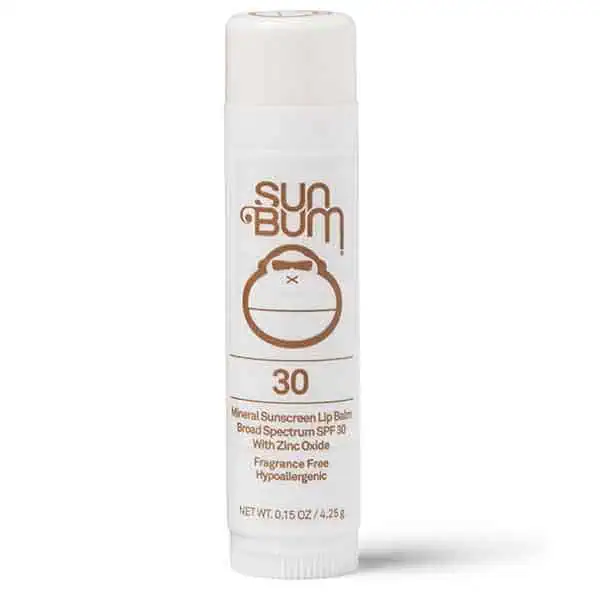
Sun Bum Mineral SPF 30 Sunscreen Lip Balm
I once made the mistake of not bringing lip balm on an eight-day hike in the Sierra Nevada, and it was one of my worst experiences in the backcountry—so painful. Now, I’m stocked up on Sun Bum Mineral SPF 30 Sunscreen Lip Balm to make sure I never have to go through that again. Whatever lip balm you bring, make sure it has some SPF.
0.8 oz / 23 g
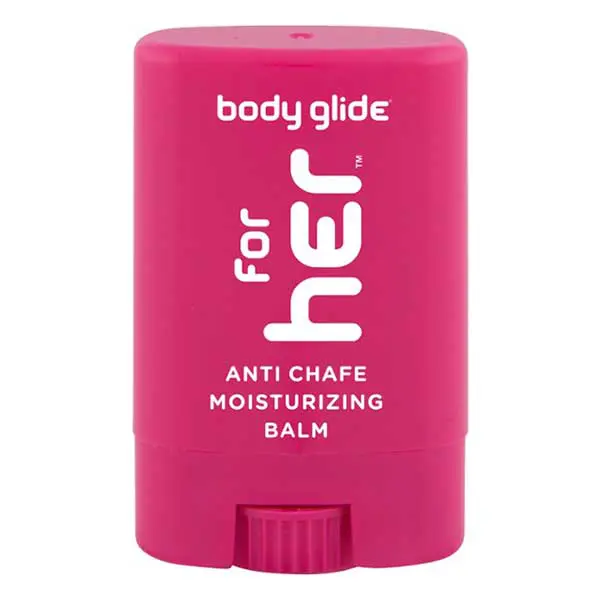
Body Glide for Her (0.35 oz)
I haven’t had any chafing issues while training for the Tour Divide, but I’m bringing a stick of Body Glide for Her to alleviate any potential suffering. It’s the same as Body Glide Anti-Chafe Balm but is also “rich in vitamins A, B, E, and F.” What? Do only “hers” need vitamins? I want some, too. I just need to be sure to apply before the chafe parade starts.
2 oz / 57 g
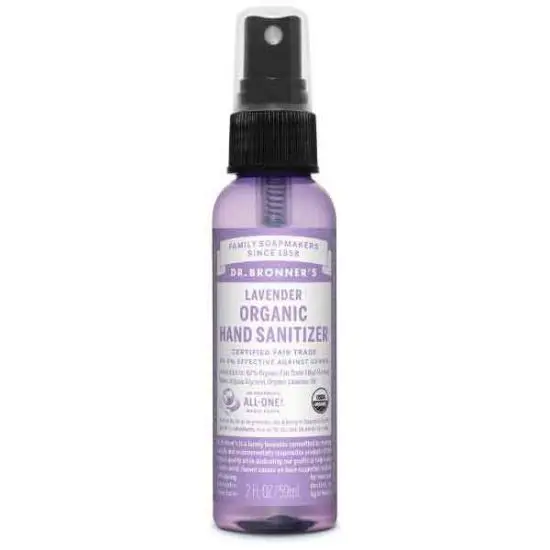
Dr. Bronner’s Organic Hand Sanitizer
If there’s one thing my long-time hiking partner, Mr. Appa, taught me, it’s about Dr. Bronner’s Organic Hand Sanitizer. It’s a spray-on hand sanitizer that makes my hands smell lavendery and (hopefully) cleans them. A peppermint version is also available, but it’s always more difficult to find. Trader Joe’s also sells a version of this if you’re based in the United States (and near one).
2 oz / 57 g
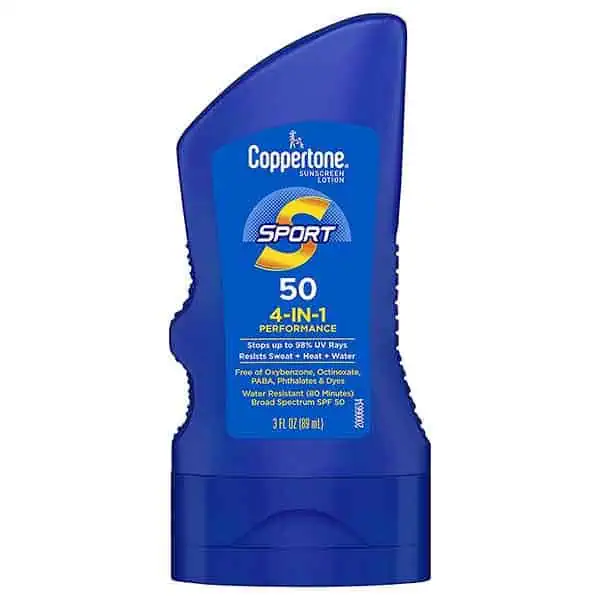
Coppertone SPORT
Sunscreen should be broad-spectrum (UVA/UVB), designed not to run off when you sweat, and ideally SPF 50 (above SPF 50 provides only marginal additional protection at an often much more expensive price). I like the consistency of Coppertone SPORT SPF 50 (I don’t like Banana Boat). What do you like? Not being sunburned? Excellent.
3.2 oz / 91 g

GUM Folding Travel Toothbrush
I like the GUM Travel Toothbrush because it folds into itself for storage and packs away easily. However, once the bristles are worn, they get stuck in the brush when closing. That said, it should be fine for the Tour Divide. The real challenge will be figuring out if I can brush my teeth while riding.
0.8 oz / 23 g

Dr. Bronner’s Travel Toothpaste
In case you are unaware, there are small versions of toothpaste available. You do not need to bring a huge tube of toothpaste while hiking. Get some Dr. Bronner’s Toothpaste (or any travel-sized toothpaste) and keep yourself from becoming a complete woodland savage. Or you can do the super-uber-duper-mega ultralight savage thing and don’t brush your teeth with toothpaste.
1 oz / 28 g
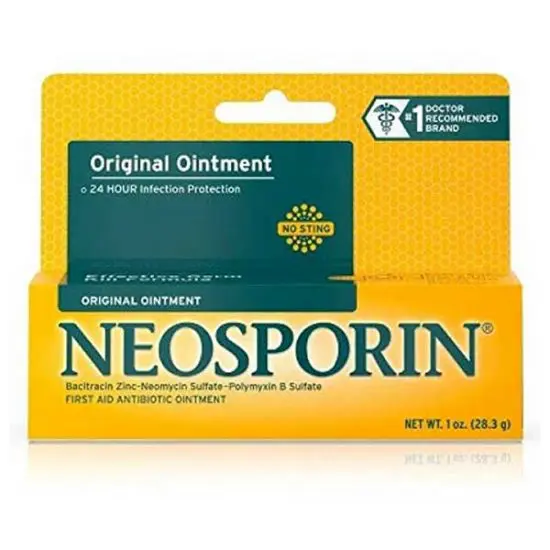
Neosporin Ointment
Many people don’t talk about (or don’t bring) any first aid into the backcountry, but it’s good to have some antibiotic ointment around for when I fall off my bike and get a boo boo. I carry a small tube of Neosporin Ointment to fight off infections. Have I used it? Yes. Is it worth carrying? Sure.
1 oz / 28 g
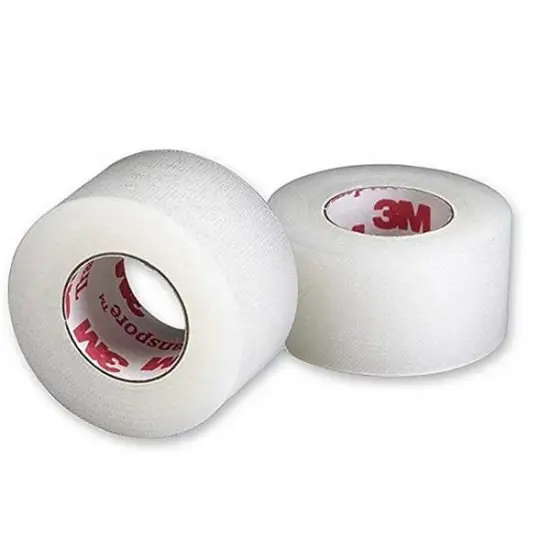
3M Medical Tape
Carrying a bit of 3M Medical Tape won’t cost much in terms of weight, but it can be very helpful if you slice something open and need more than just a Band-Aid. I guess I can rely on my Gorilla Tape, but I don’t want to rip all my hair (and skin) off.
0.6 oz / 17 g
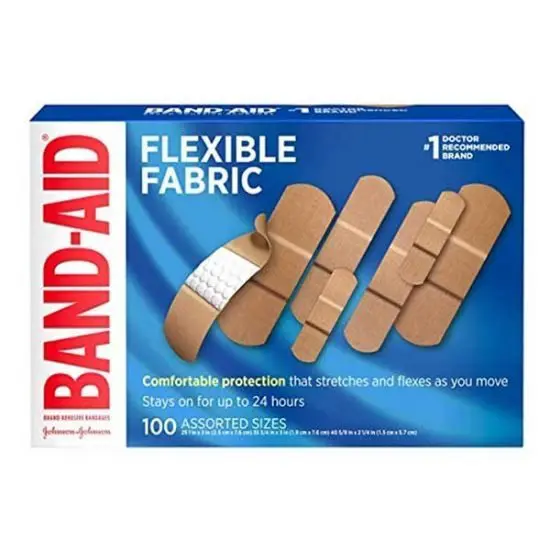
Band-Aid Bandages
I plan to have a stash of Band-Aid Bandages tucked away somewhere in one of my bags to stop the bleeding that will inevitably occur somewhere on my body at some point on the Tour Divide.
0.2 oz / 6 g

Charmin Ultra Soft
Often, you take what you can get in terms of toilet paper on the trail (those privies never have the good stuff), but if I ever get the choice, it’s Charmin Ultra Soft for the win. Keeping clean will minimize butt chafe and maximize your poo-freeness. Just remember to pack out your toilet paper!
1 oz / 28 g
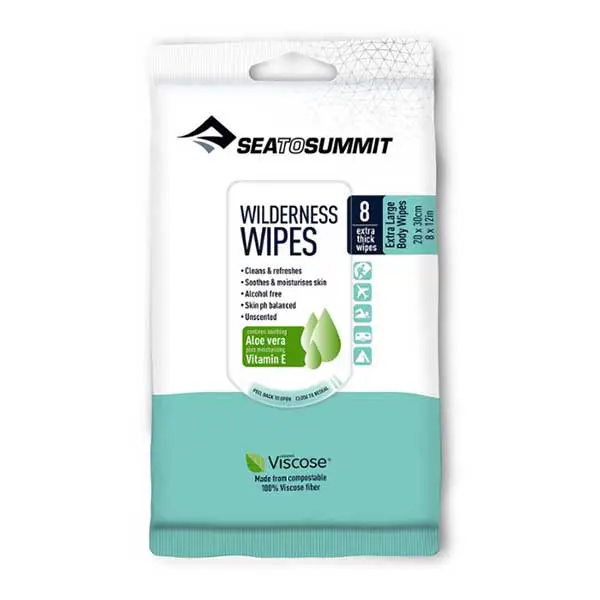
Sea to Summit Wilderness Wipes
It took me a while to come around, but damn, having some Sea to Summit Wilderness Wet Wipes (or any wet wipes) can be life-saving in the backcountry. In addition to ensuring the cleanest of bums following a backcountry waste disposal, they can be used to clean your disgusting feet to help keep them blister-free. But as with toilet paper, remember to pack them out.
3 oz / 85 g

Mack’s Maximum Protection Soft Foam Earplugs
I don’t think I will have much trouble sleeping on the Tour Divide (unless it’s because my body hurts too badly), but just in case, I’ll have a stash of Mack’s Maximum Protection Soft Foam Earplugs with me. These are slightly larger than the standard Mack’s earplugs, which means they block out more noise (since they actually fill my ear canal).

Park Tool I-Beam Mini Tool
A multitool is an essential piece of kit on the Tour Divide, and I think (and hope) the Park Tool I-Beam Mini Tool has all the bits I need to adjust my bike. It’s frustrating how nonstandard all the bolts on bikes are—some components use torx bolts, some use hex—there doesn’t appear to be any rhyme or reason.

Wolf Tooth Components Master Link Combo Pliers
The Wolf Tooth Components Master Link Combo Pliers are another key piece of my repair kit. Inside the pliers, I’ll store two SRAM Powerlock Links (the new components I added to my bike mean it’s now only compatible with SRAM chains). The pliers themselves are used to install/remove master links, remove valve cores, and tighten valve stems. They can also be used as a tire lever.

LEZYNE Carbon Drive Lite HP
A pump is essential to a bicycle repair kit, and I’ve gone with the LEZYNE Carbon Drive Lite HP Bicycle Frame Pump. Why? Because it’s worked for me thus far and was one of the lighter options I could find in my search for a small, compact, and lightweight pump. Ideally, I won’t have to use it much, but it would be irresponsible to head out without it.

Dynaplug Racer Pro
The Dynaplug Racer Pro is my fix-a-flat solution. Yes, I am running tubeless tires on my bike (that means there’s no tube inside my wheel if you haven’t heard of this magical thing called tubeless before), but in case I get a puncture too large for my sealant to take care of (there’s literally liquid sealant inside the bike tire that fills small punctures), the Dynaplug Racer Pro should (hopefully) be able to take care of me. I’ve never had to use one before, but I’ll be ready should the occasion arise on the Tour Divide.

SCHWALBE Bicycle Tube
There are ways your tire can fail that sealant cannot fix. In these situations, you need a tube. I’m carrying one SCHWALBE Bicycle Tube if I damage my tire beyond repair. Some people carry two full-sized tubes, but I’m just carrying this one. Instead of a second, I’m carrying a Tubolito Tubo-MTB (more on this below).

Tubolito Tubo-MTB
Lots of people carry one extra tube. Lots of other people carry two extra tubes. Tubes are fairly bulky, so instead of carrying two full-sized tubes, I’m splitting the difference and carrying a Tubolito Tubo-MTB as a second backup tube. I’ve never used one of these, but the reviews on the Tubolito (essentially an ultralight tube) are mixed. Hopefully, I won’t end up having to use this (because that would mean I’ve somehow blown two tires), but I’ll feel a little better knowing I have a backup for my backup.
Therm-a-Rest Instant Field Repair Kit
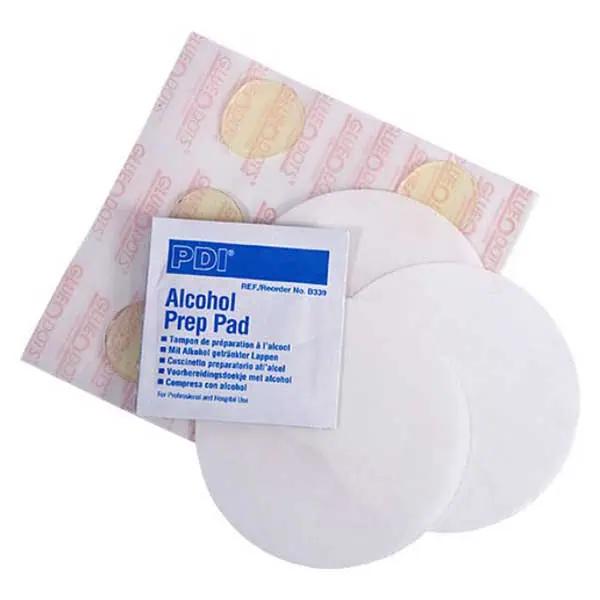
I can tell you from experience that sleeping on a leaky sleeping pad is no fun. Waking up in the middle of the night, blowing up your sleeping pad, waking up your friends, and repeating throughout the night is no way to prepare for a day filled with what will presumably be a lot of physical exertion. I bring two (but I might start bringing three) sleeping pad patches with me out on the trail; I usually leave the alcohol swabs at home since they typically are dried out by the time I end up using them. A couple of patches are a wise thing to have stashed somewhere in your pack.
0.2 oz / 6 g
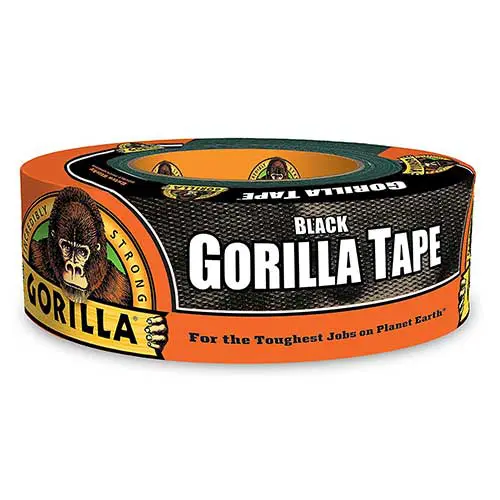
Gorilla Tape
Tape. An often overlooked but incredibly useful thing to have with you on a thru-hike. Tear your down jacket? Tape! Rip your tent? Tape! Need to shut up your hiking partner? Tape! Just don’t bring an entire roll. I like Gorilla Tape because it’s incredibly sticky, waterproof, and thick. I’ve used this to patch a hole in my shorts before, and the tape didn’t come off even after multiple washes. That said, get whatever tape you want – bring some (because you can’t have mine).
1 oz / 28 g

Garmin Edge 1040 Solar Bike Computer
Instead of using my watch to track my ride, I’m using a Garmin Edge 1040 Solar Bike Computer. I went with this model mostly because it has the largest battery and can recharge via the sun. It also has maps, navigation, and all the cycling stats I could ask for (especially when paired with the Speed and Cadence Sensor).
4.7 oz / 133 g
Nitecore NB10000 Gen II
I’m bringing two Nitecore NB10000 Gen II battery packs for charging devices. Typically, I bring a Nitecore 20000, but in the interest of redundancy and hedging against potential failures, two 10000s are probably a better option for the Tour Divide. I’ll probably charge these with my dynamo hub and then use these to charge my devices. I’m not sure that one way is more efficient, but I’ll have plenty of time to figure it out.
4.7 oz / 133 g
One of the most important things I look for in earbuds is battery life. The Pixel Buds Pro offer up to 31 hours of battery life (around 11 hours for a full charge, with additional charges available via the case) and have excellent noise cancellation. They’re comfortable to wear for long periods (i.e., all day), and the microphone works well. I plan to wear one at a time, which allows the one I’m not wearing to recharge while it’s in the case.
2.2 oz / 62 g
You’re probably not looking at this gear list hoping to find a new phone, but I get asked which phone I am using often enough that I’ve decided to include the Google Pixel 8 Pro. I’m not an iPhone fan, so I stick with Google. This thing has a killer camera and will be used extensively for navigation and taking notes (in addition to some photography).
7.41 oz / 210 g
Peak Design Everyday Case
Peak Design makes both excellent camera and phone accessories. The Peak Design Everyday Case has a magnet that allows me to attach my wallet and various optional mounts that make using my phone in my car or on my bicycle a breeze. Does any of this help hiking? I guess not, but this is an awesome case and is officially part of my pack.
1.5 oz / 43 g

Anker Nano II 65W
Yes, I have a dynamo hub, but I will hopefully still be in a position every once in a while where I have the opportunity to charge devices via a wall plug. The Anker Nano II 65W has three ports, one USB-A and two USB-C, which is plenty to charge my devices. It also has a folding plug, which is great for not stabbing holes in my stuff sacks, down jackets, or pack liners.
4.5 oz / 128 g
What do we think? Do you have any suggestions, critiques, or questions about the gear? I’m always happy to talk gear, though I often hesitate to admit it. Leave a comment below and let me know your thoughts.
Affiliate Disclosure: This page may contain affiliate links, which means I may receive small commissions for purchases made via these links at no additional cost to you. This helps pay the bills and keep the site up and running. Thank you for your support!